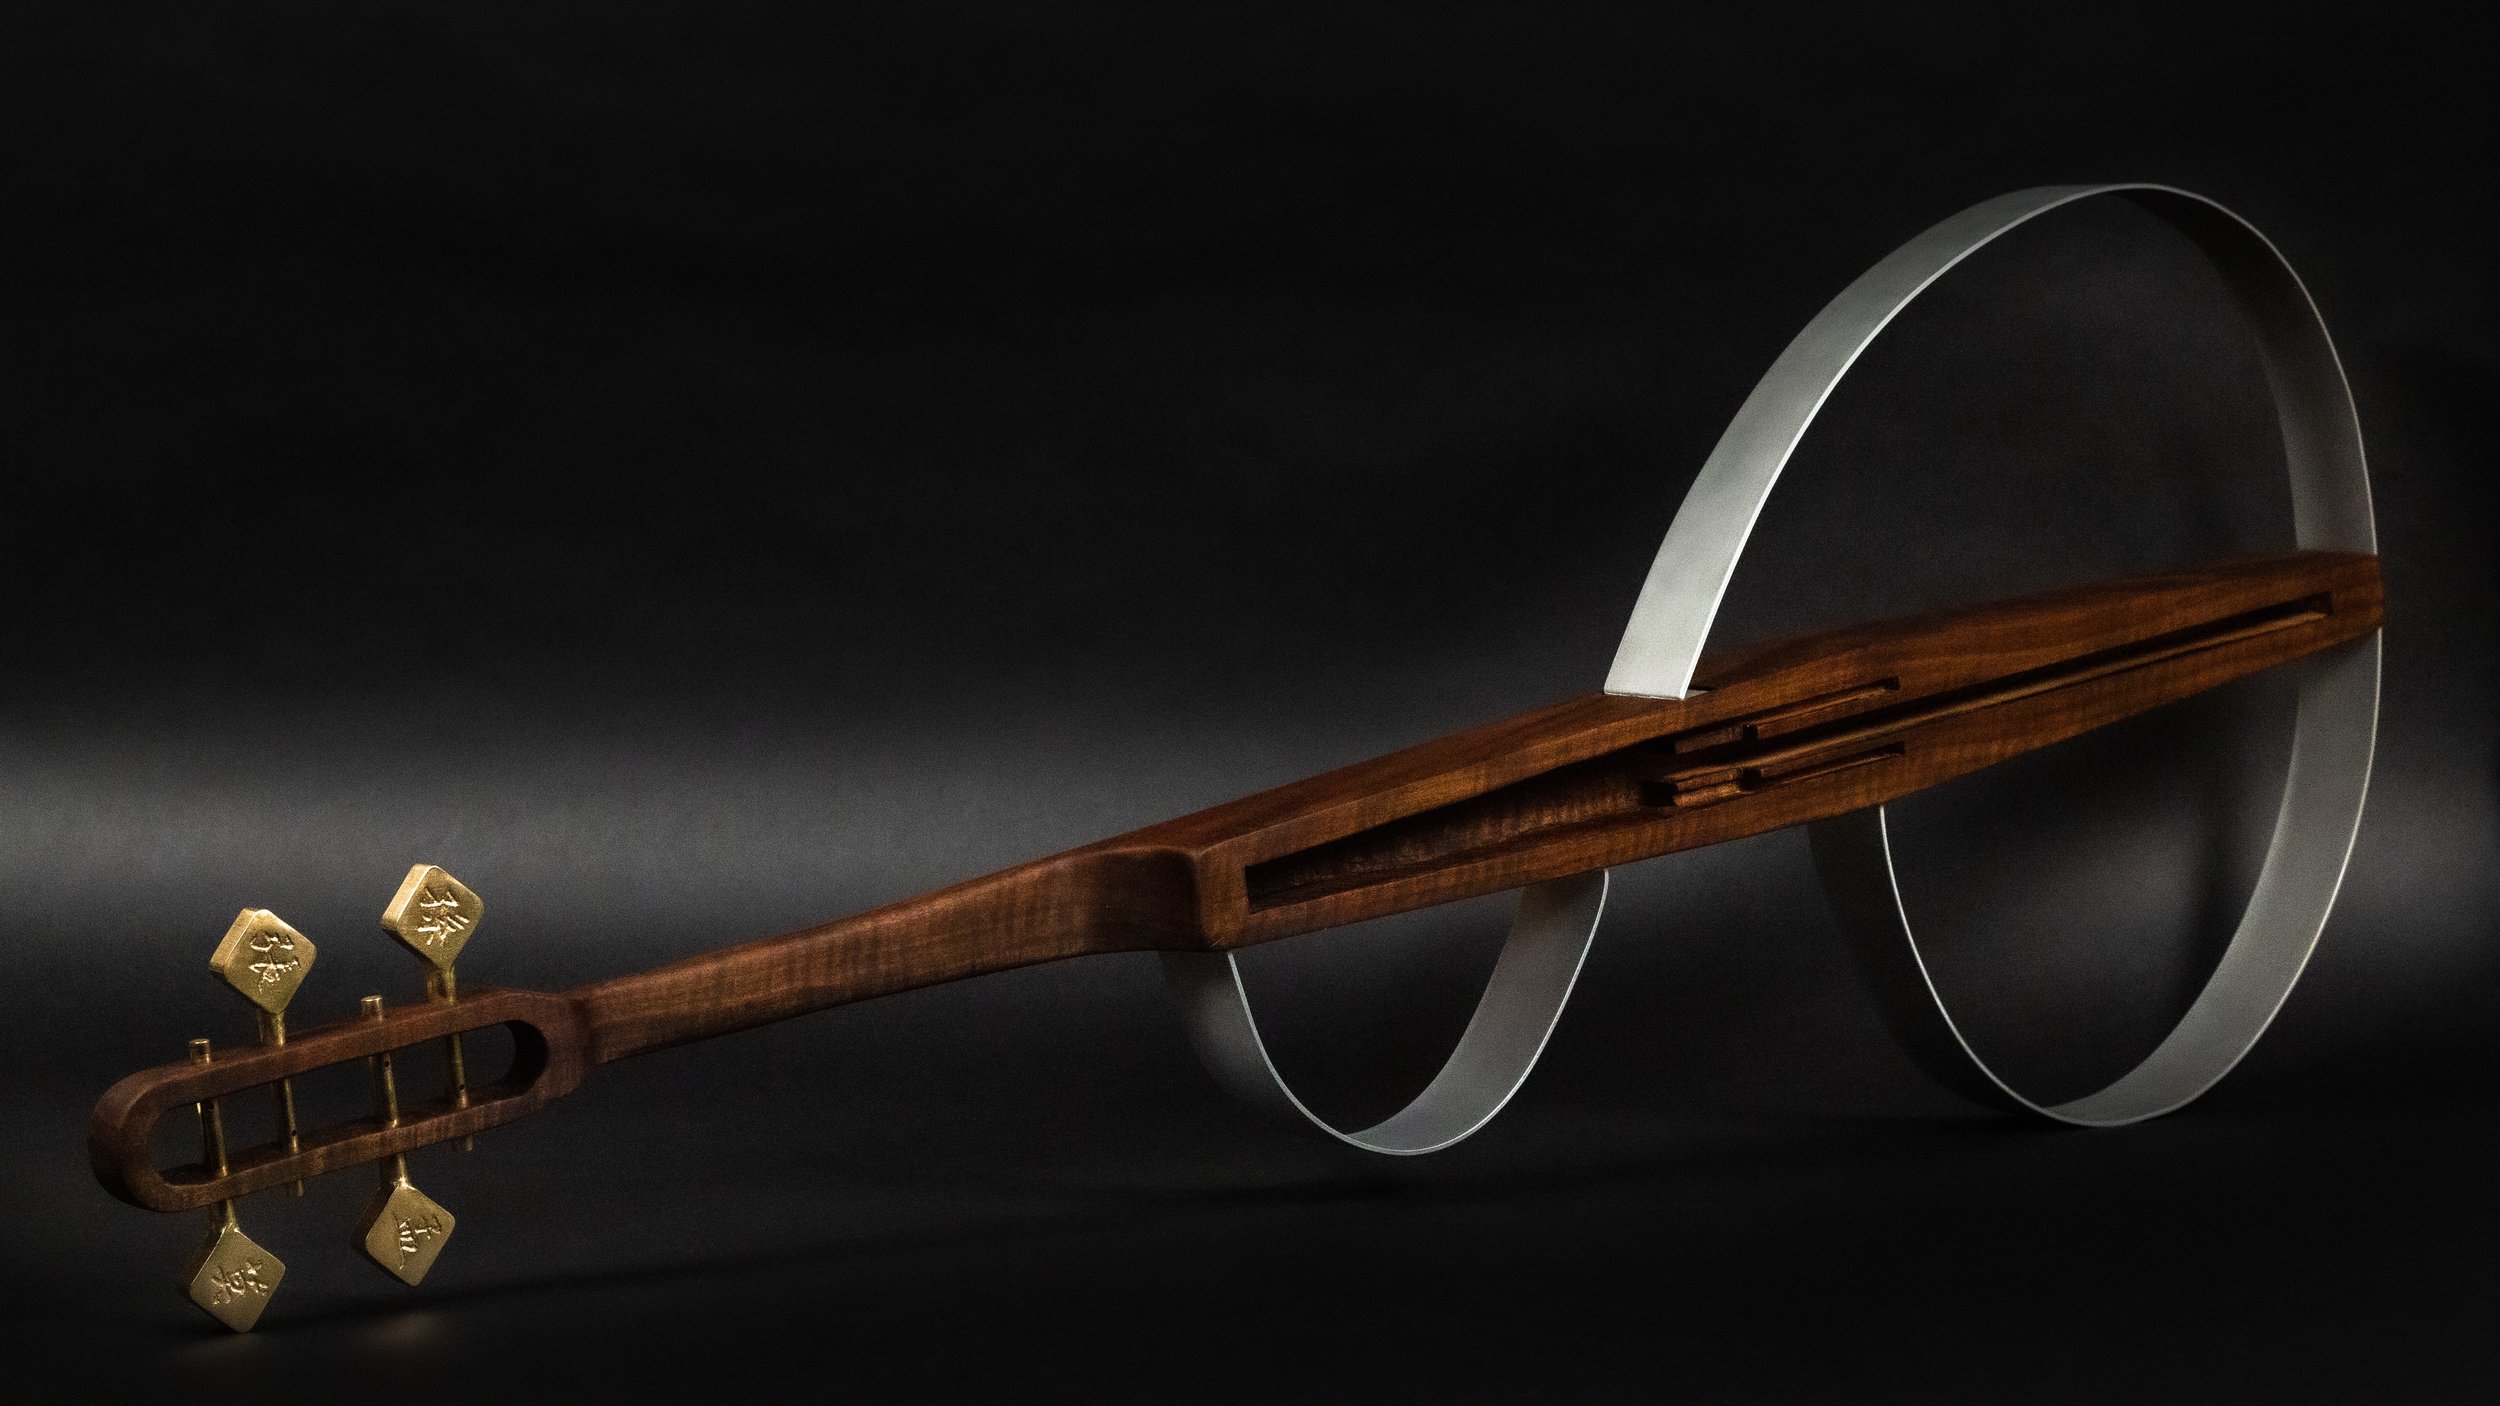
electric cello
sand casting, sheet metal forming, woodworking, machining (lathe + mill), finishing, laser cutting,
3d printing, cad (fusion 360)
overview
goal:
design + fabricate an electric cello embodying what cello means to me: music, family, & memory, while learning various manufacturing processes including sand casting, machining, forming, & woodworking
fabrication:
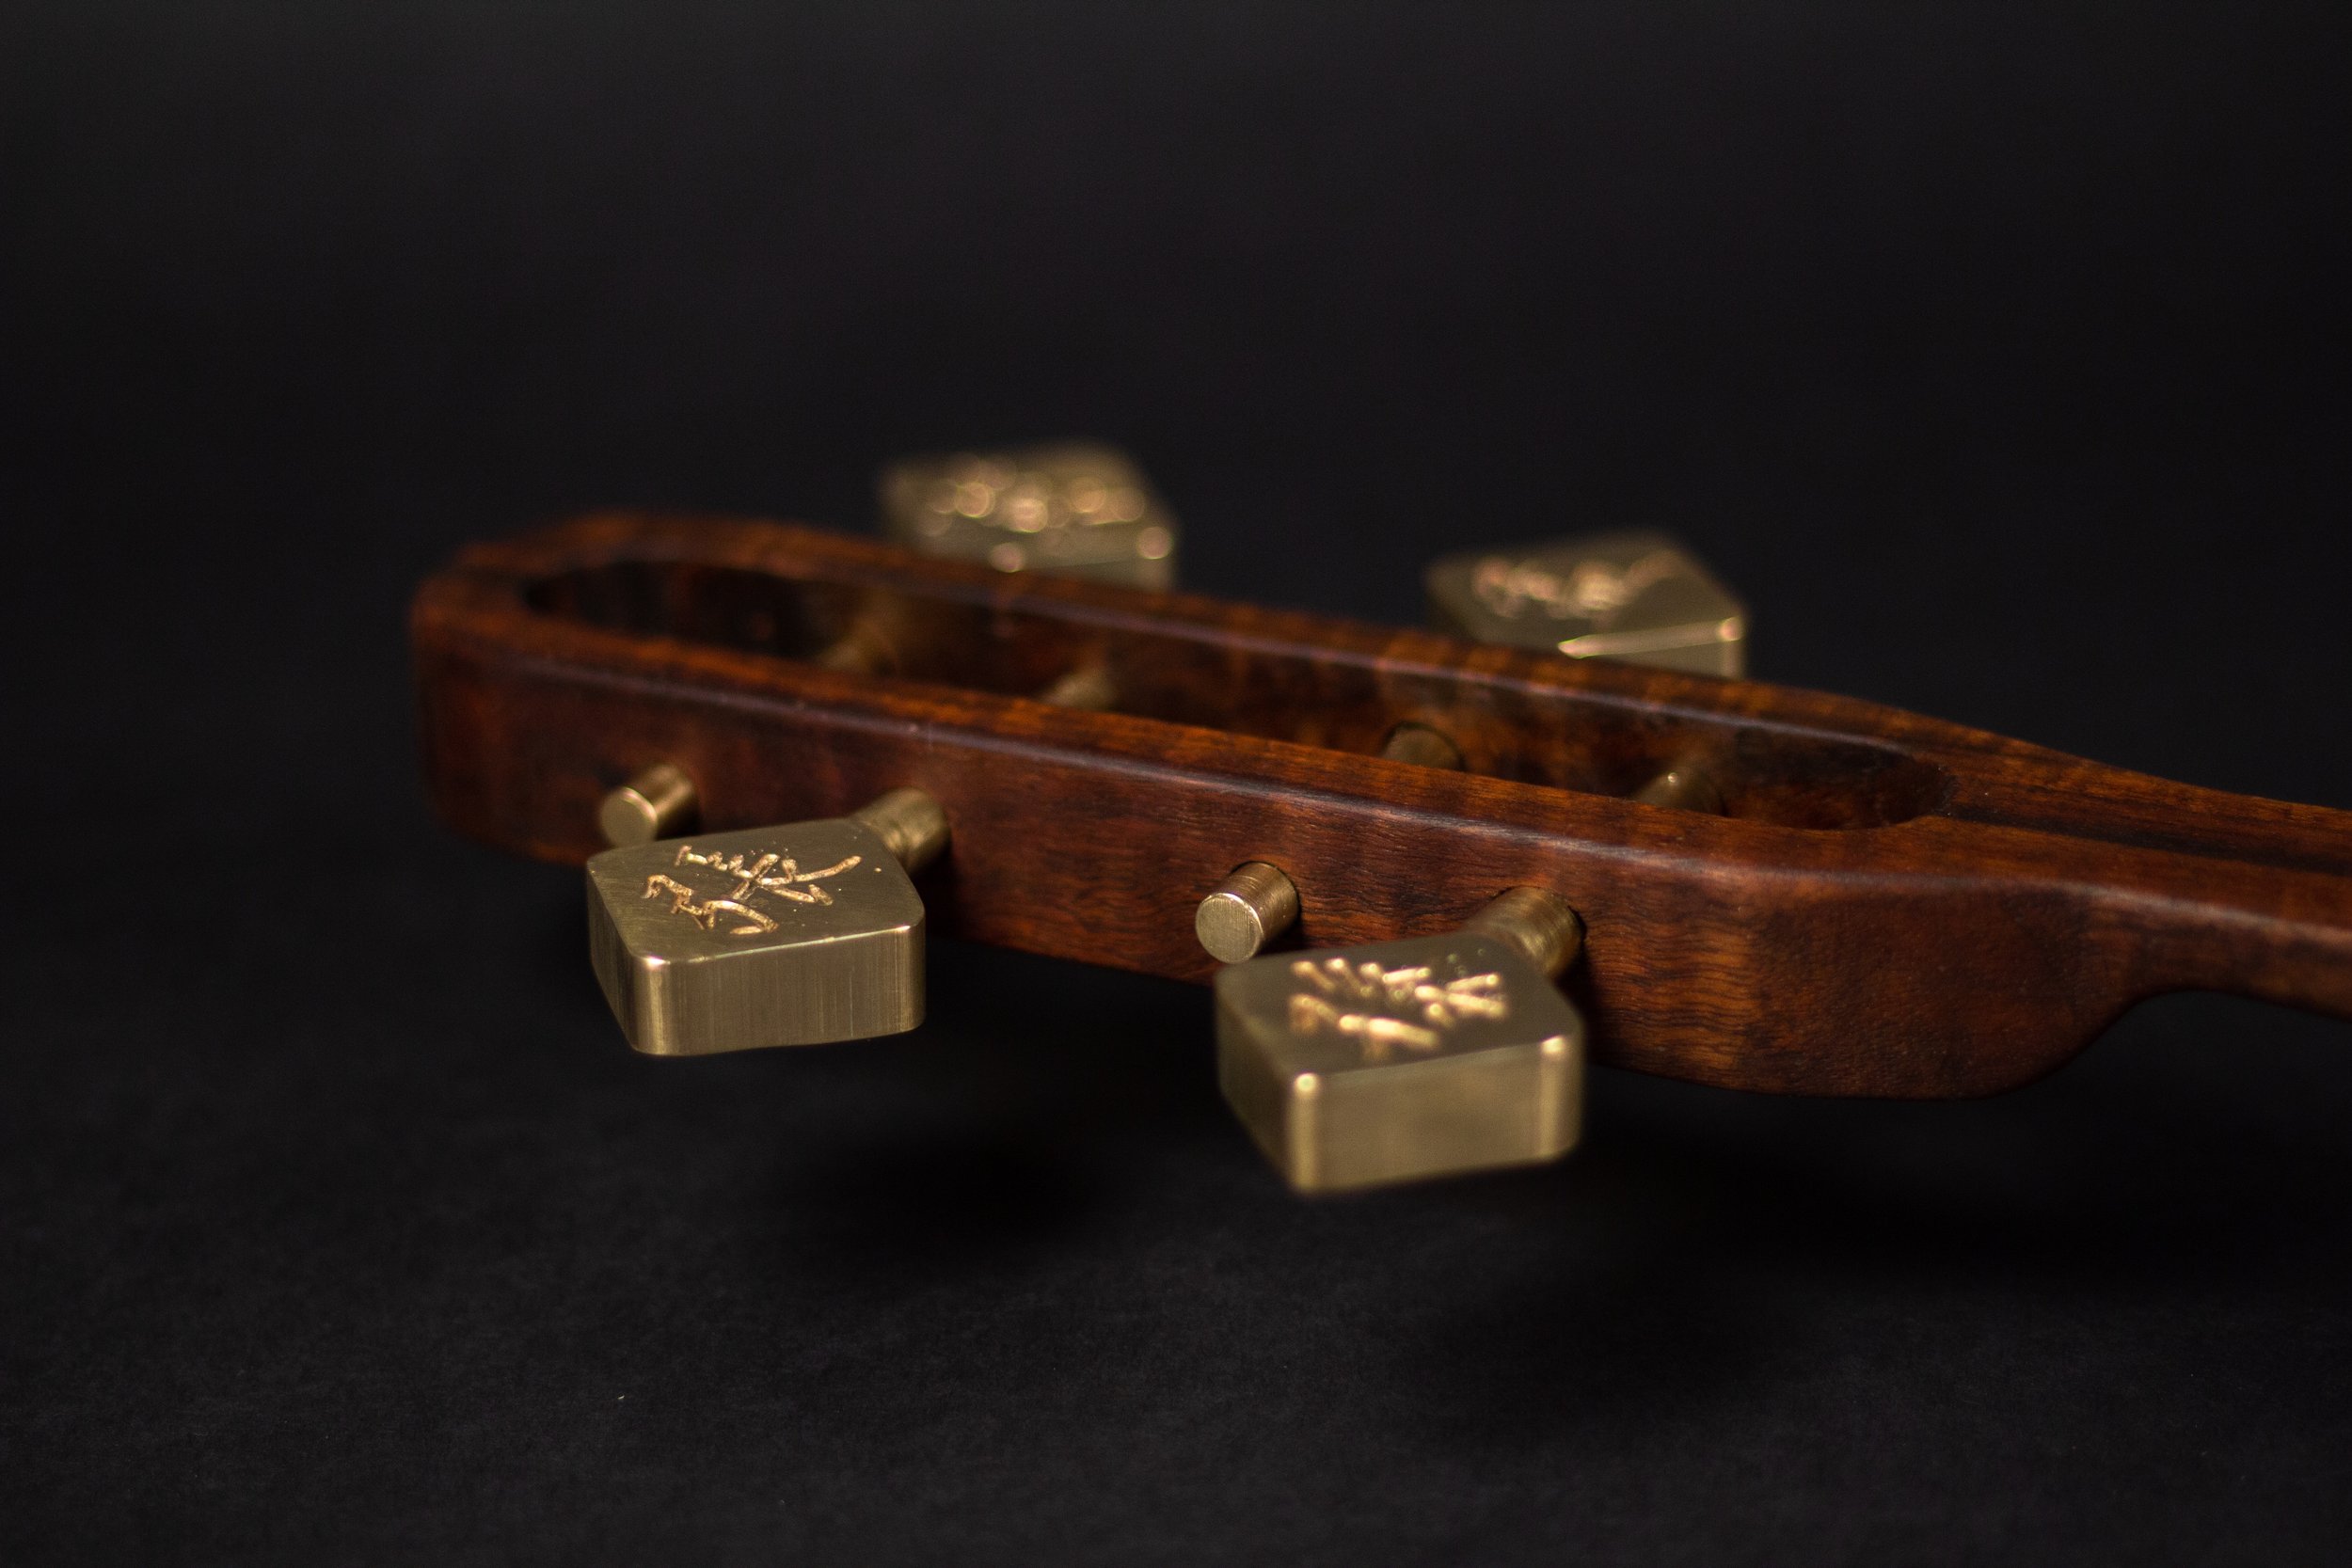
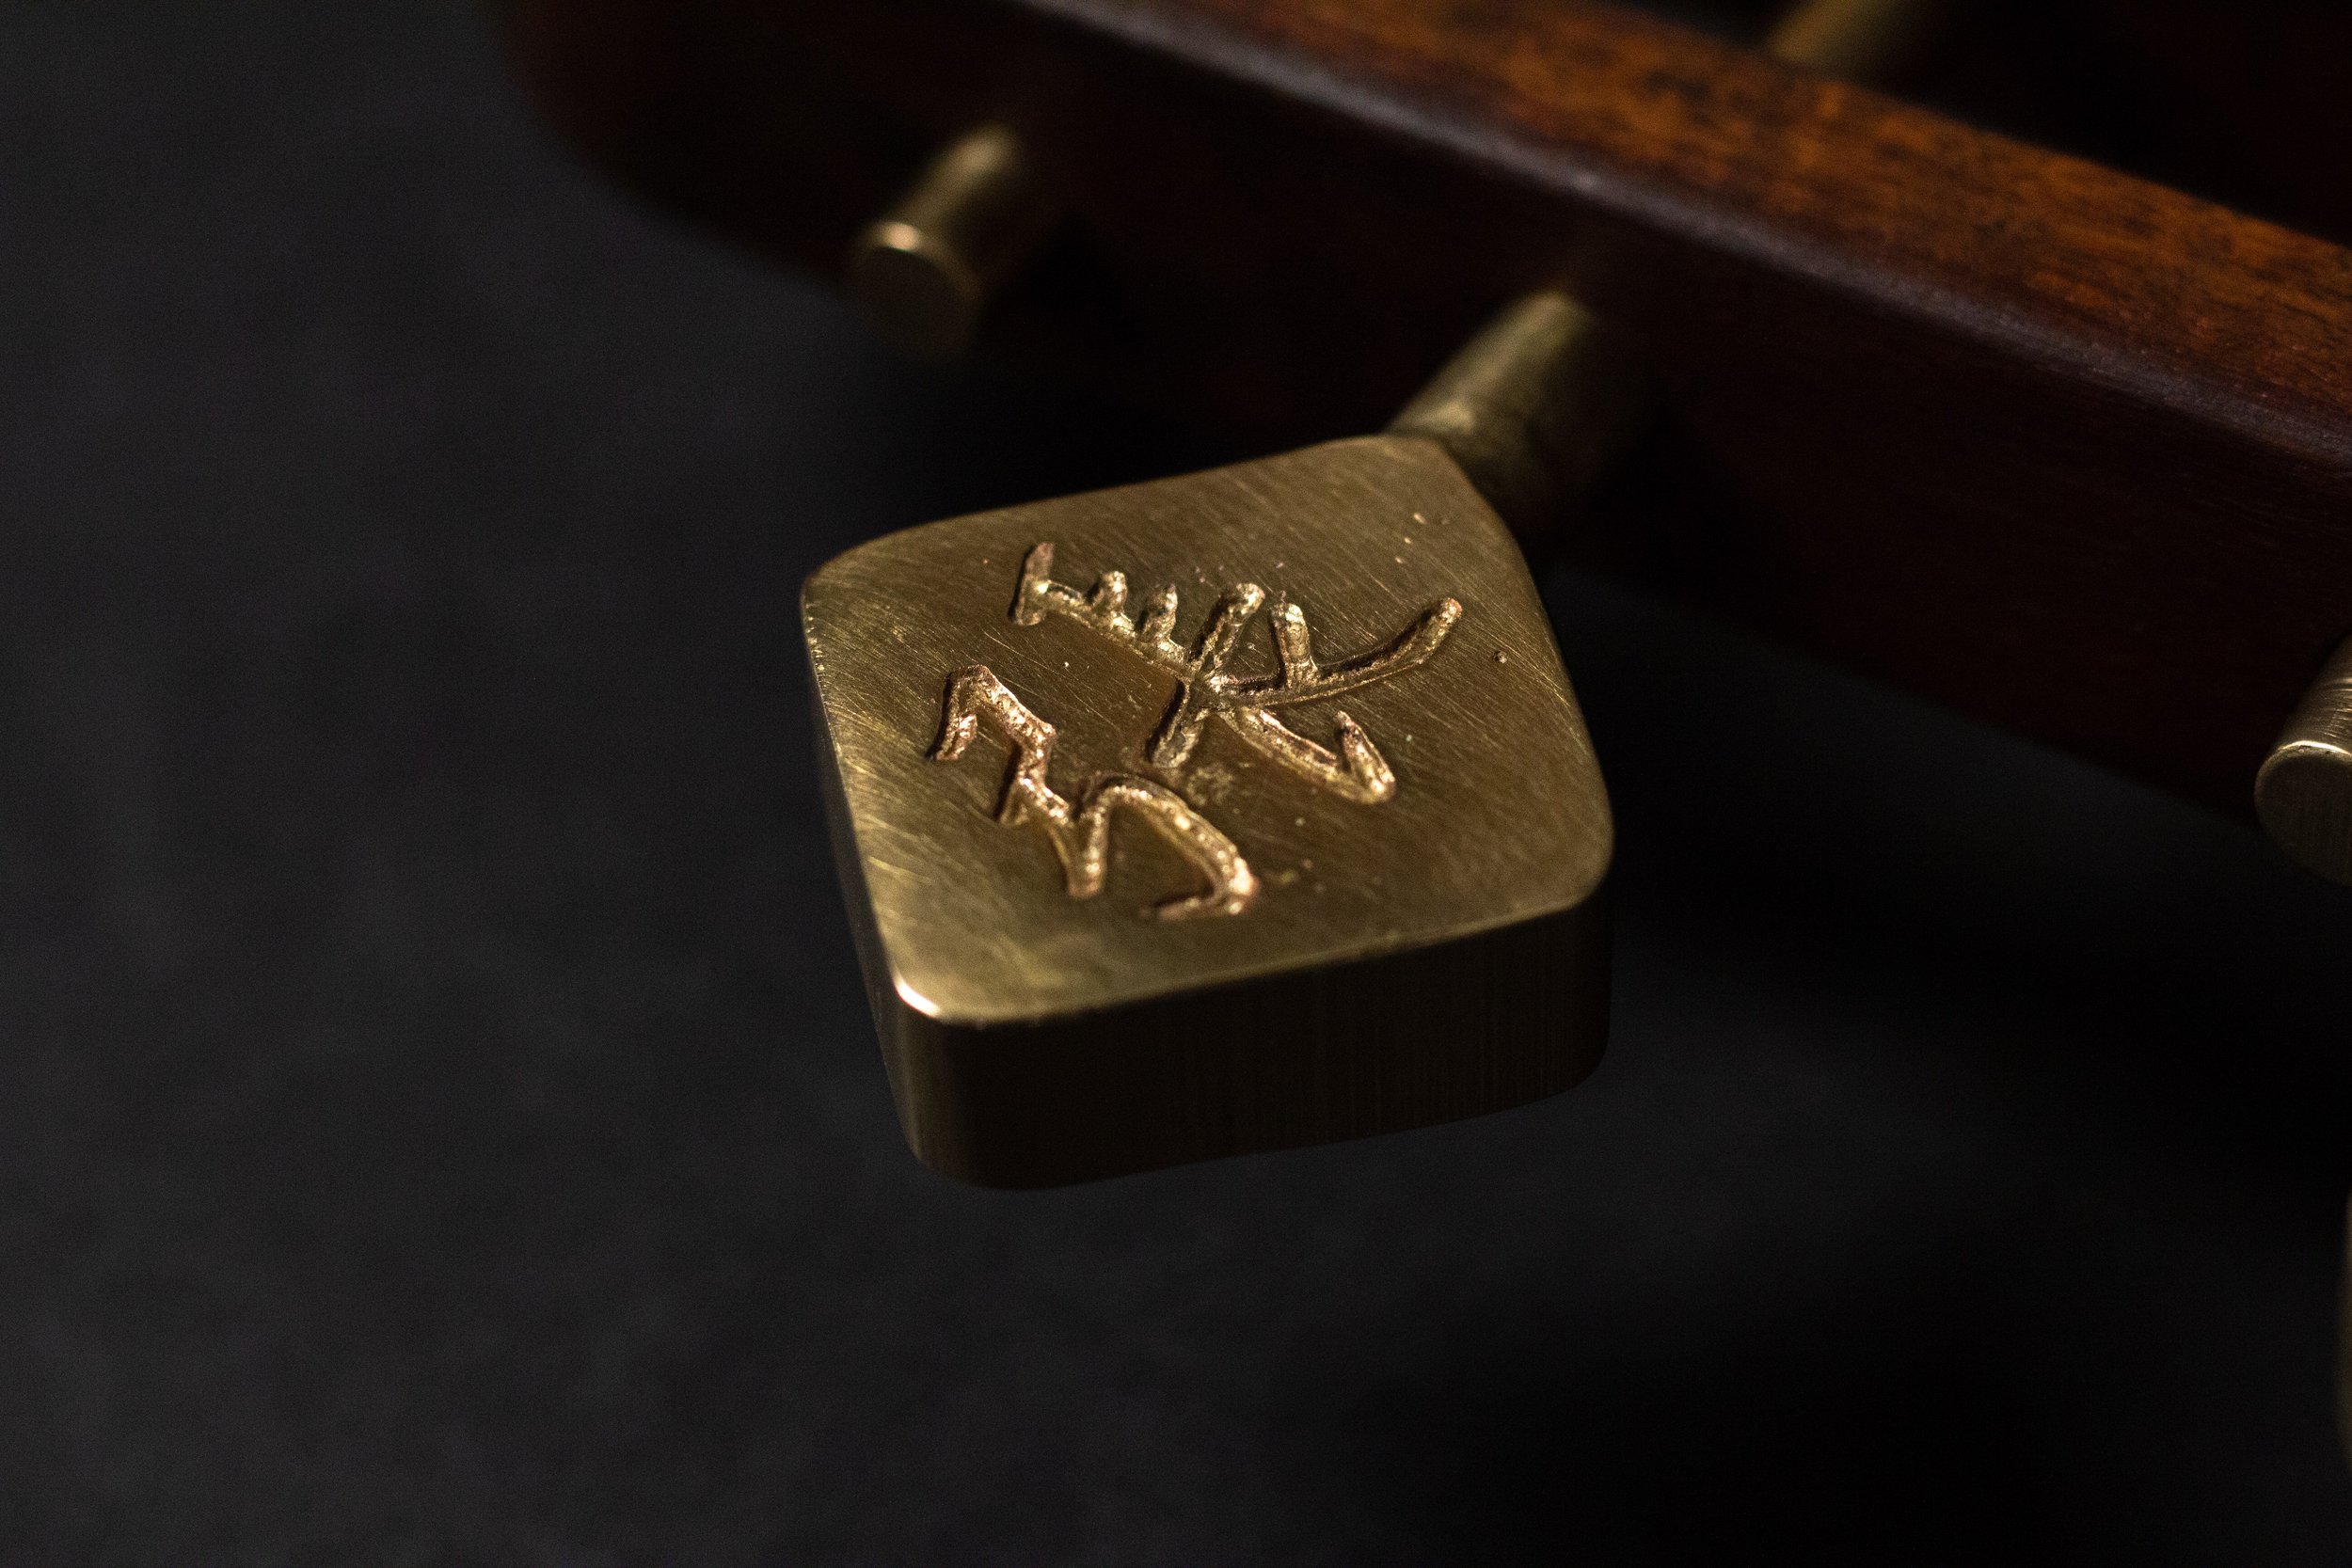
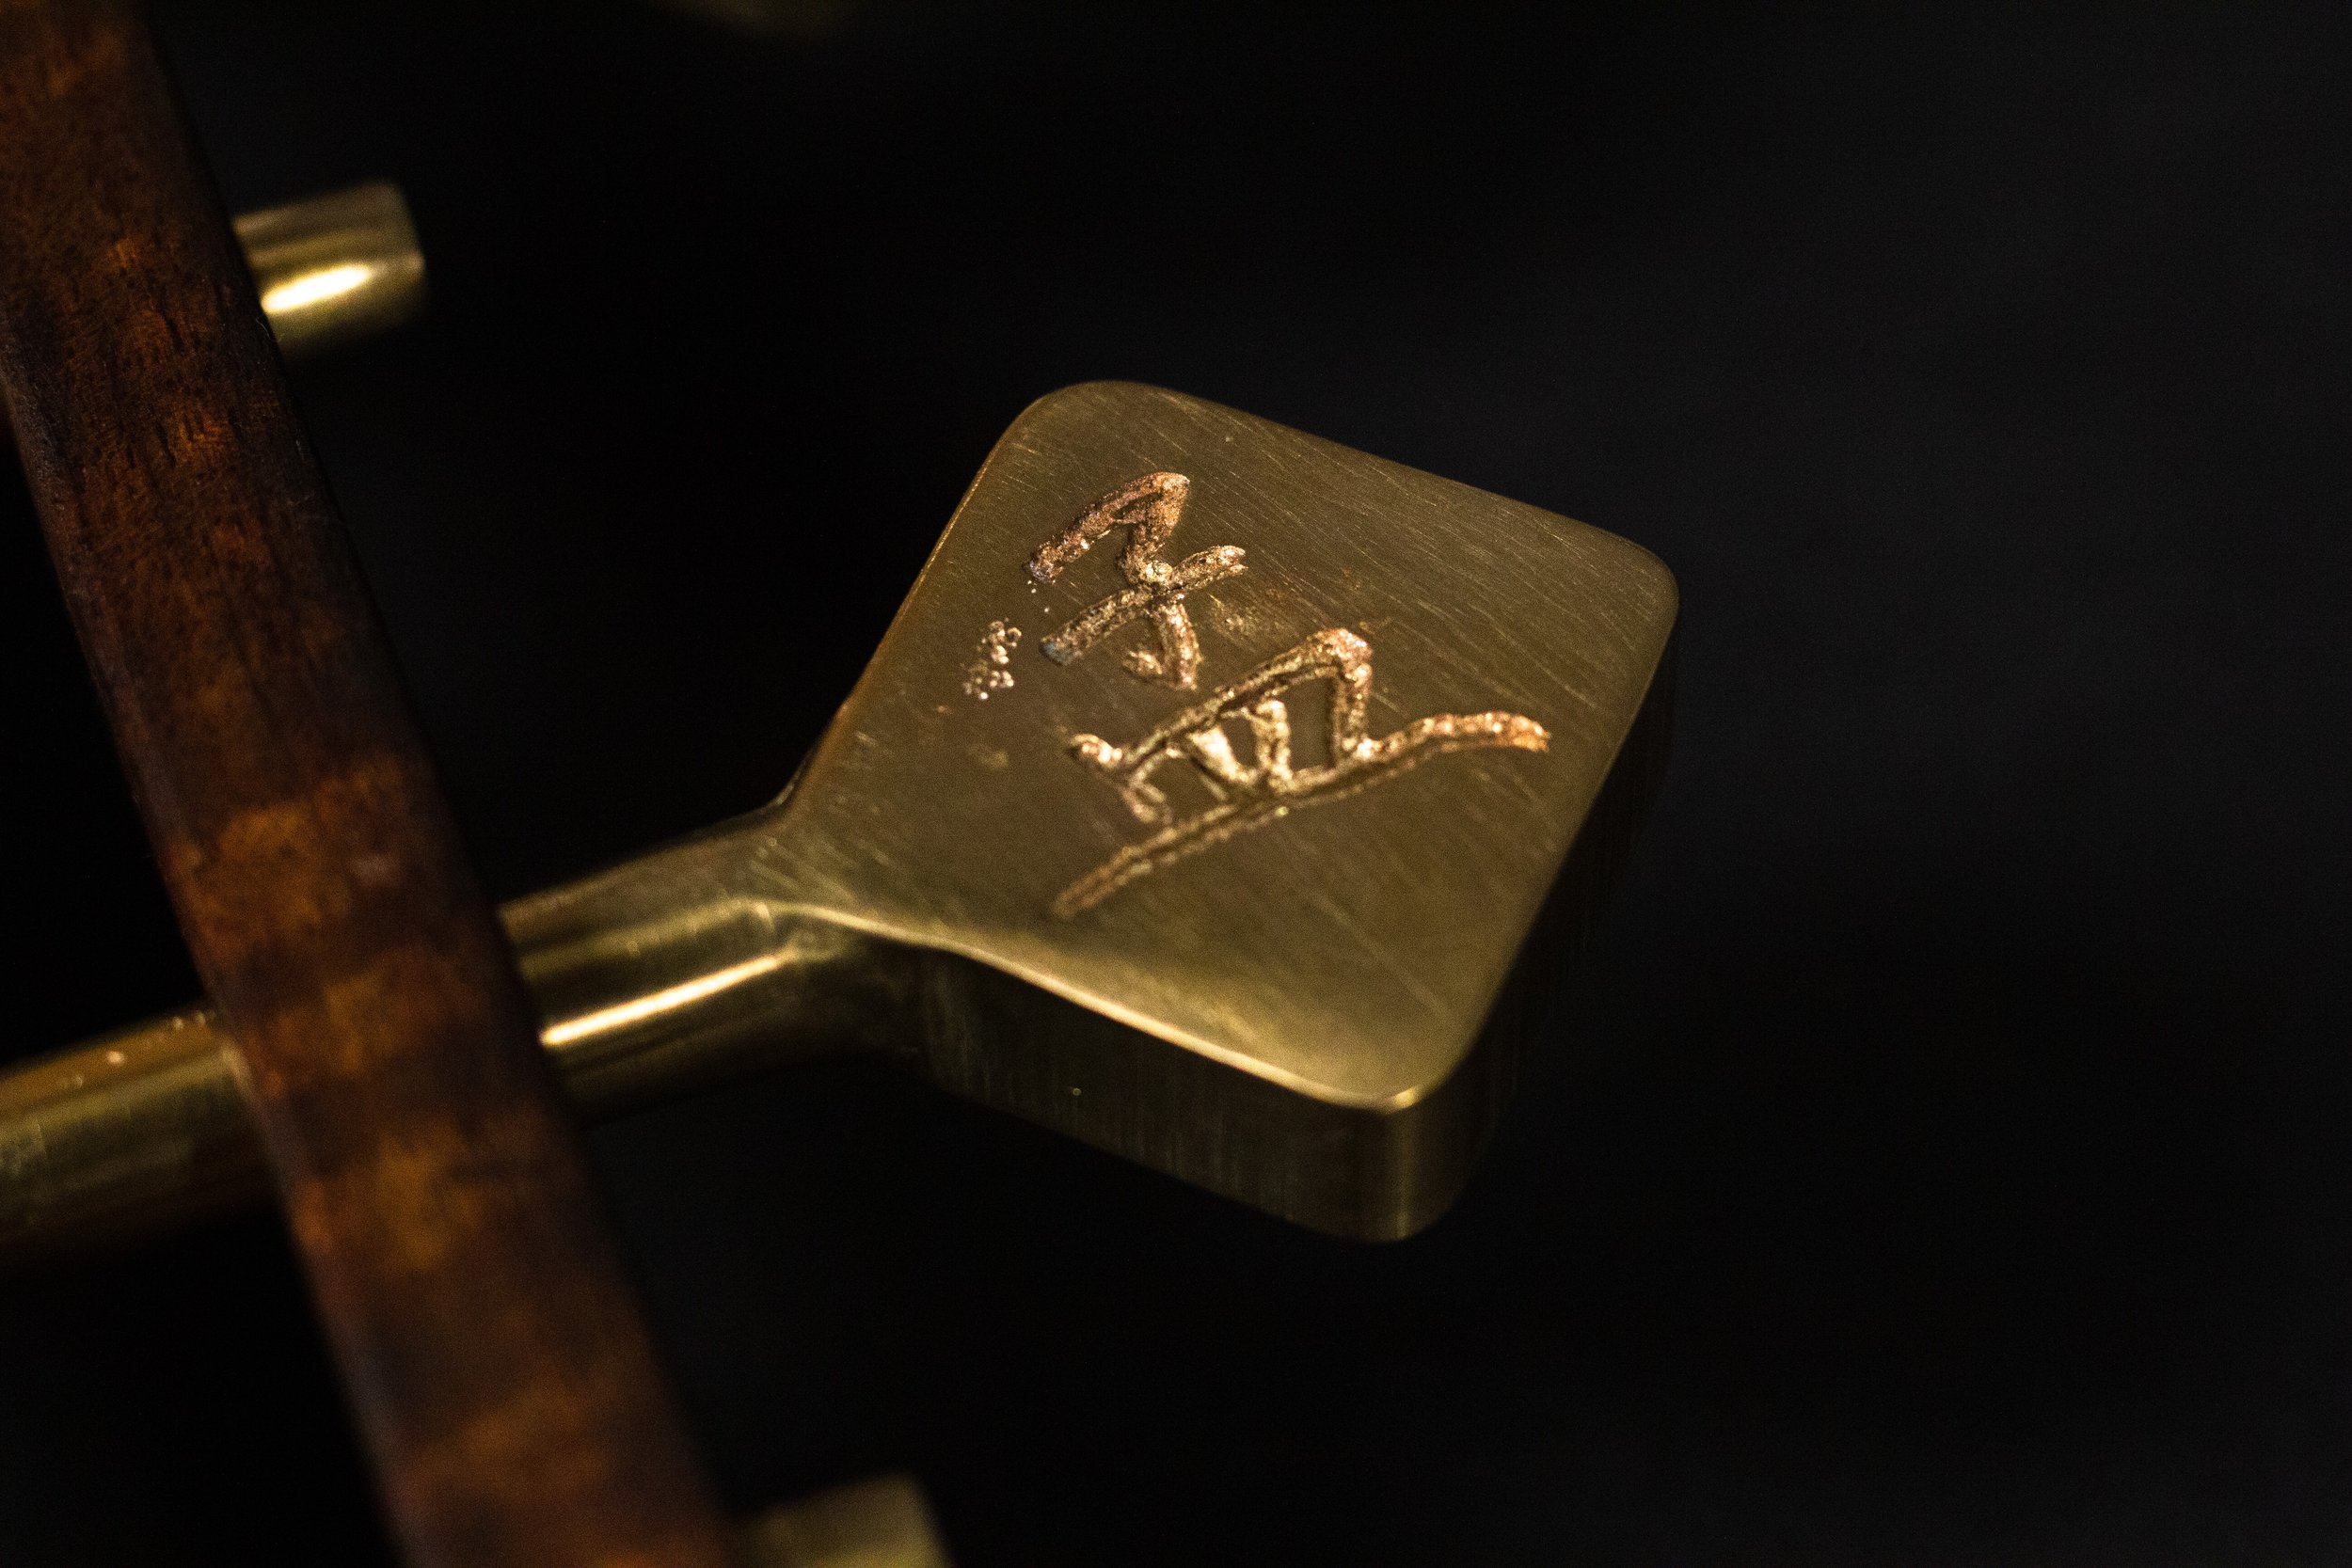
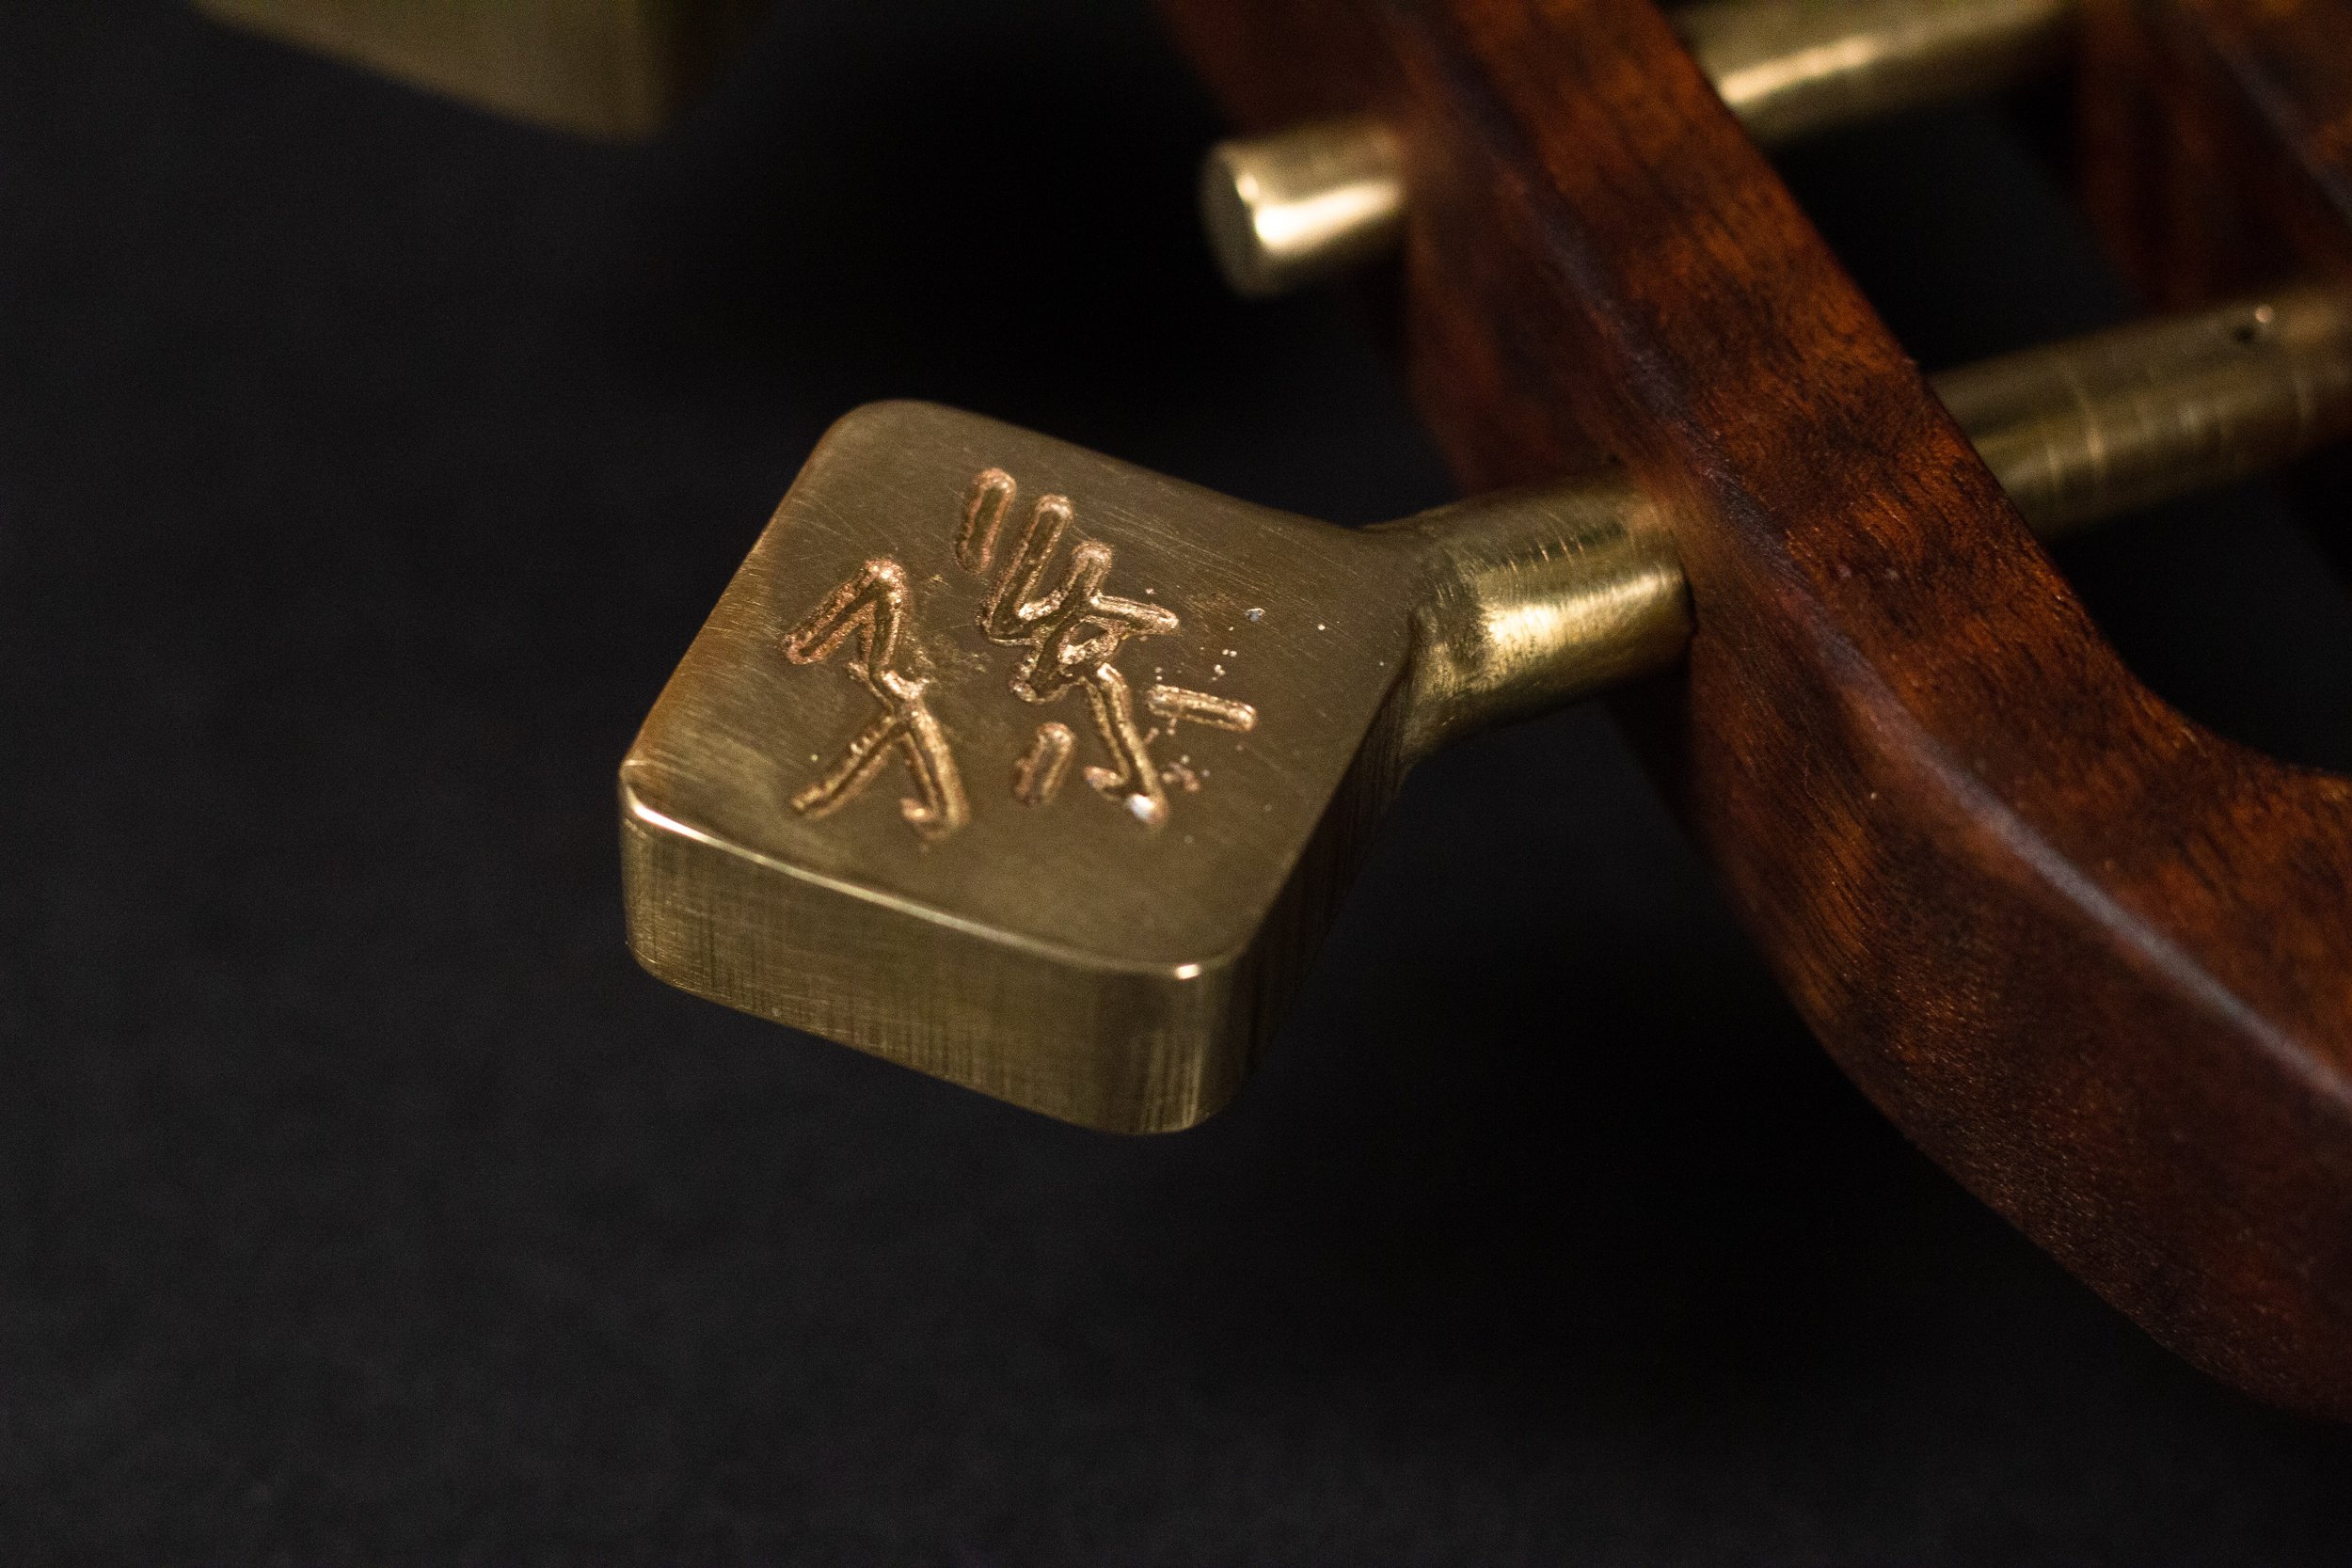
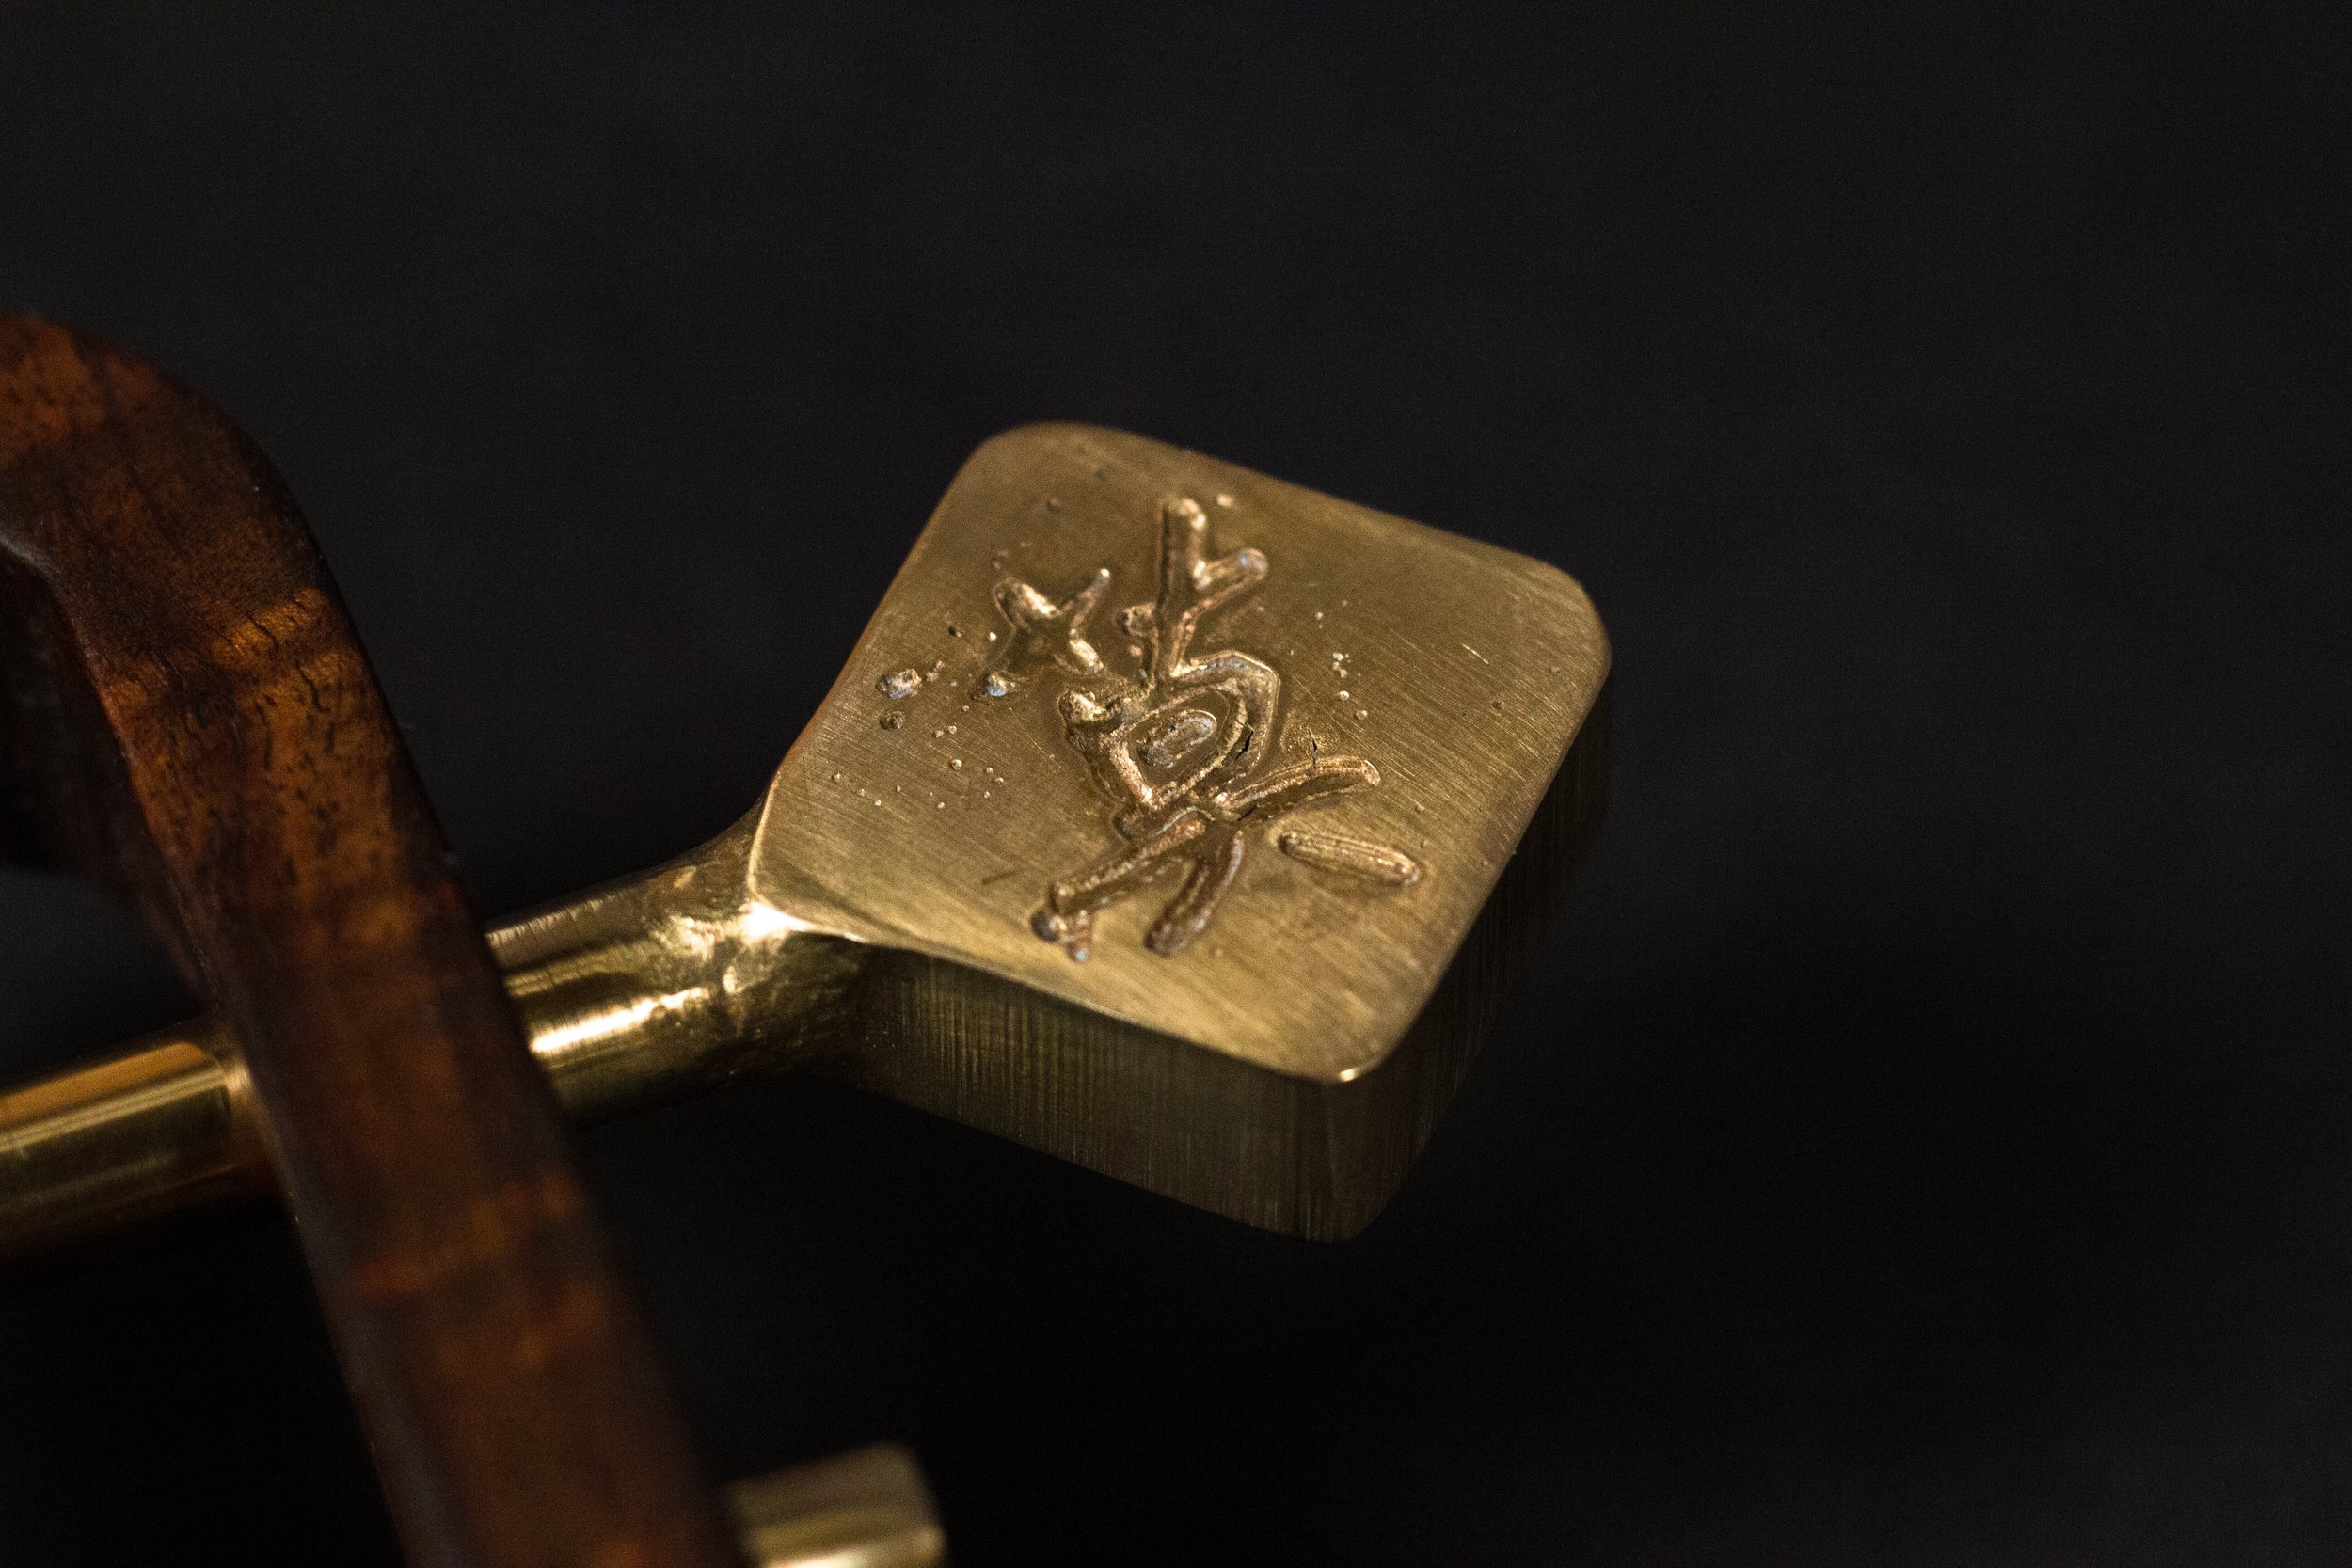
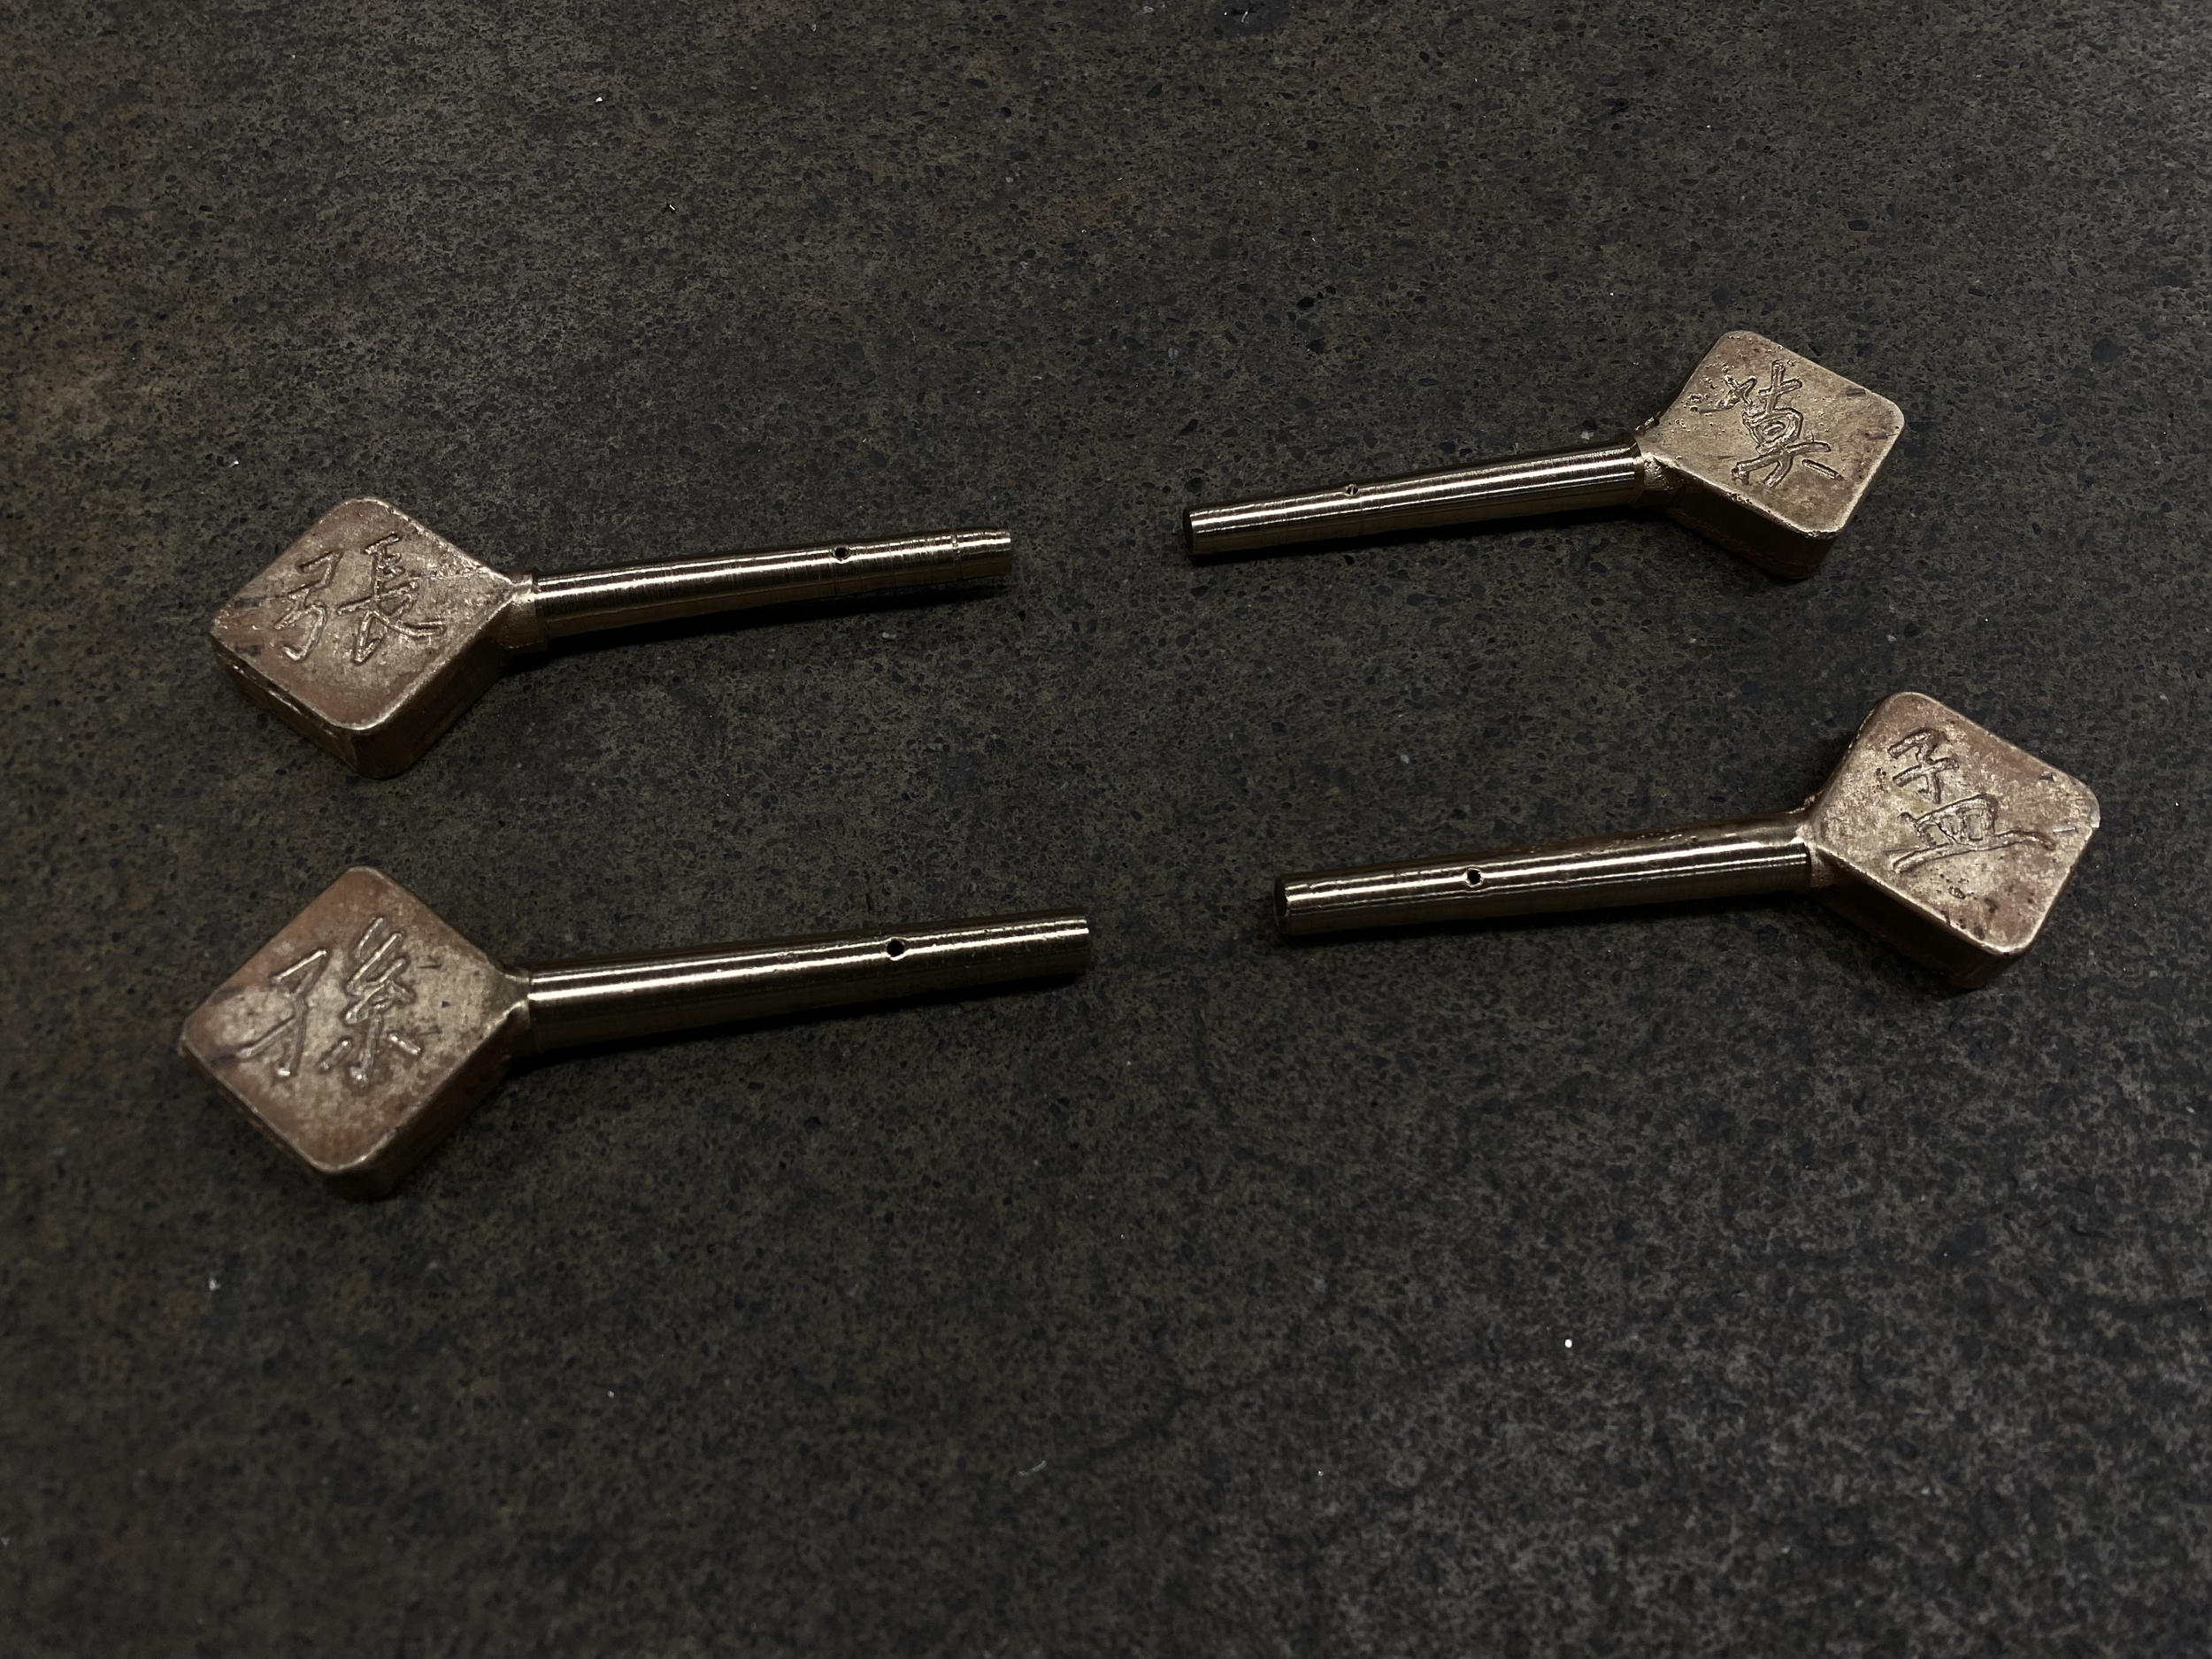
tuning pegs sand cast in silicon bronze
3d printed pattern (debossed characters’ depth = 0.020”)
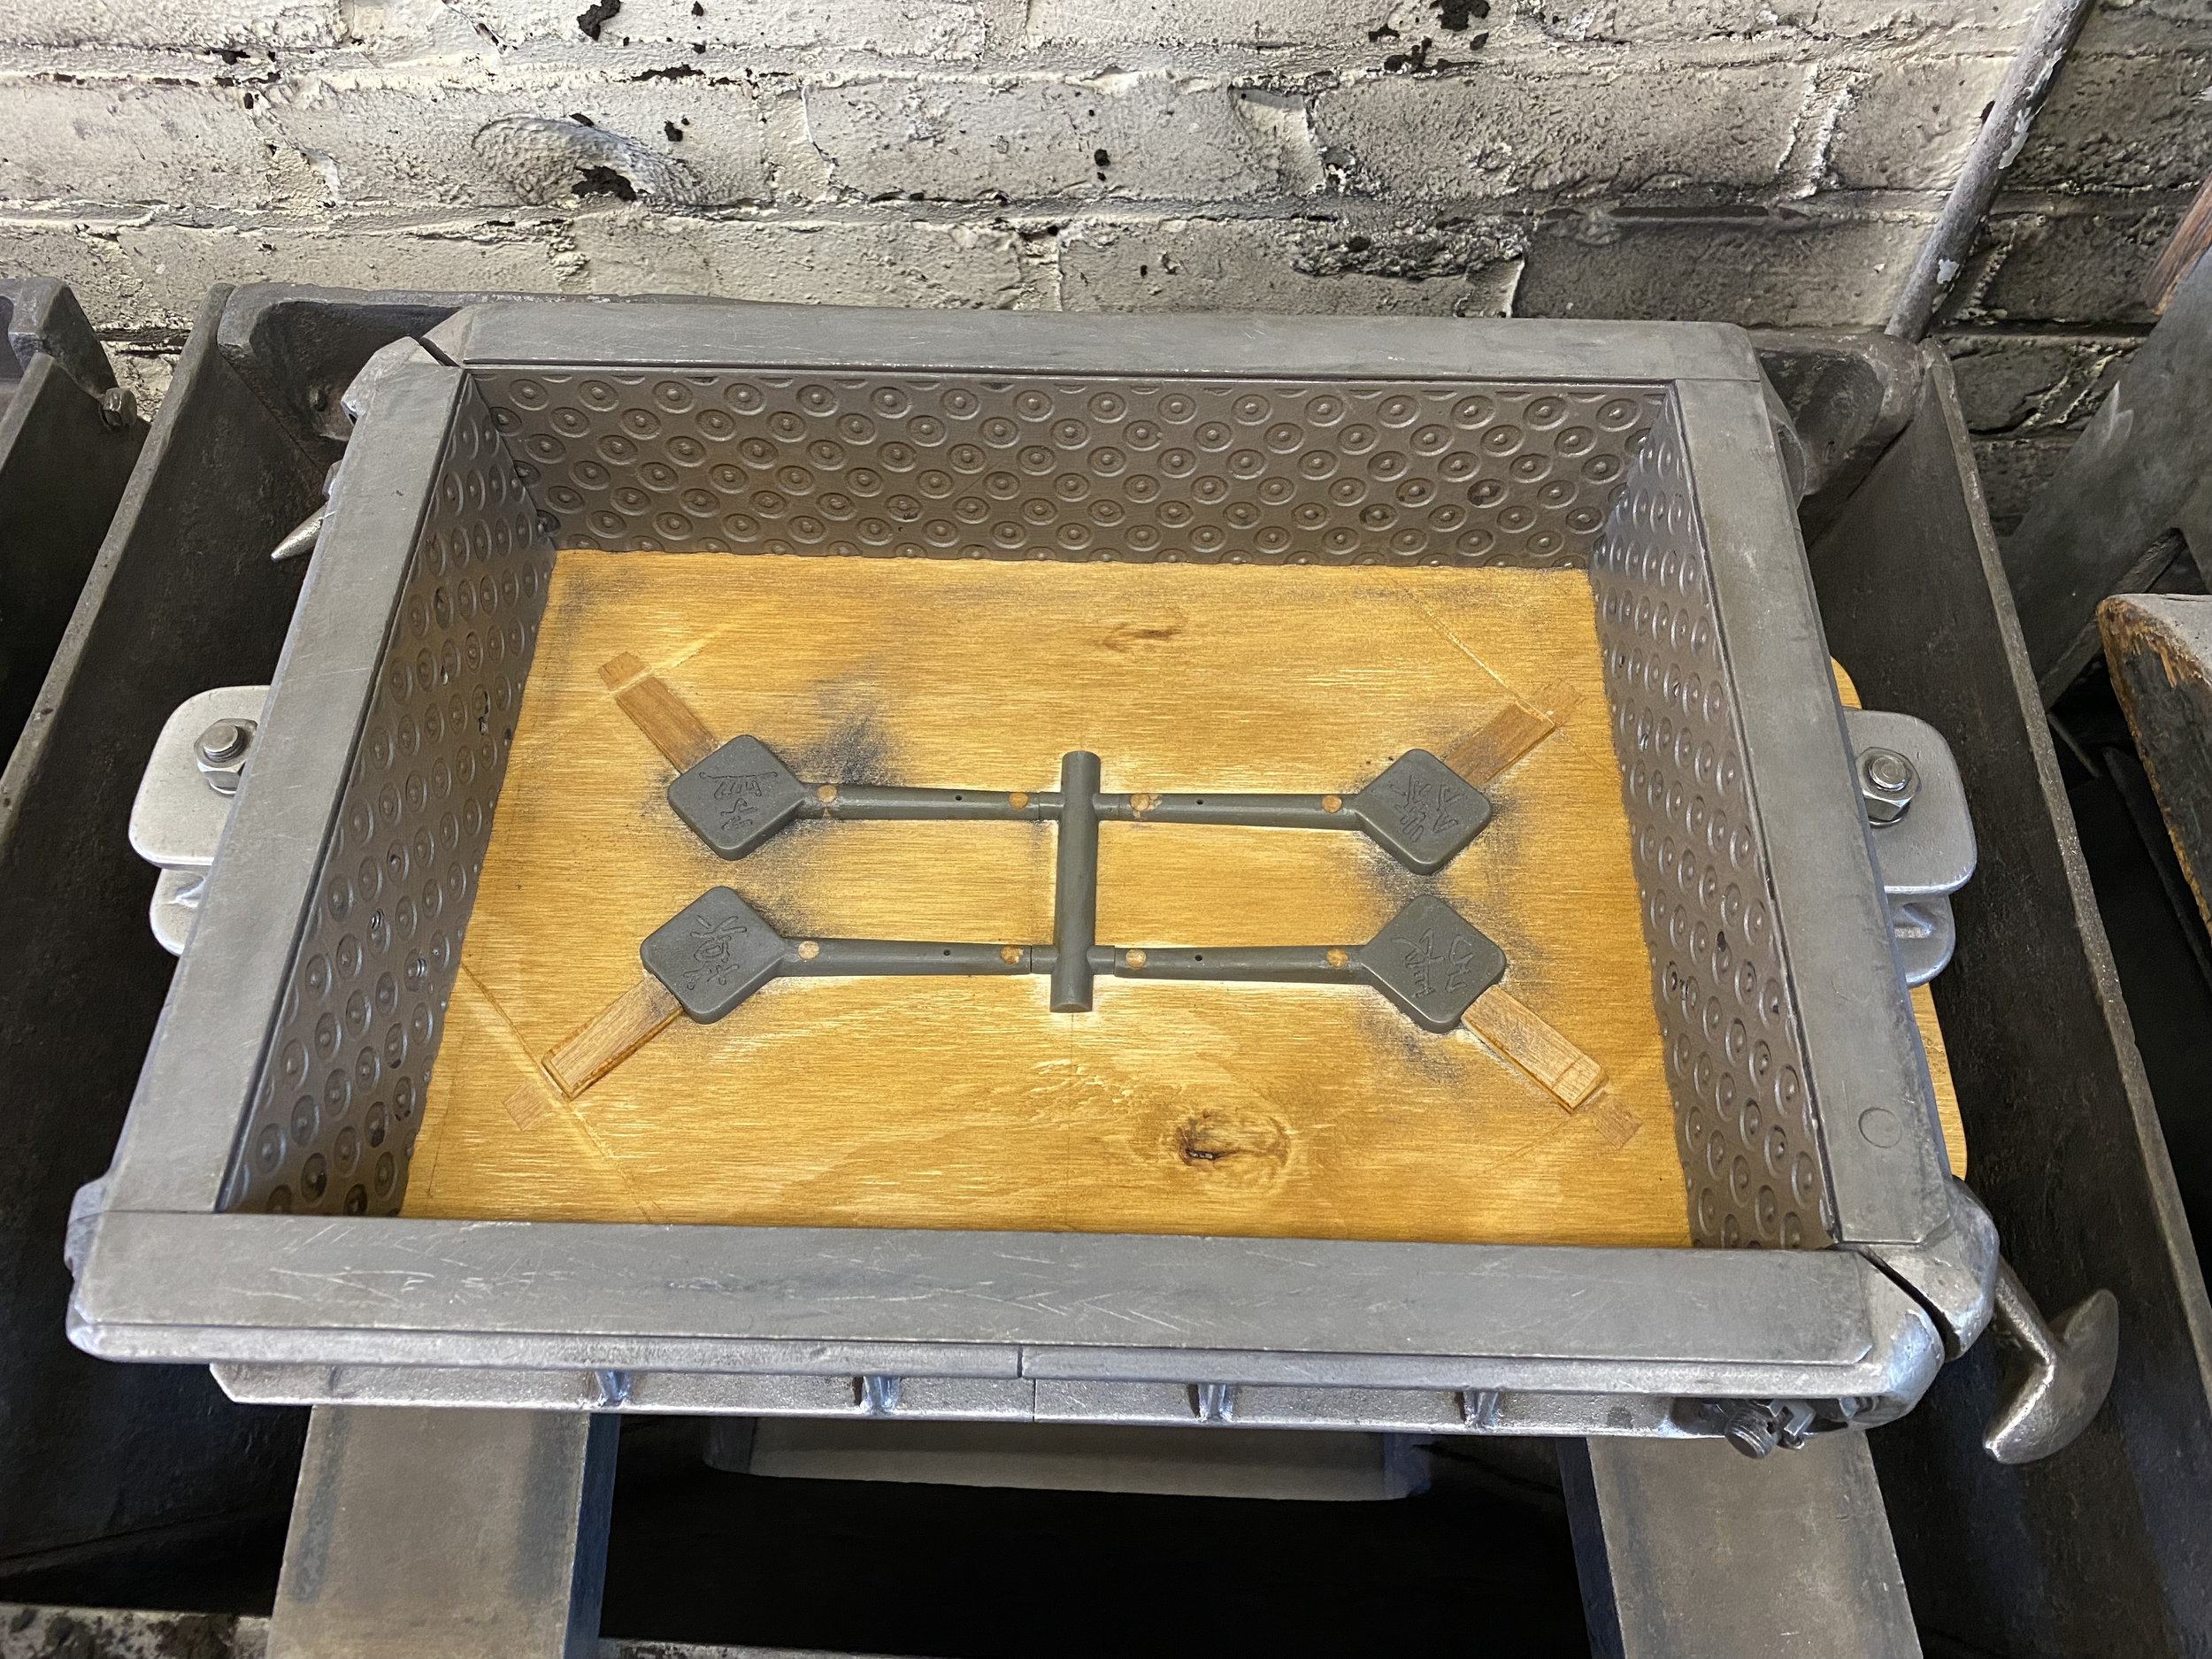
made pattern board from wood + 3d printed pieces (family mold)
risers included on ends to minimize sink
cut shaft tapers on lathe, using taper attachment (standard 1:25 taper ratio)
used foredom to clean up debossed characters + sanded to 1000 grit + polished
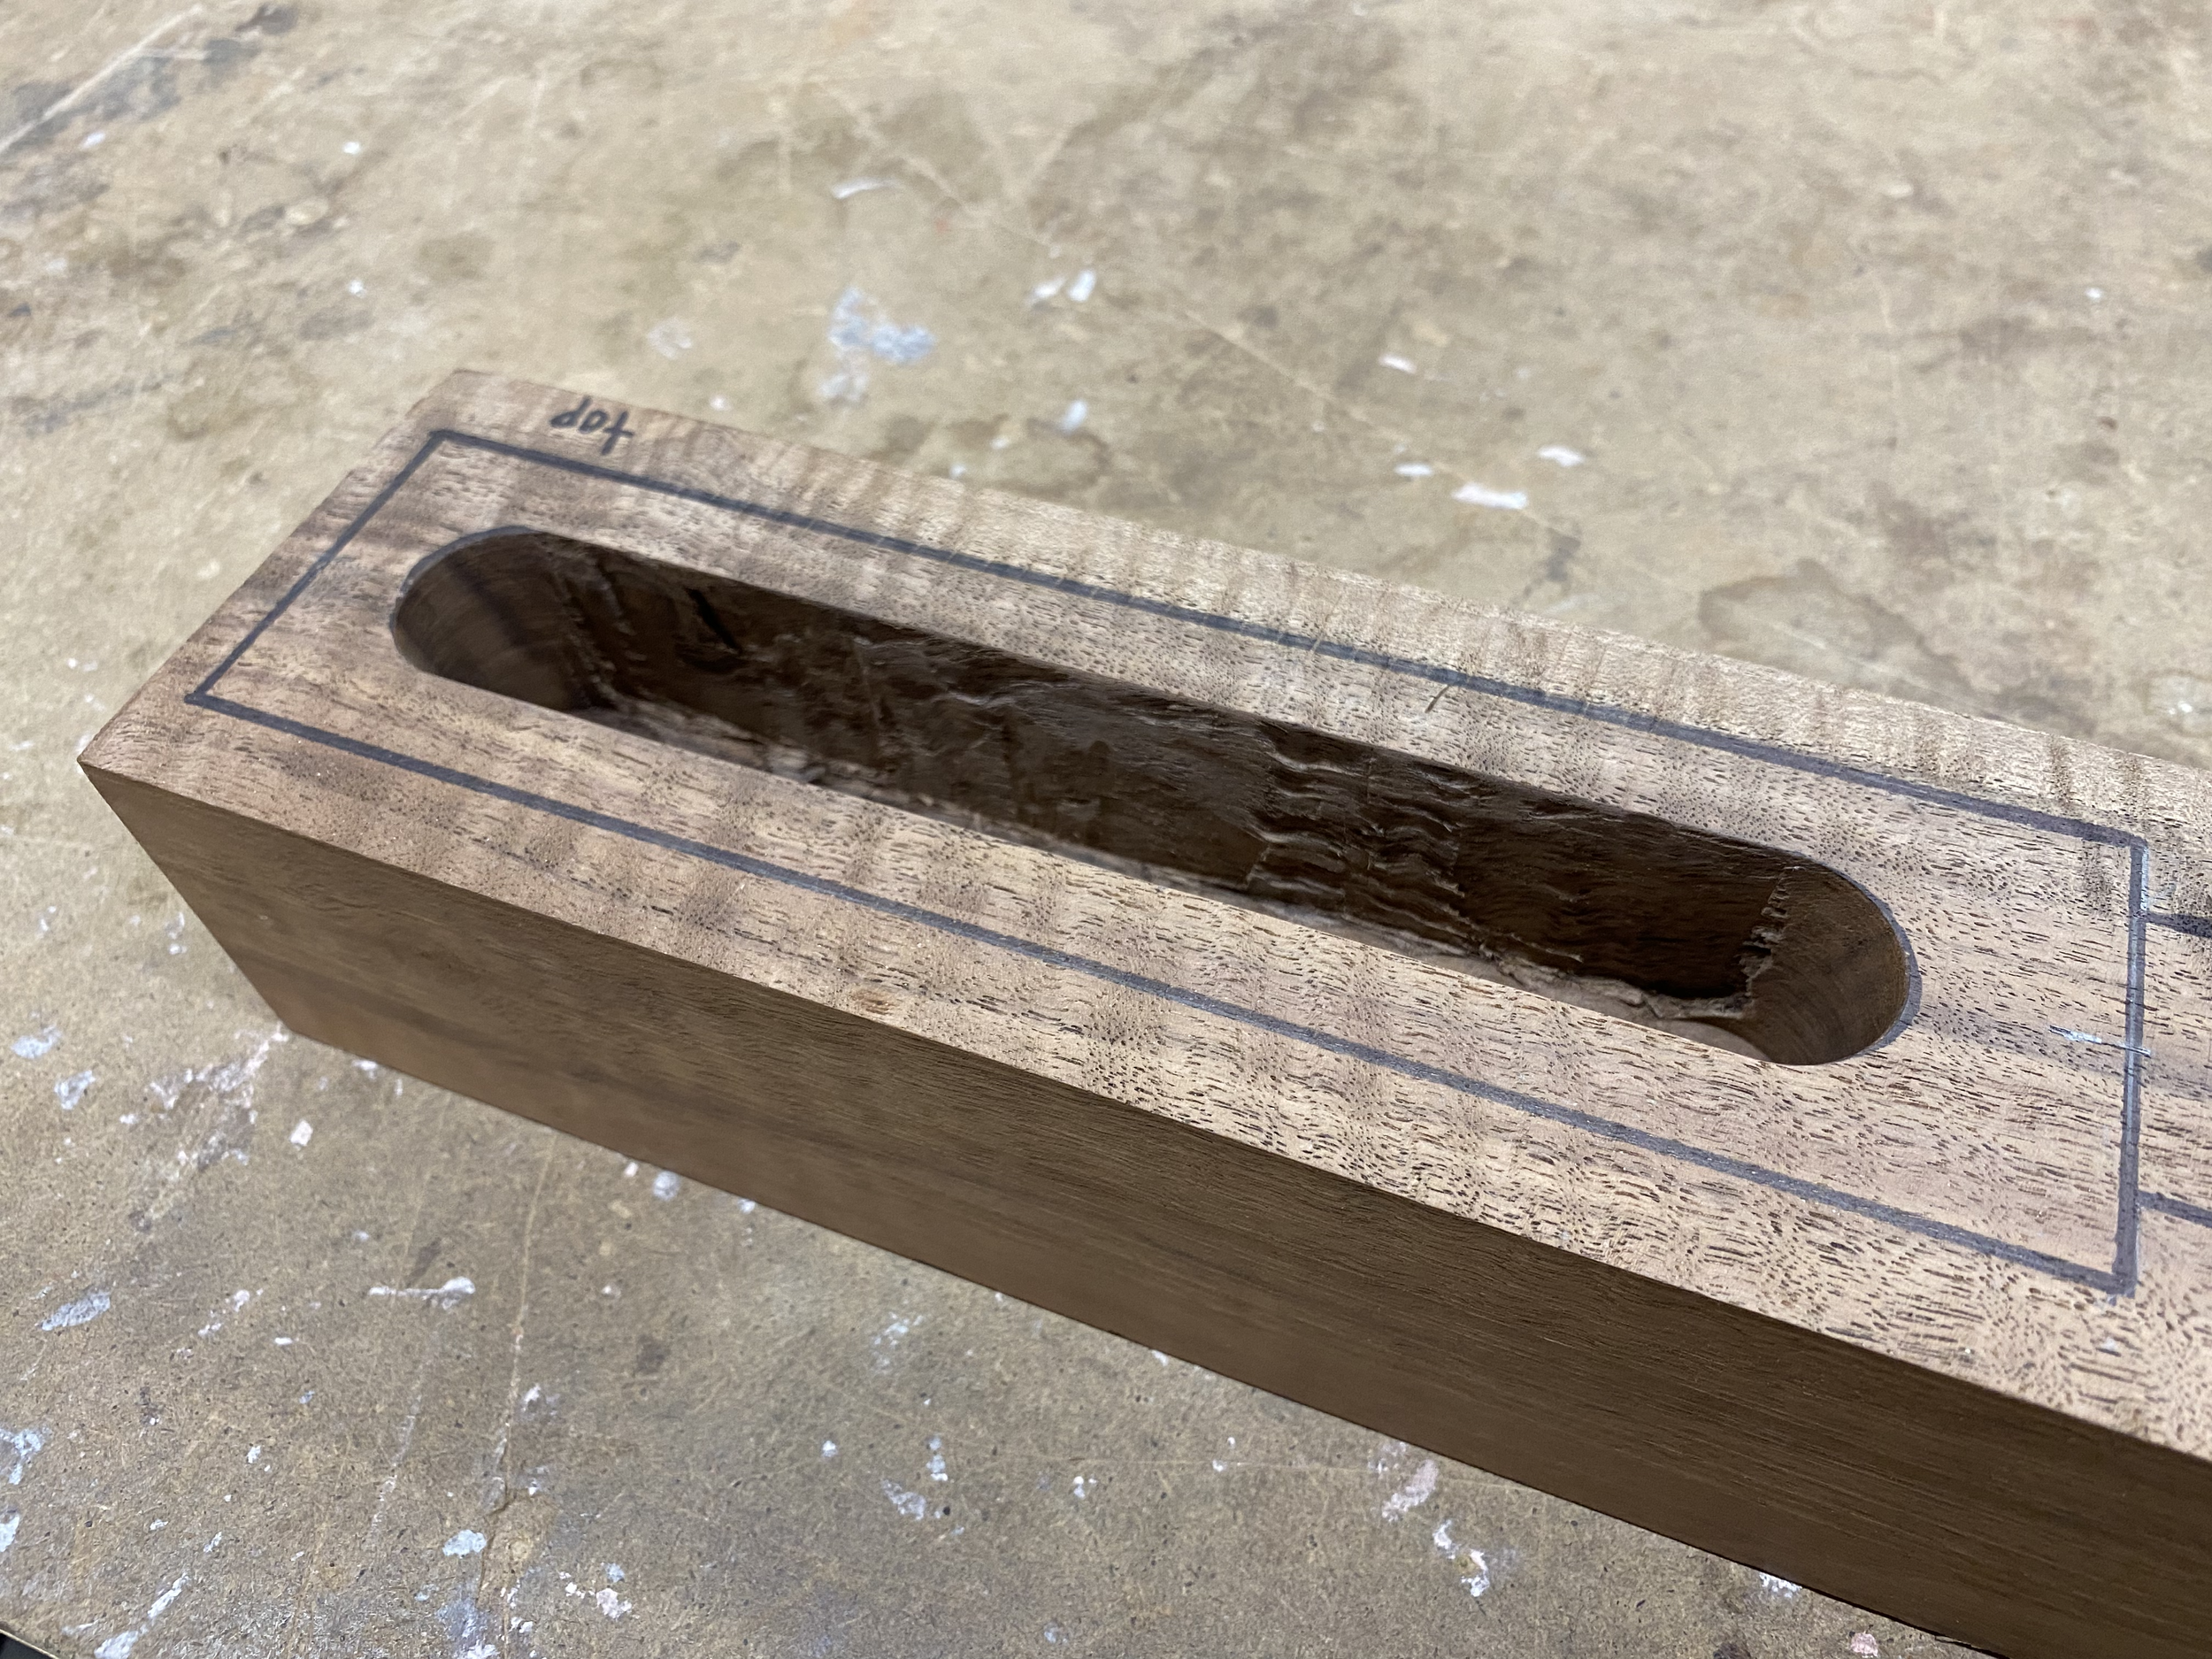
body carved from a single plank of bastogne walnut wood
laser cut templates for marking
hollowed out main cavity for electronics
routed channel for endpin + grooves for wiring from piezo pickups (mounted in bridge)
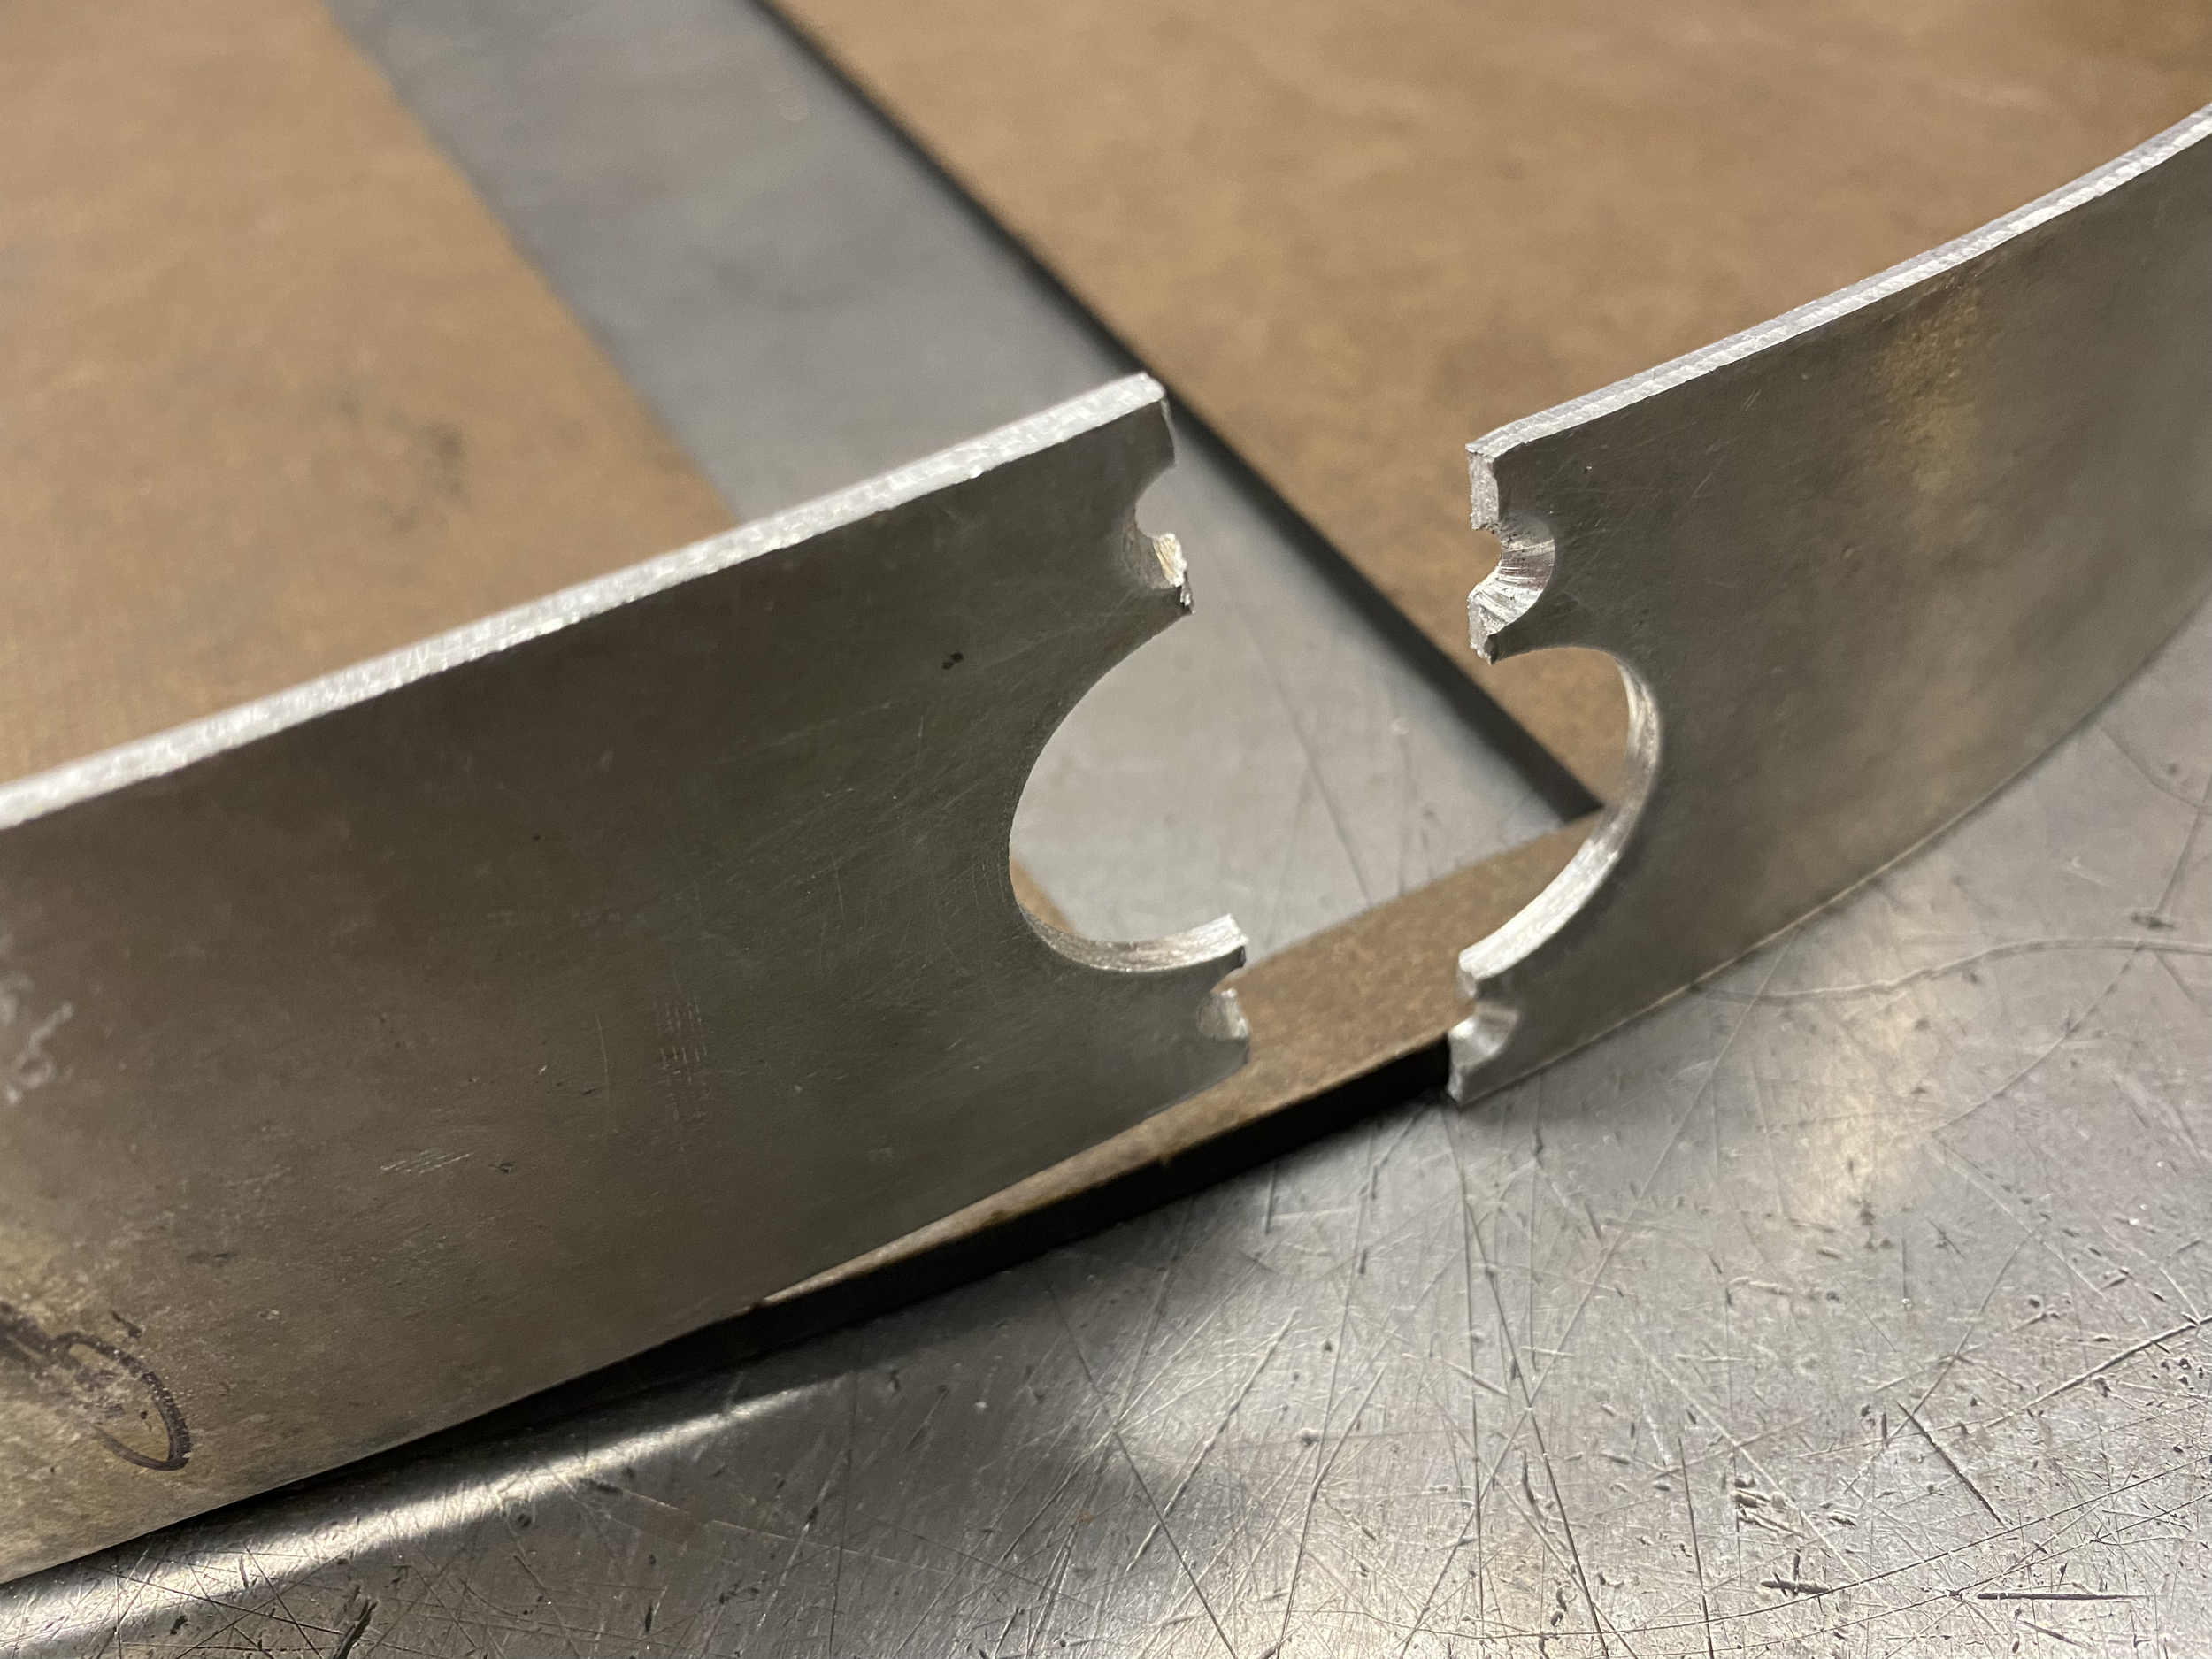
carved recesses for sheet metal flanges to sit flush within body
installed wood inserts for 6-32 machine screws to make frame detachable
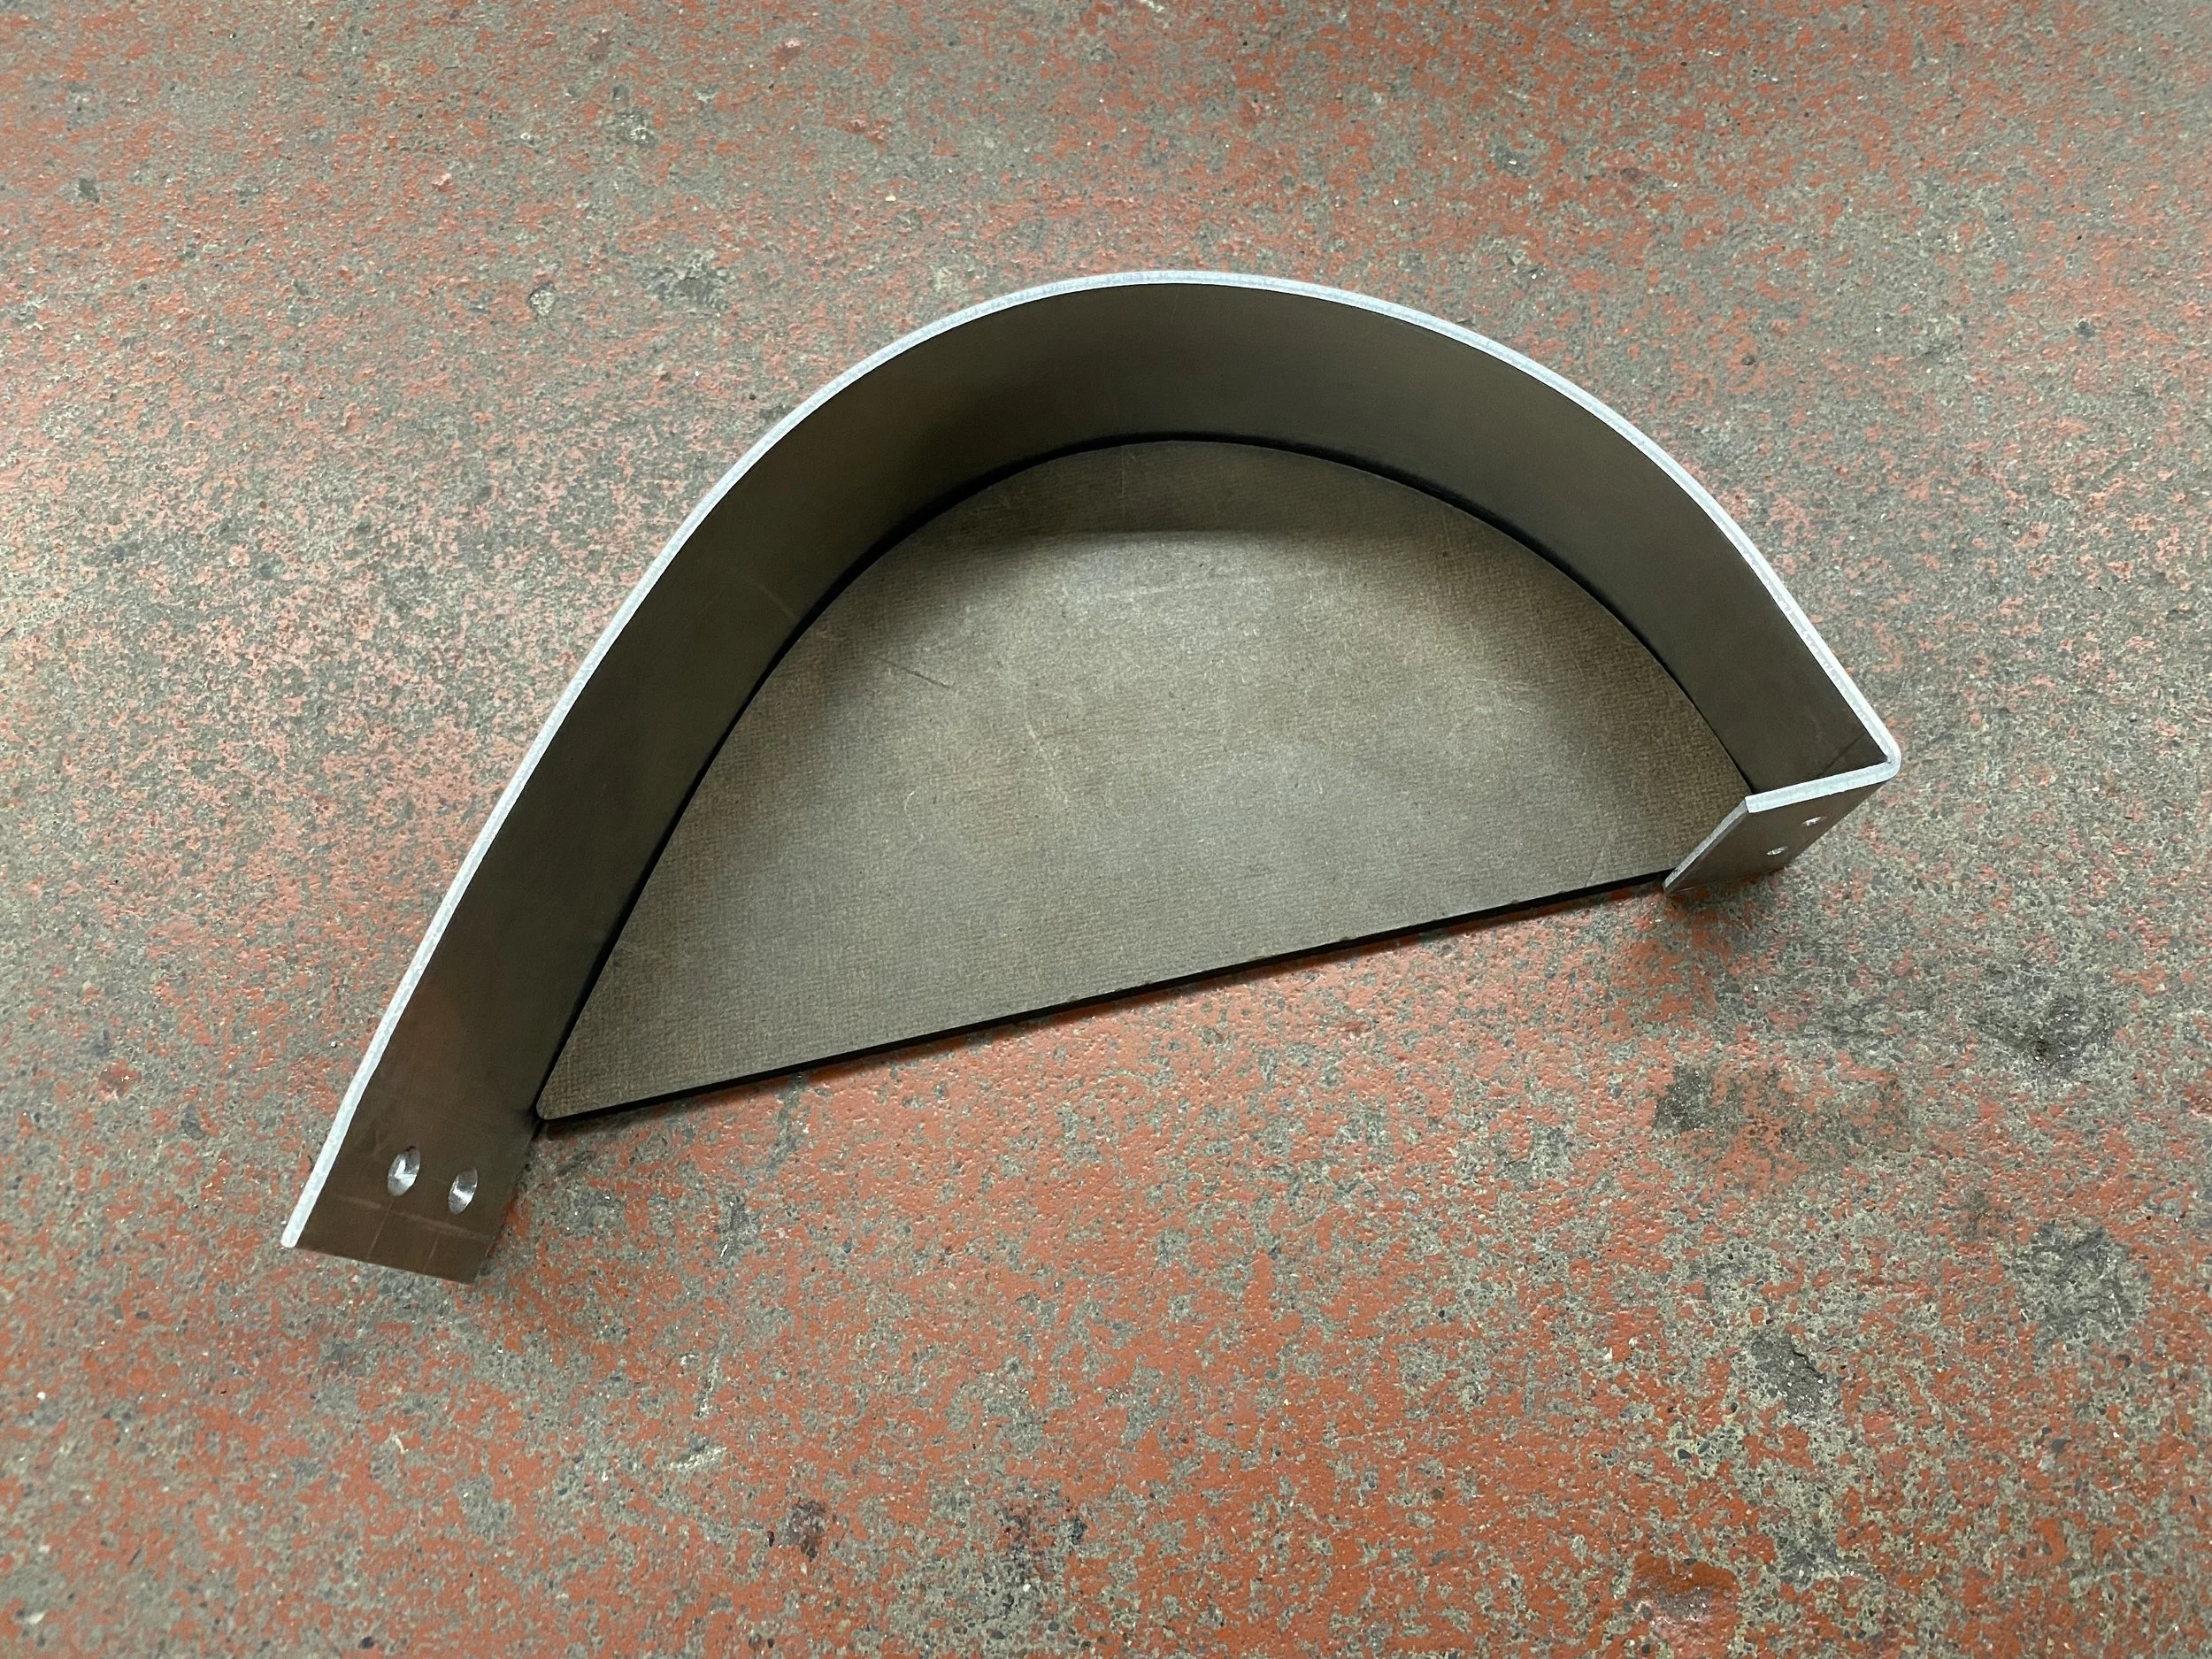
frame formed from aluminum sheet metal
sheet metal: 5052 aluminum, 0.100” thick
screw hole countersinks (82 degrees) + endpin holes created on mill
formed curves using slip roller + propane torch + hammer
flanges for interfacing with wood body created using press brake
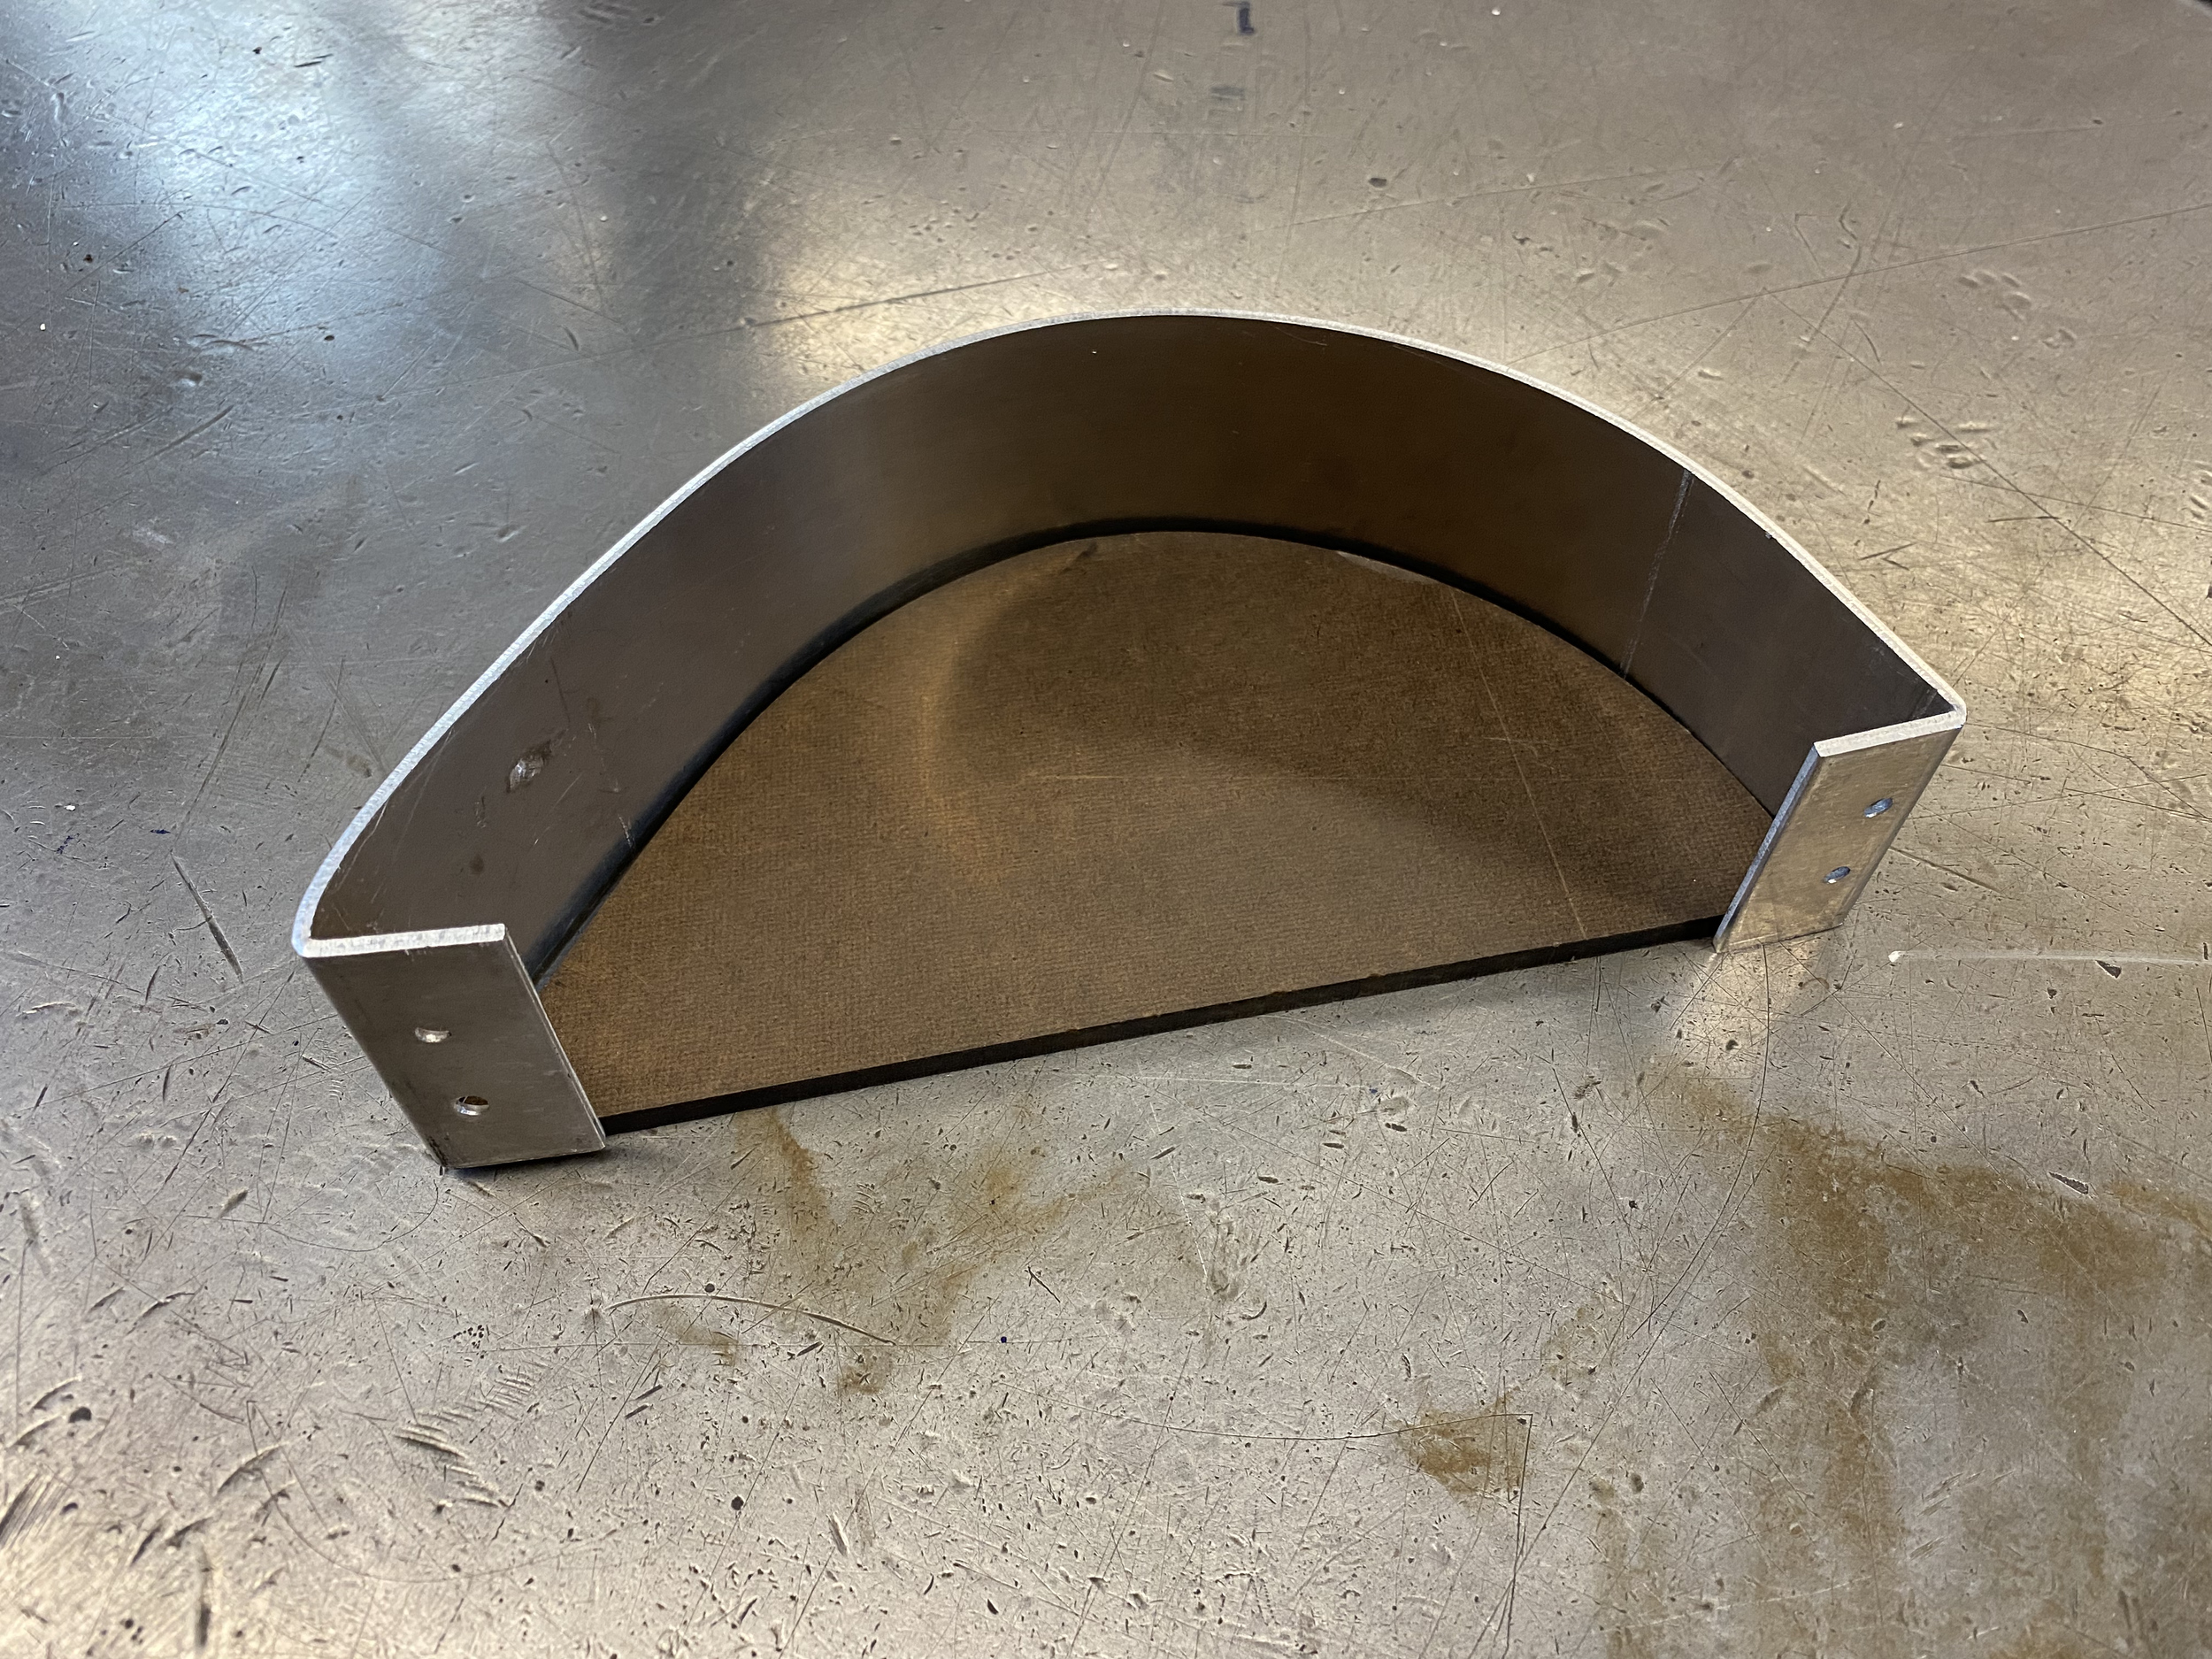
bead blasted finish
sketching

cad

initial cad (isometric)

initial cad (top)
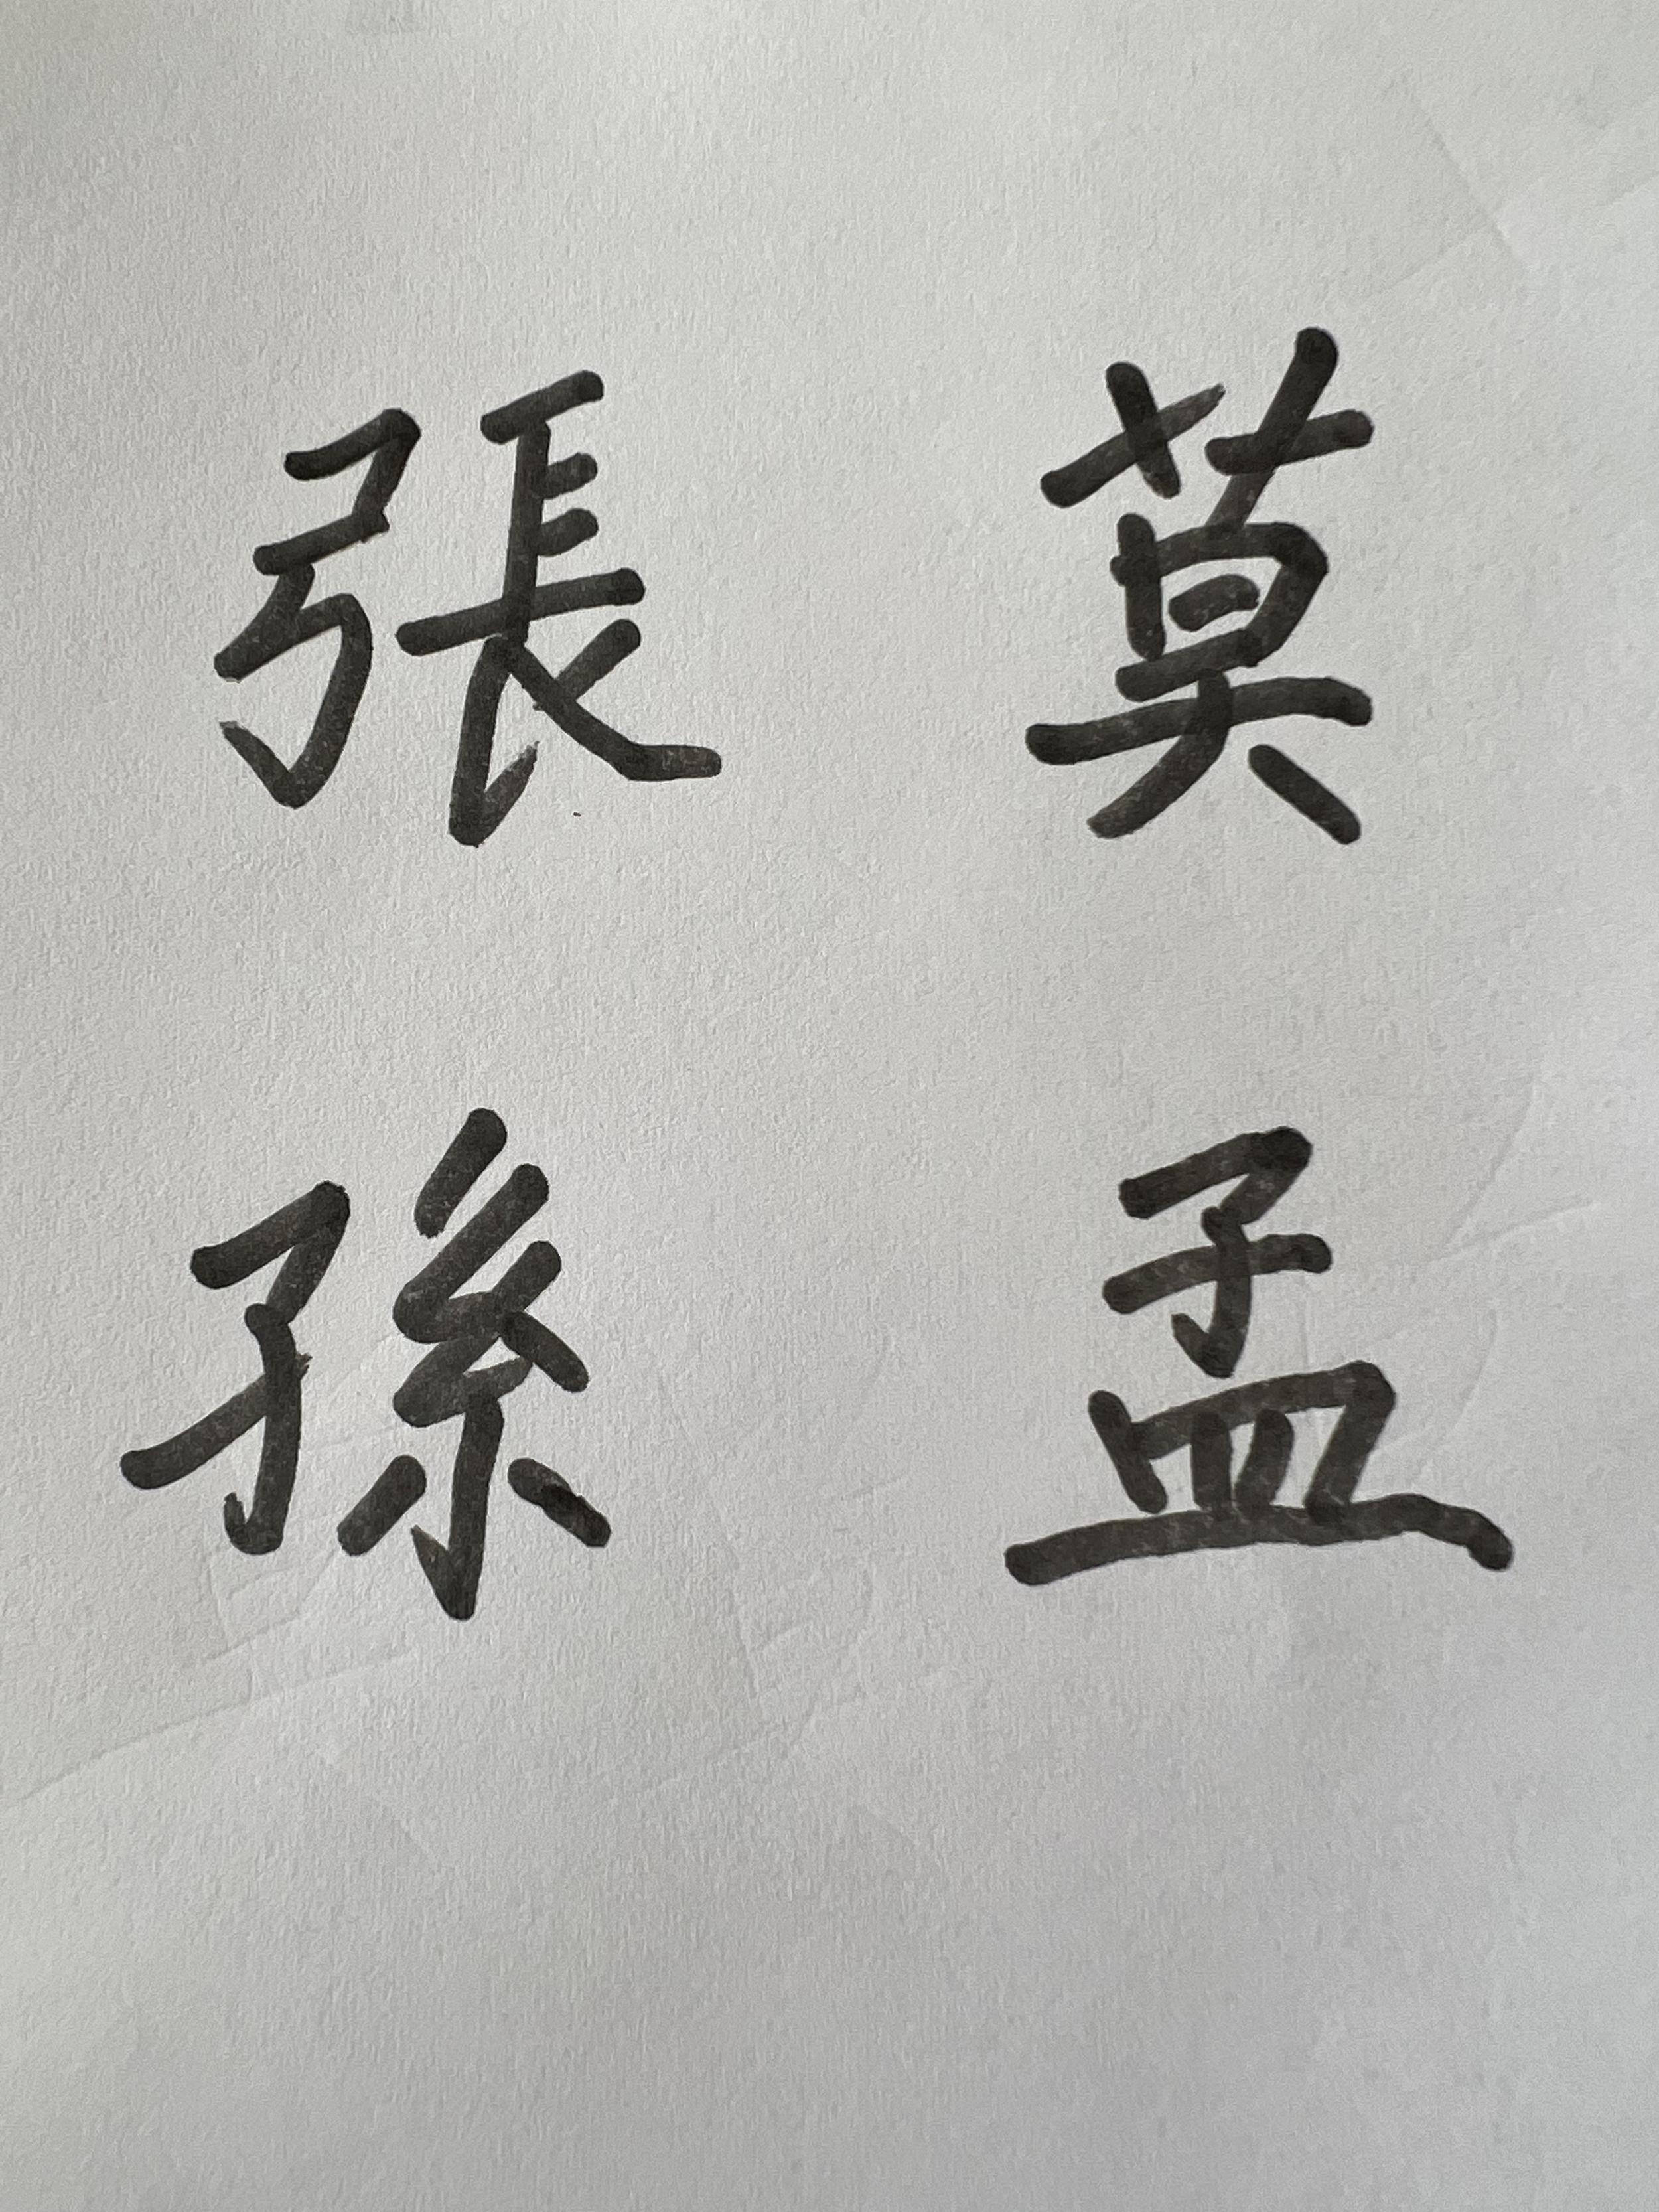
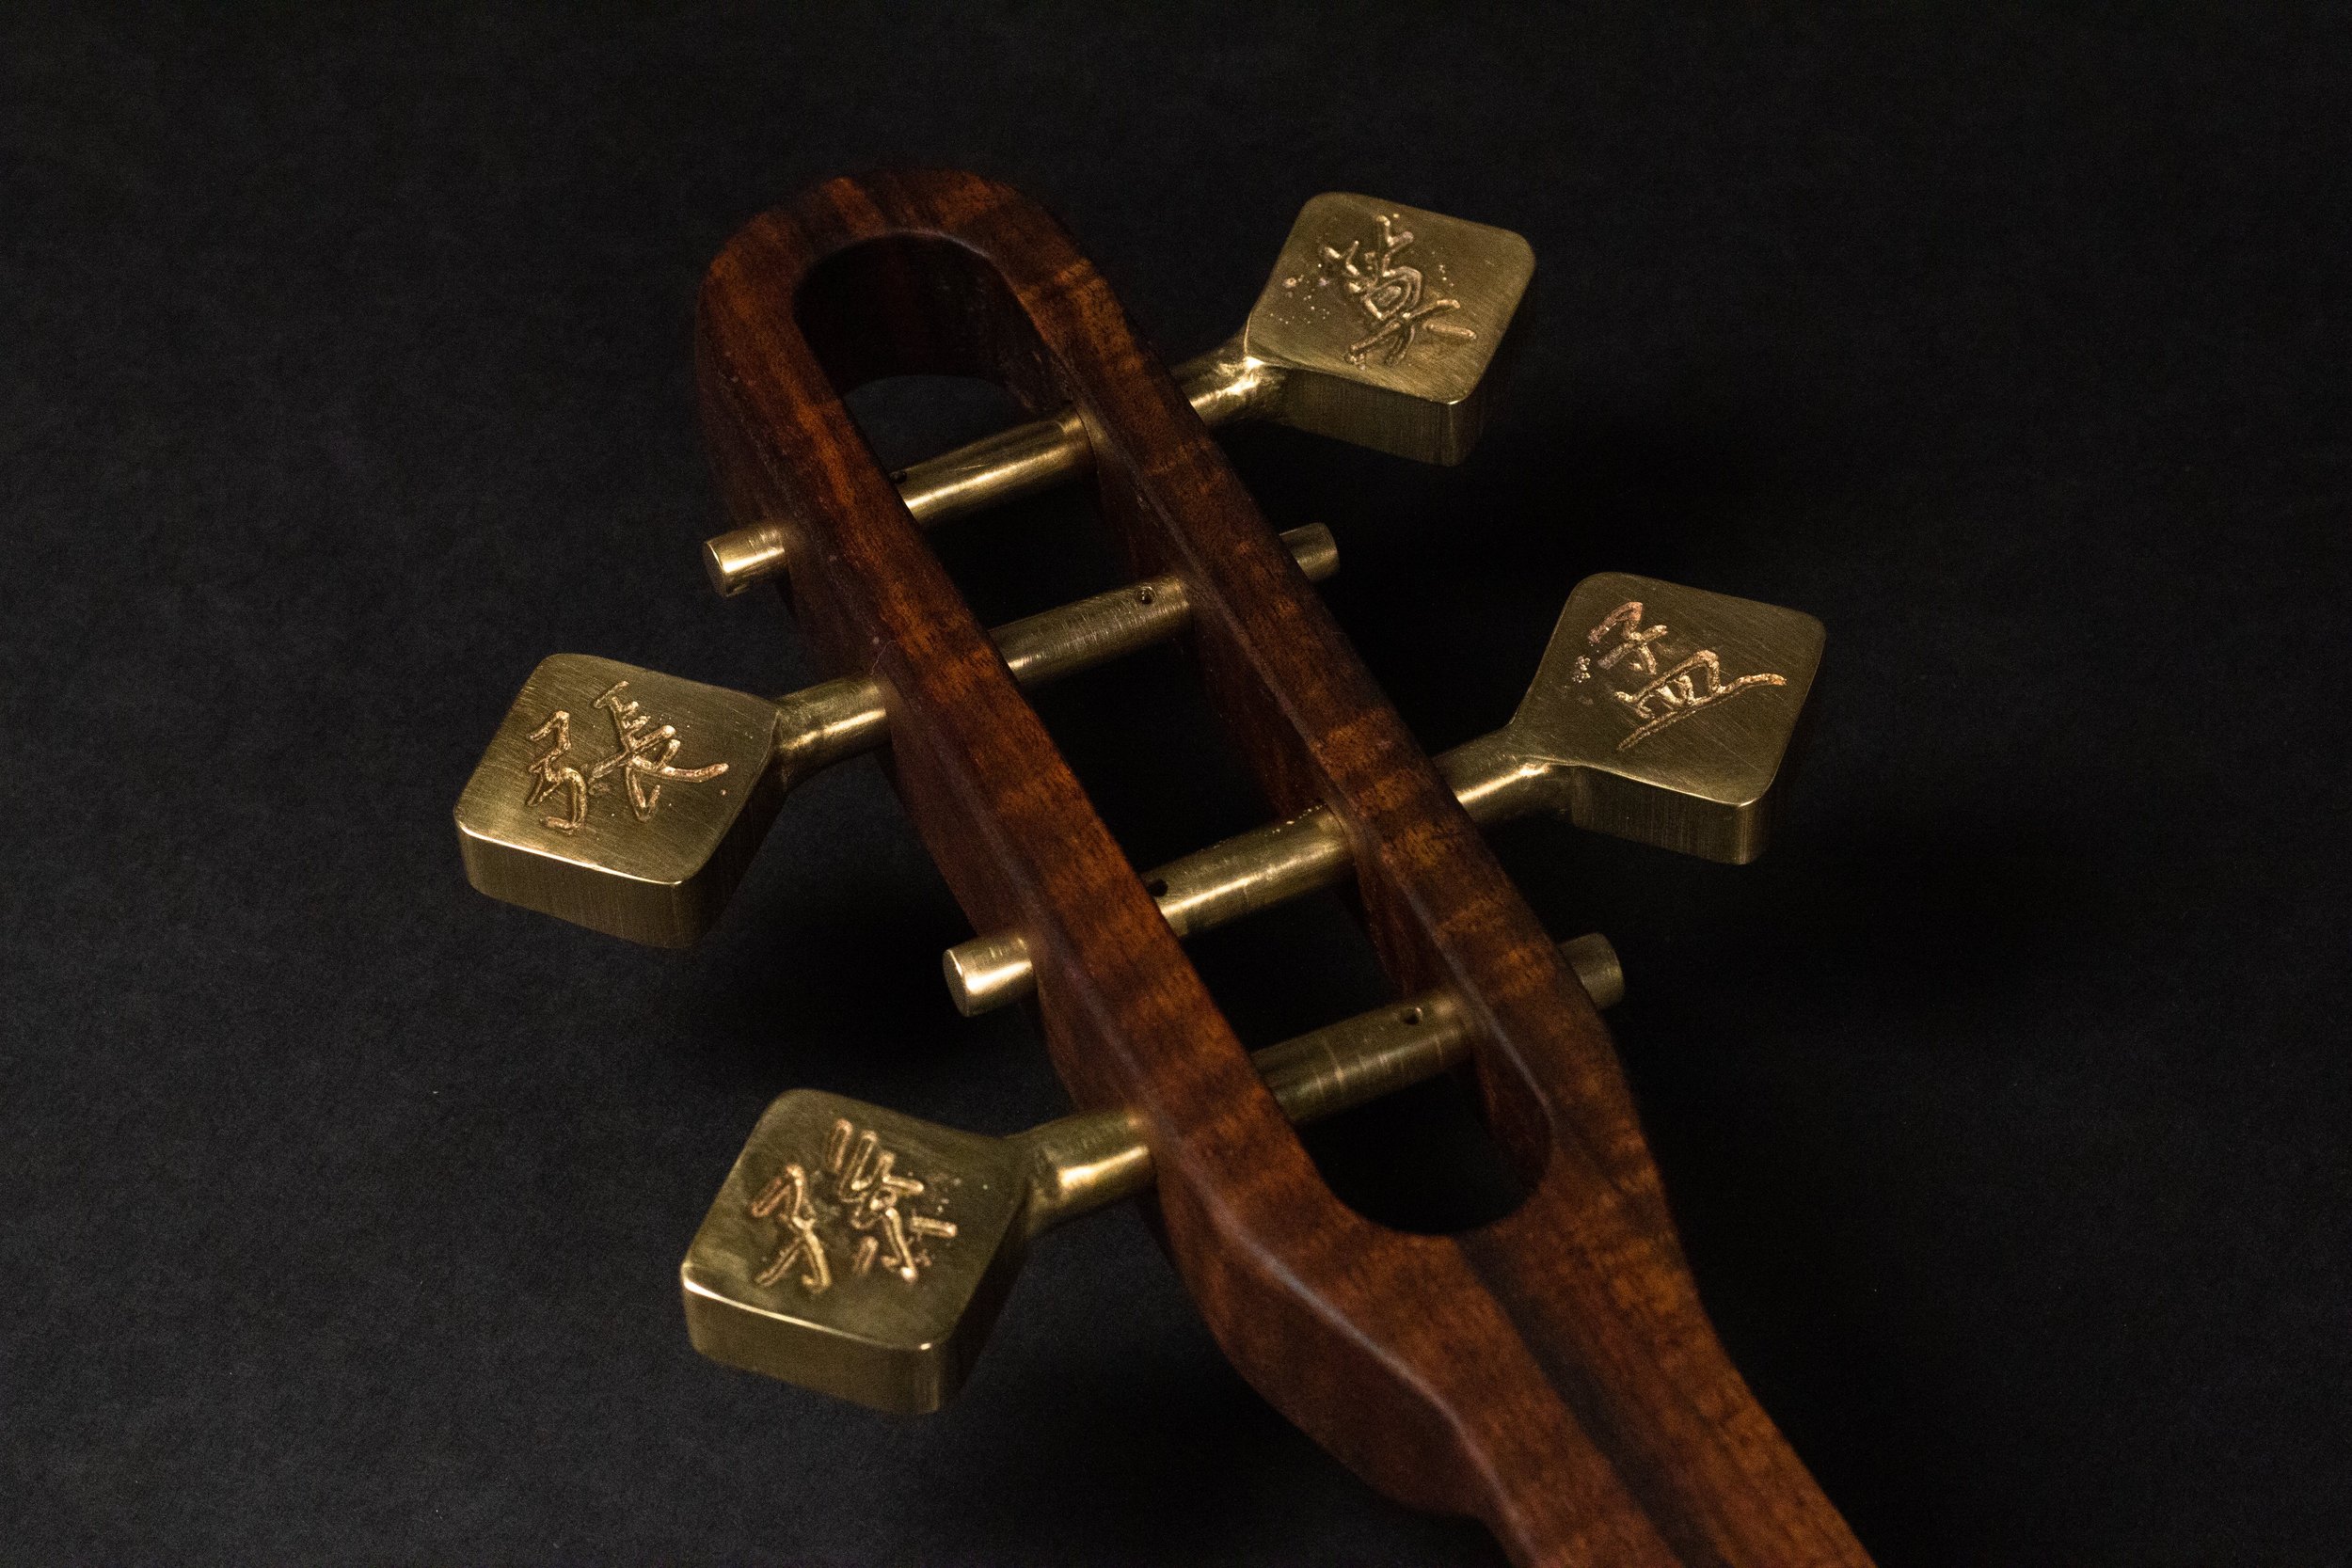
my family's names in chinese (written by my grandma), reworked in adobe illustrator, and imported to fusion 360 to model debossed tuning pegs
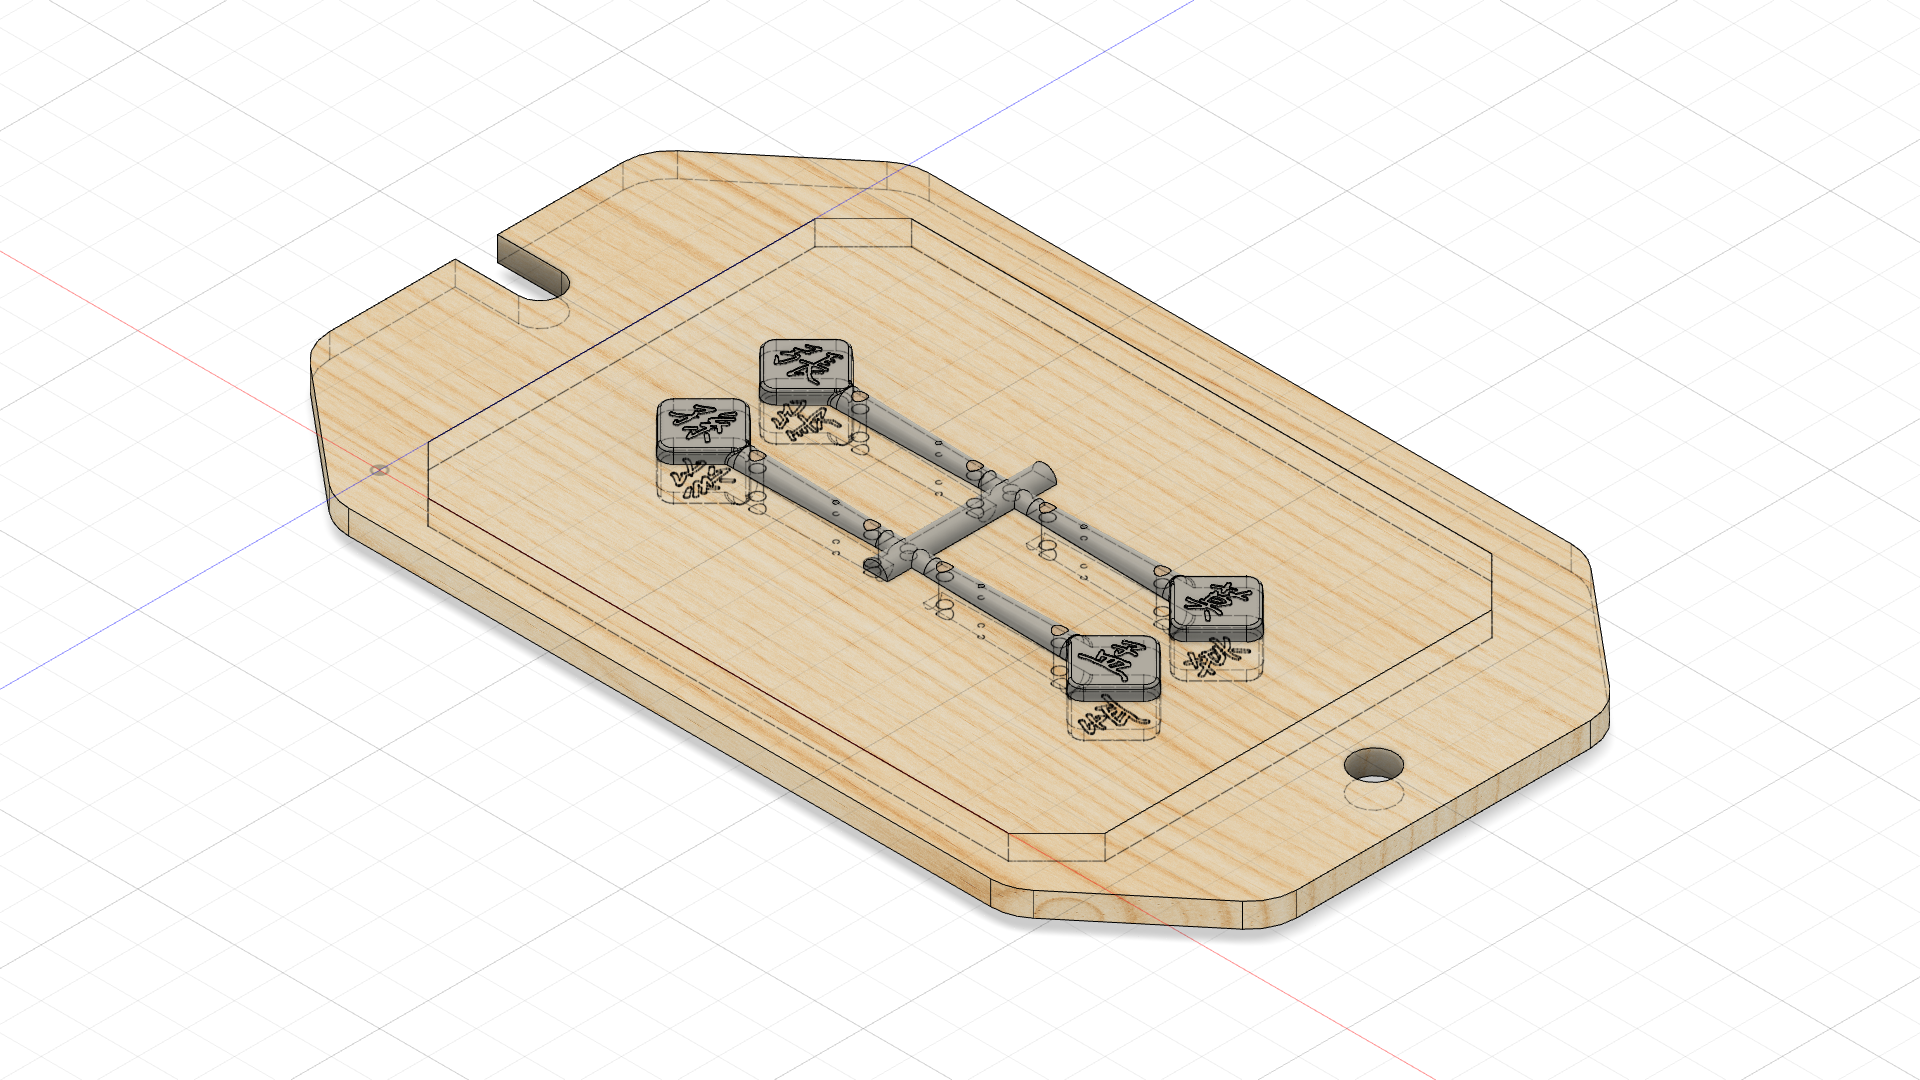
pattern board model
sand casting - tuning pegs
prototyping: rammed up sand casts of same character ( 張 ) with 4 different 3d printed parts with varying depths (0.010" - 0.040")
found that 0.020" was ideal depth for sand casting the deboss (the white character)
the first pour had too much sink
added risers to the pattern board to prevent sink

risers (close-up), which add thermal mass to the ends of the parts, reducing sink
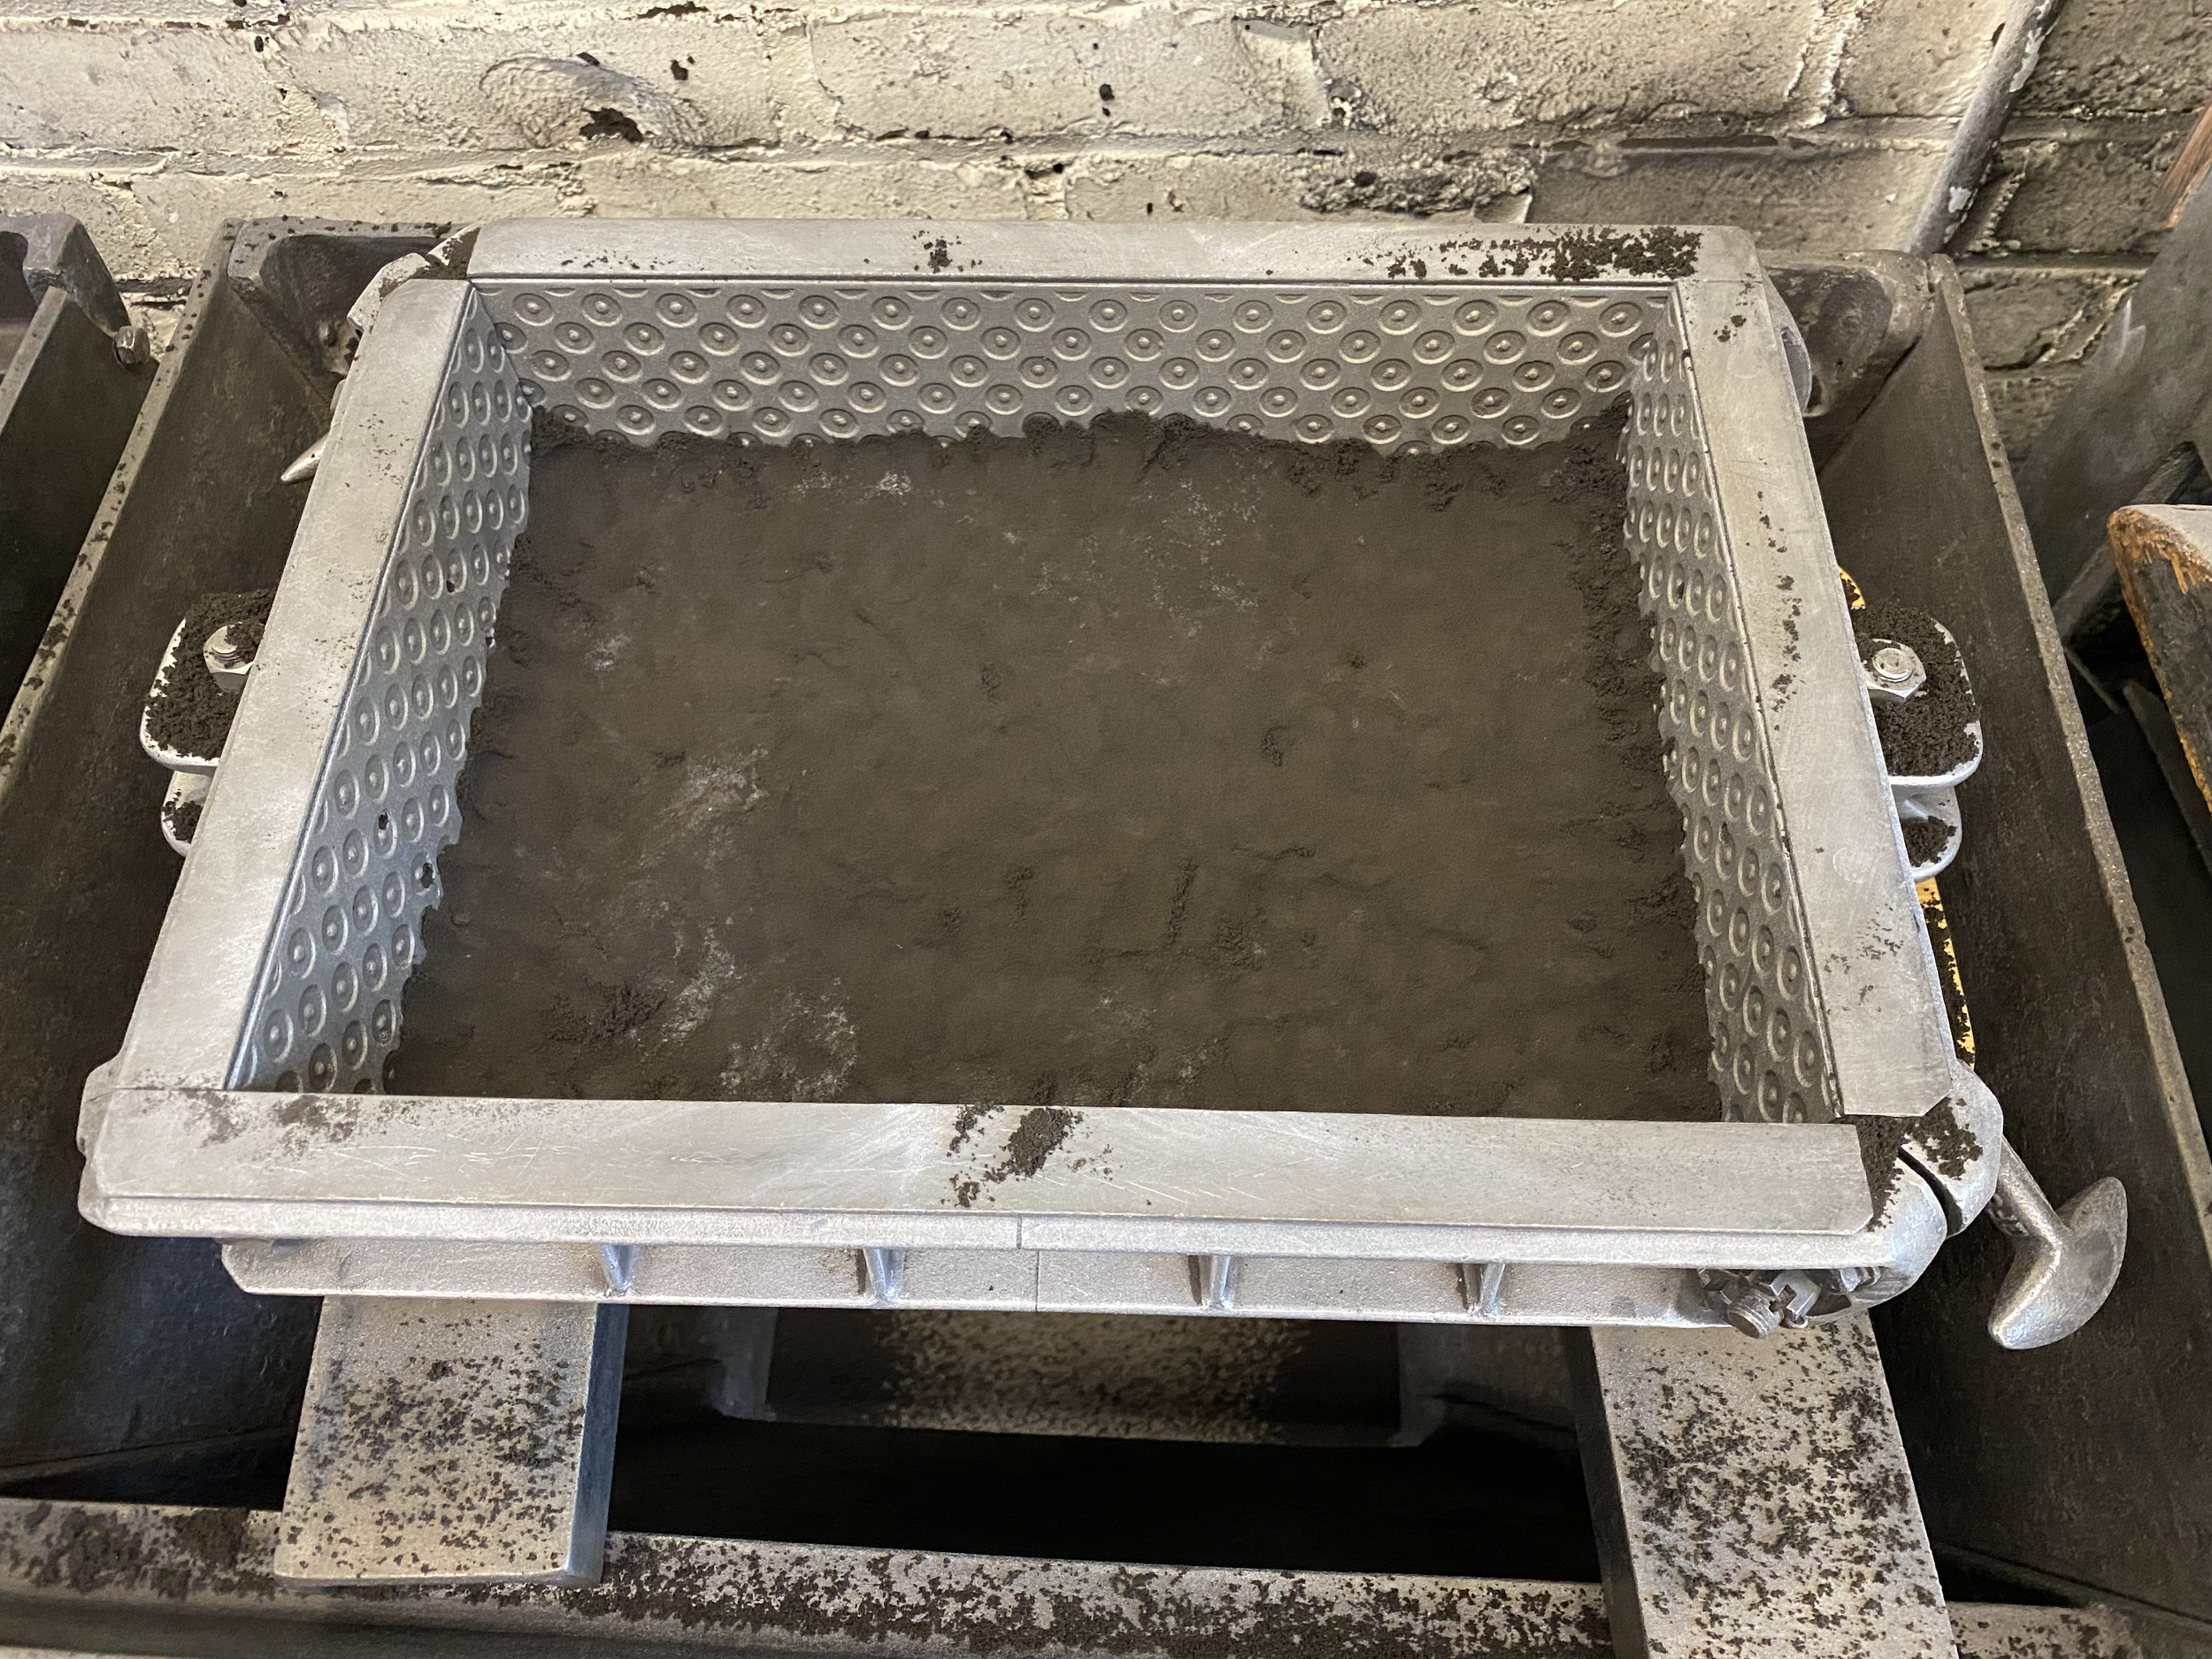
ramming up for the 2nd pour
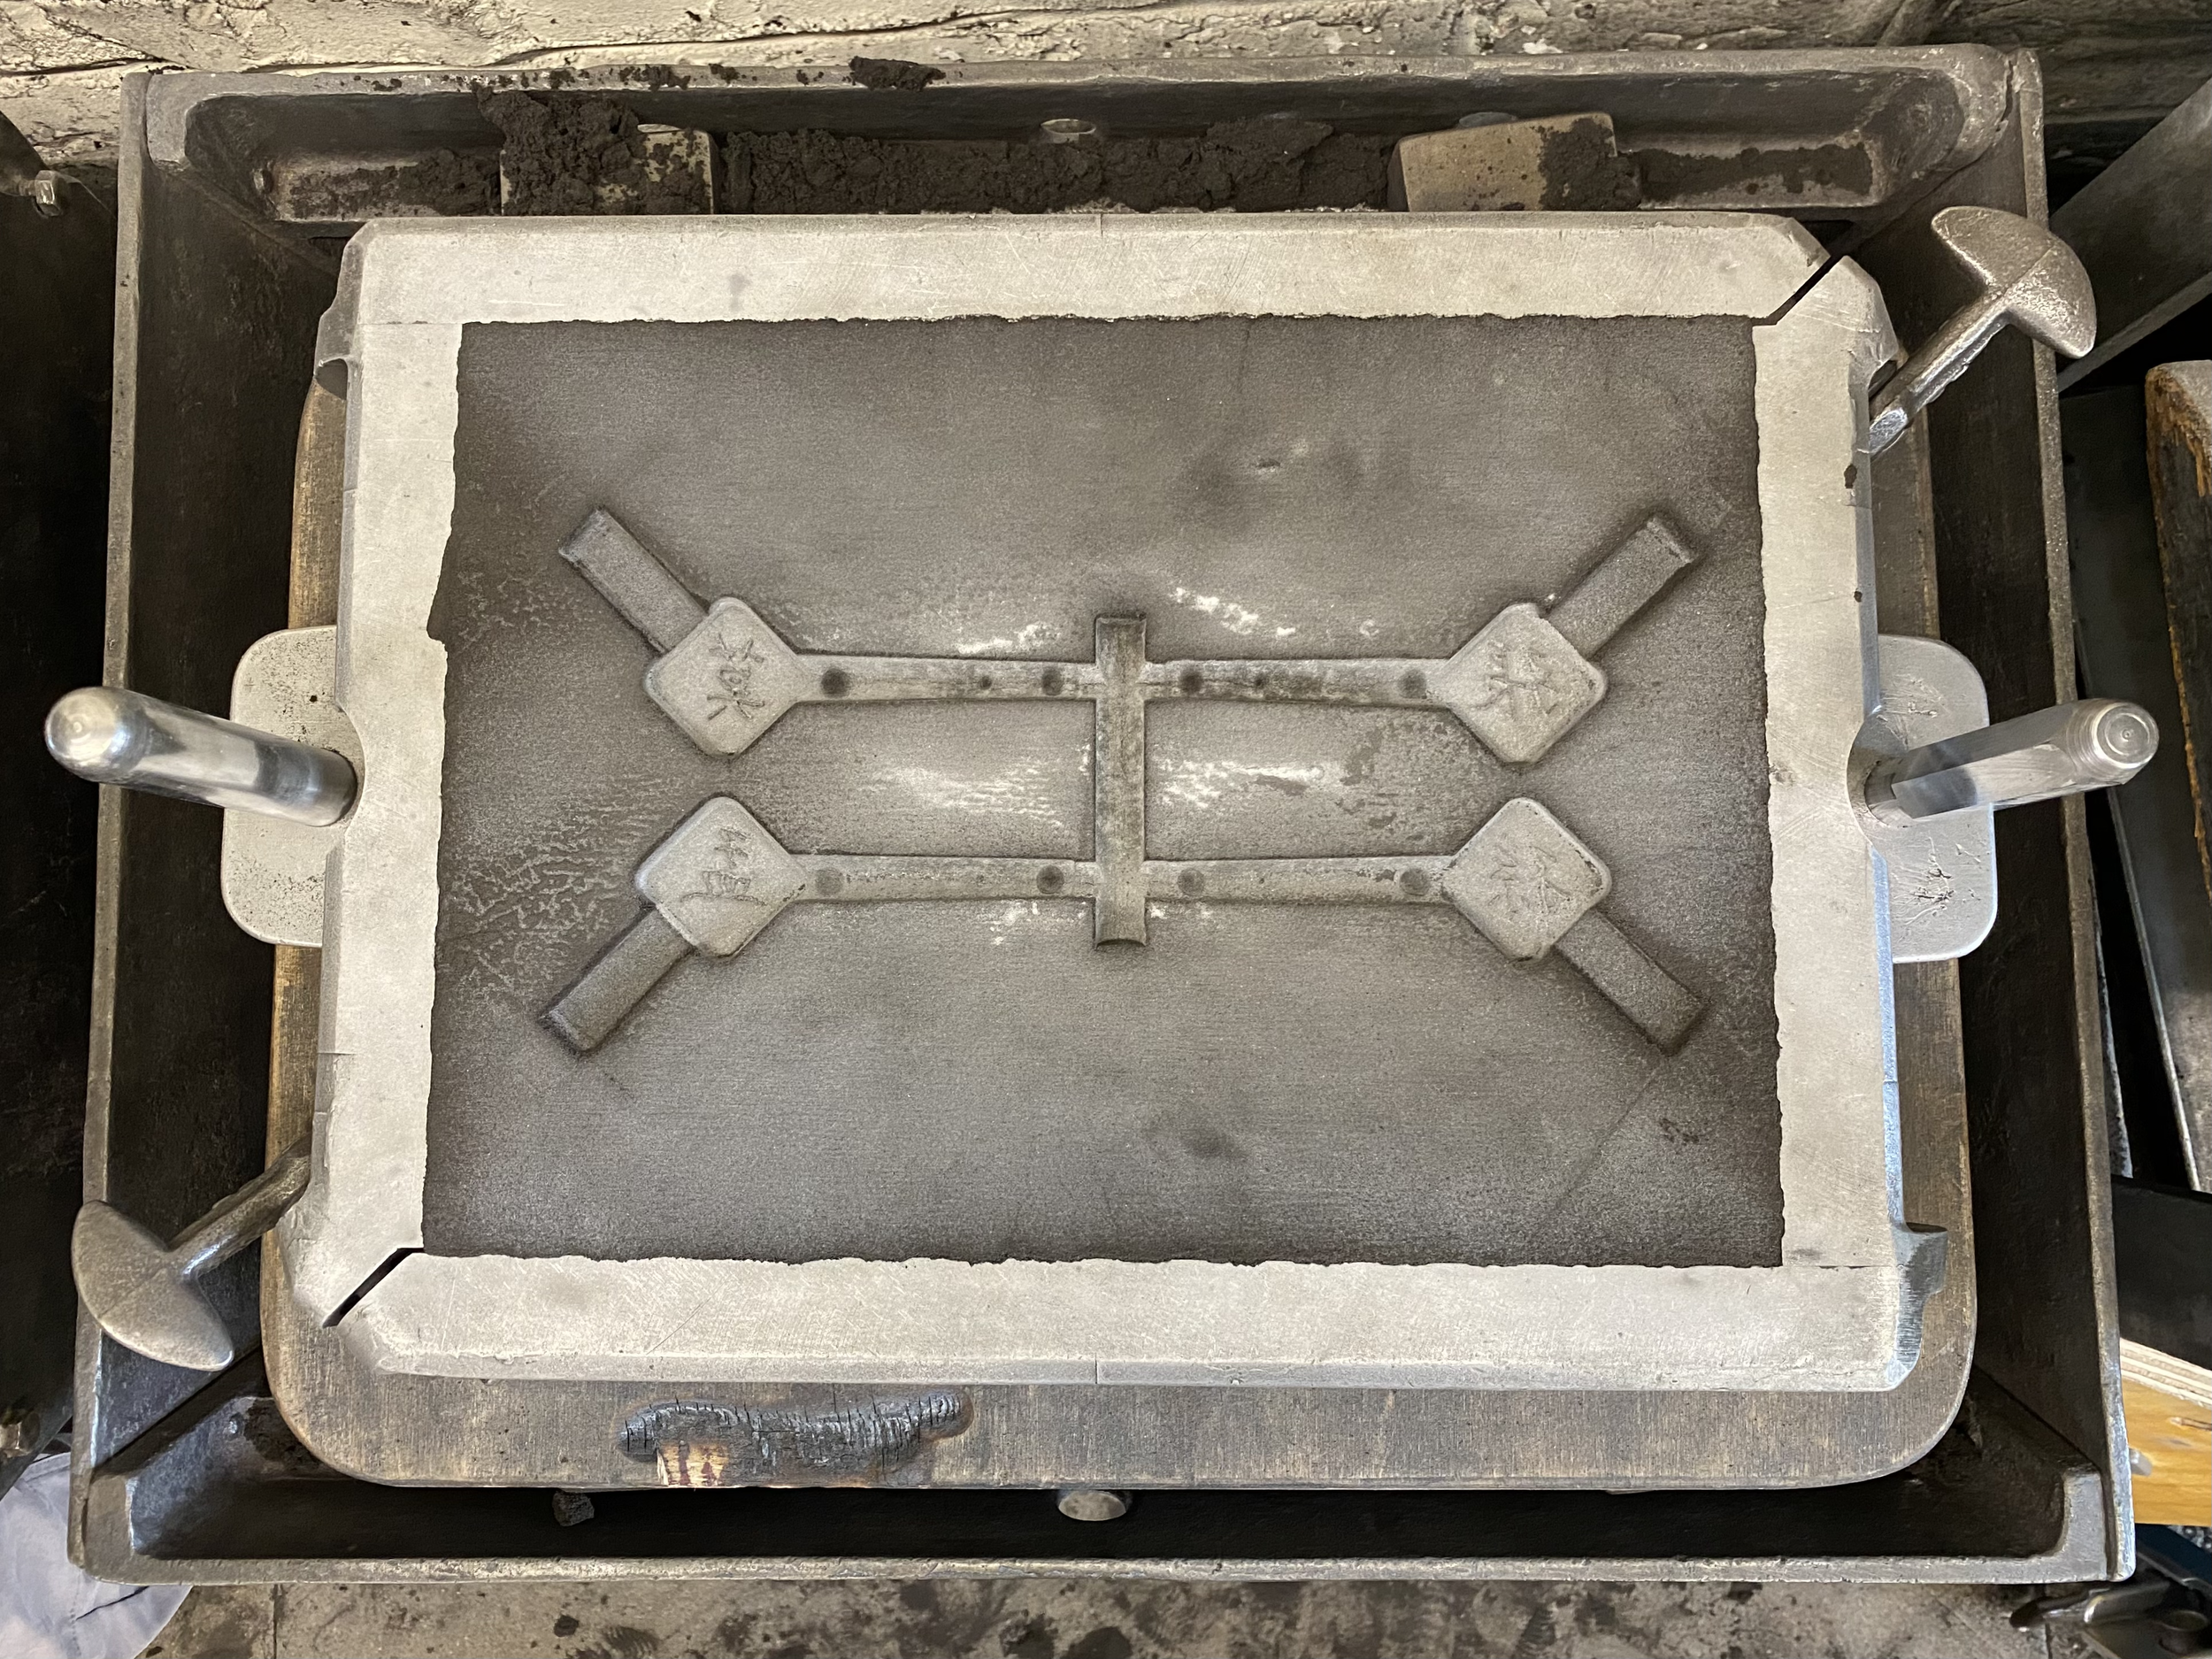
2nd ram up

2nd ram up (details)
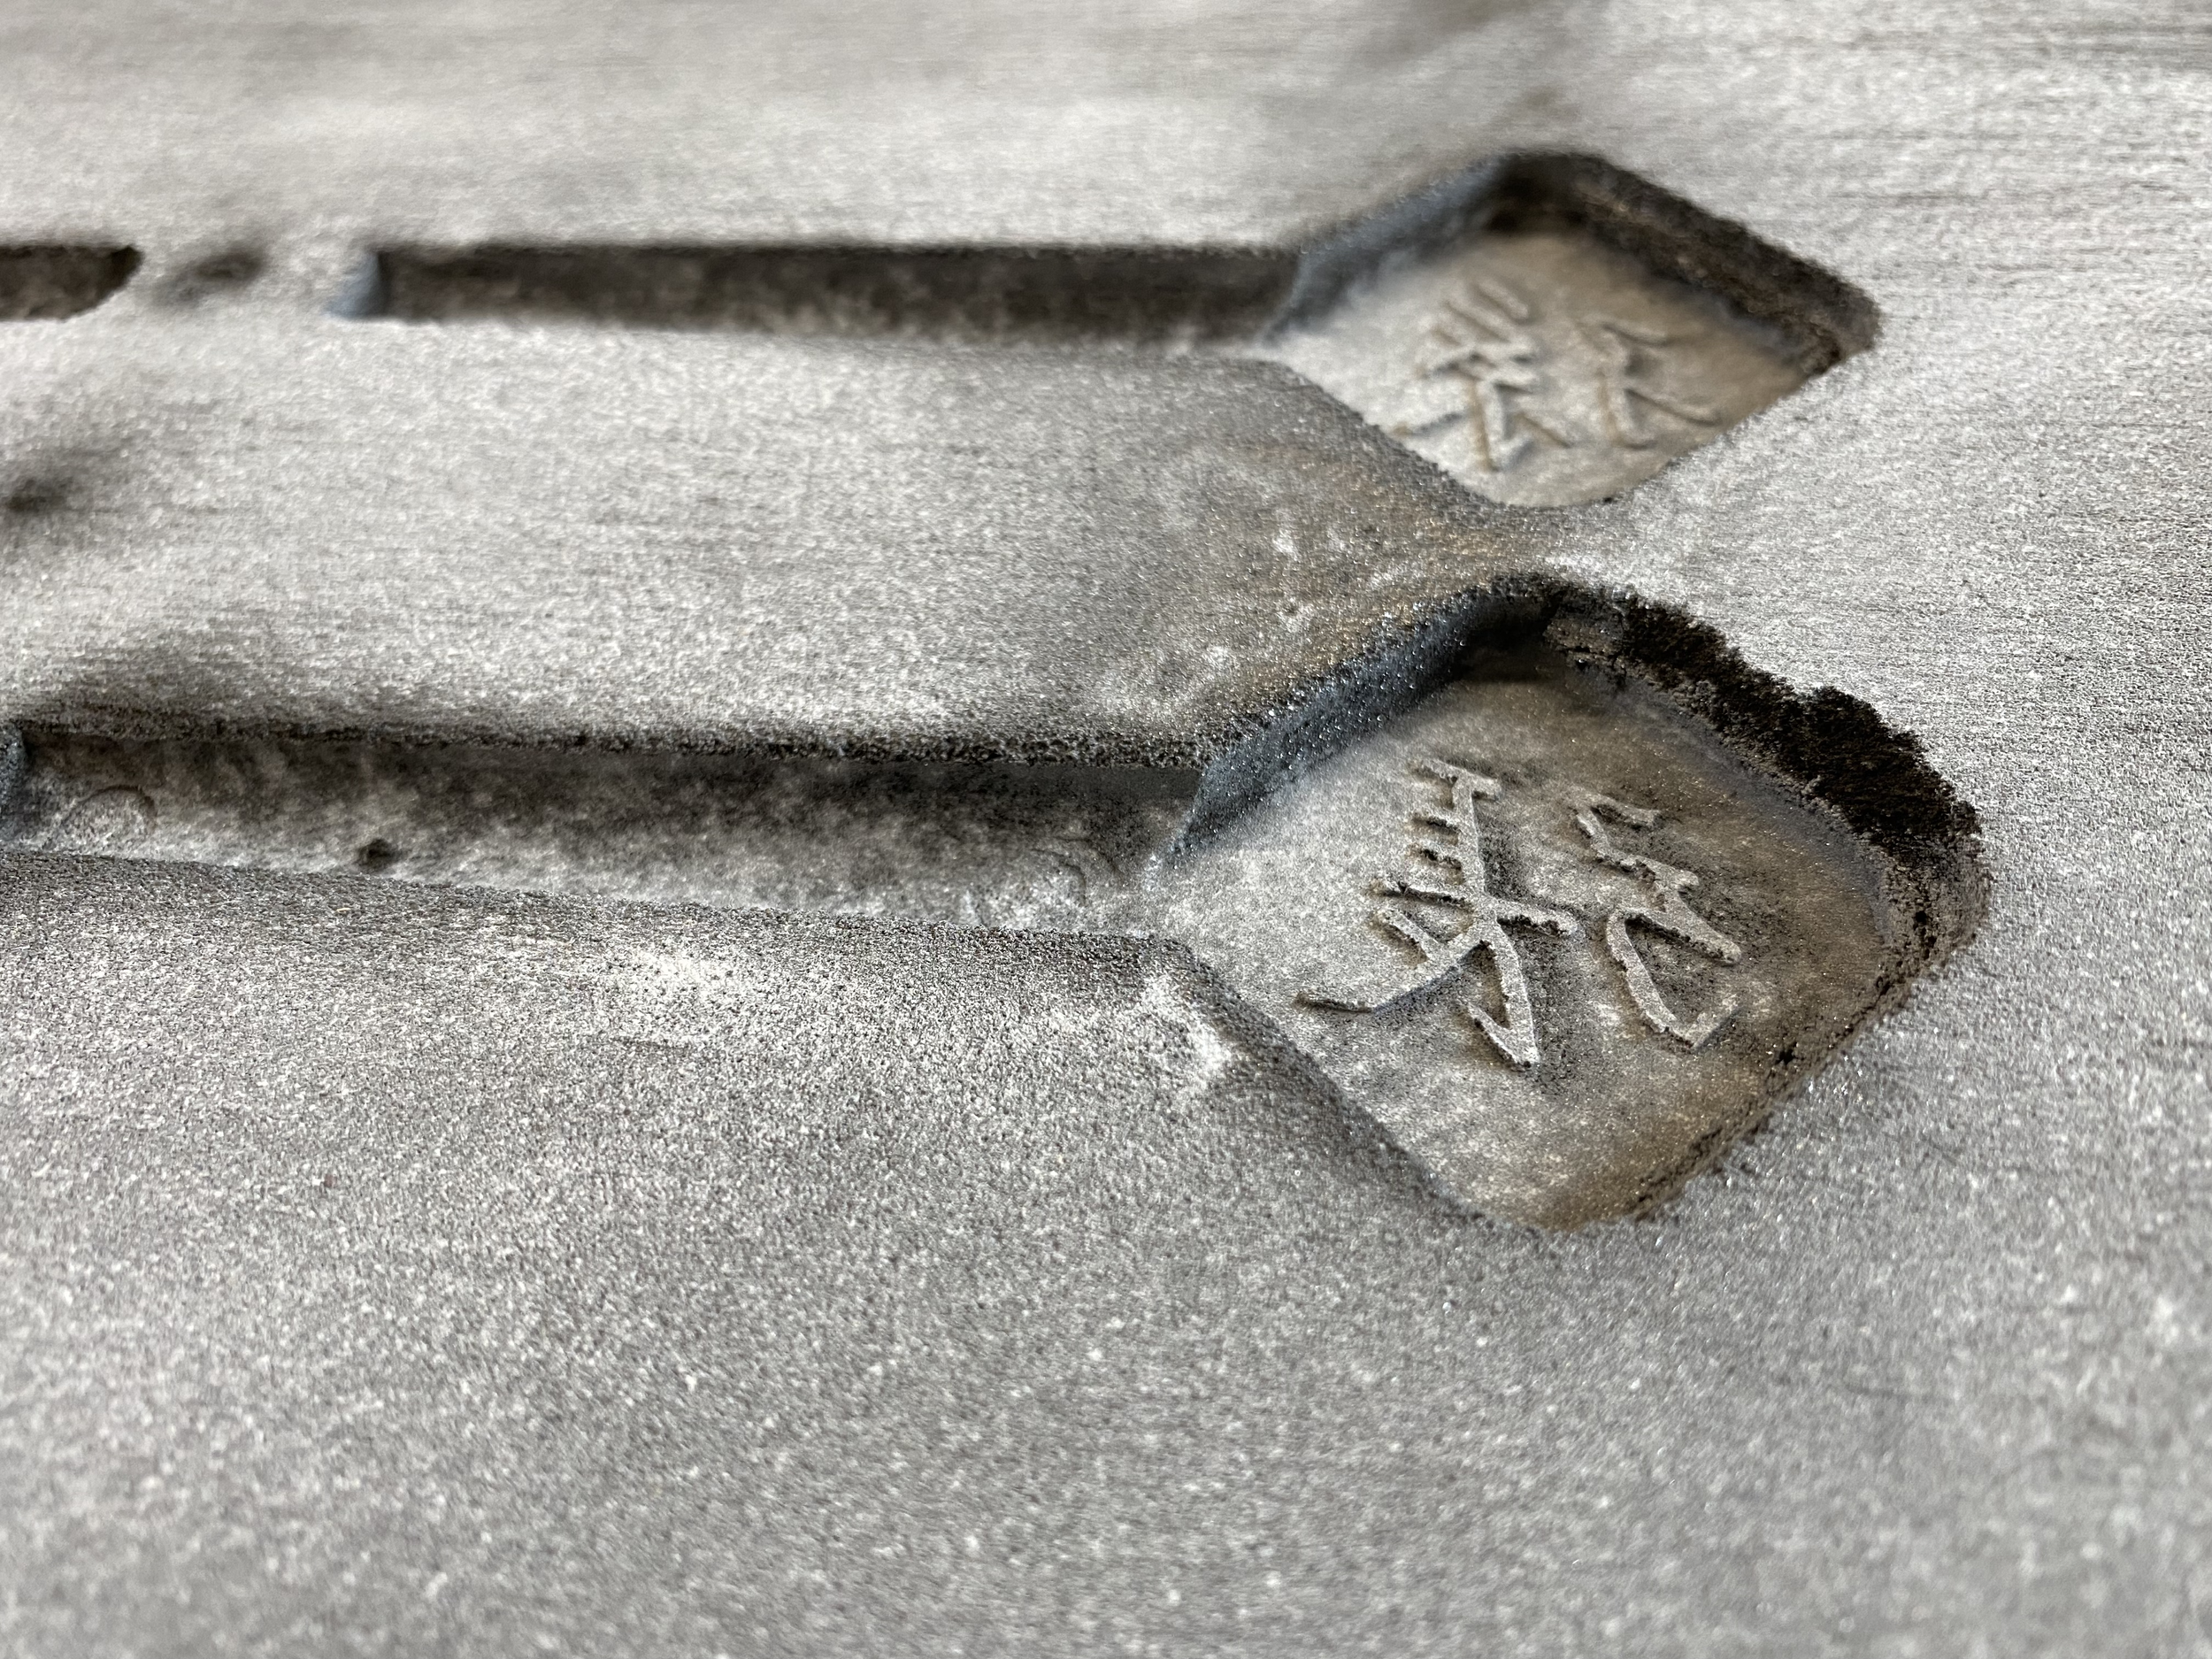
2nd ram up (details)
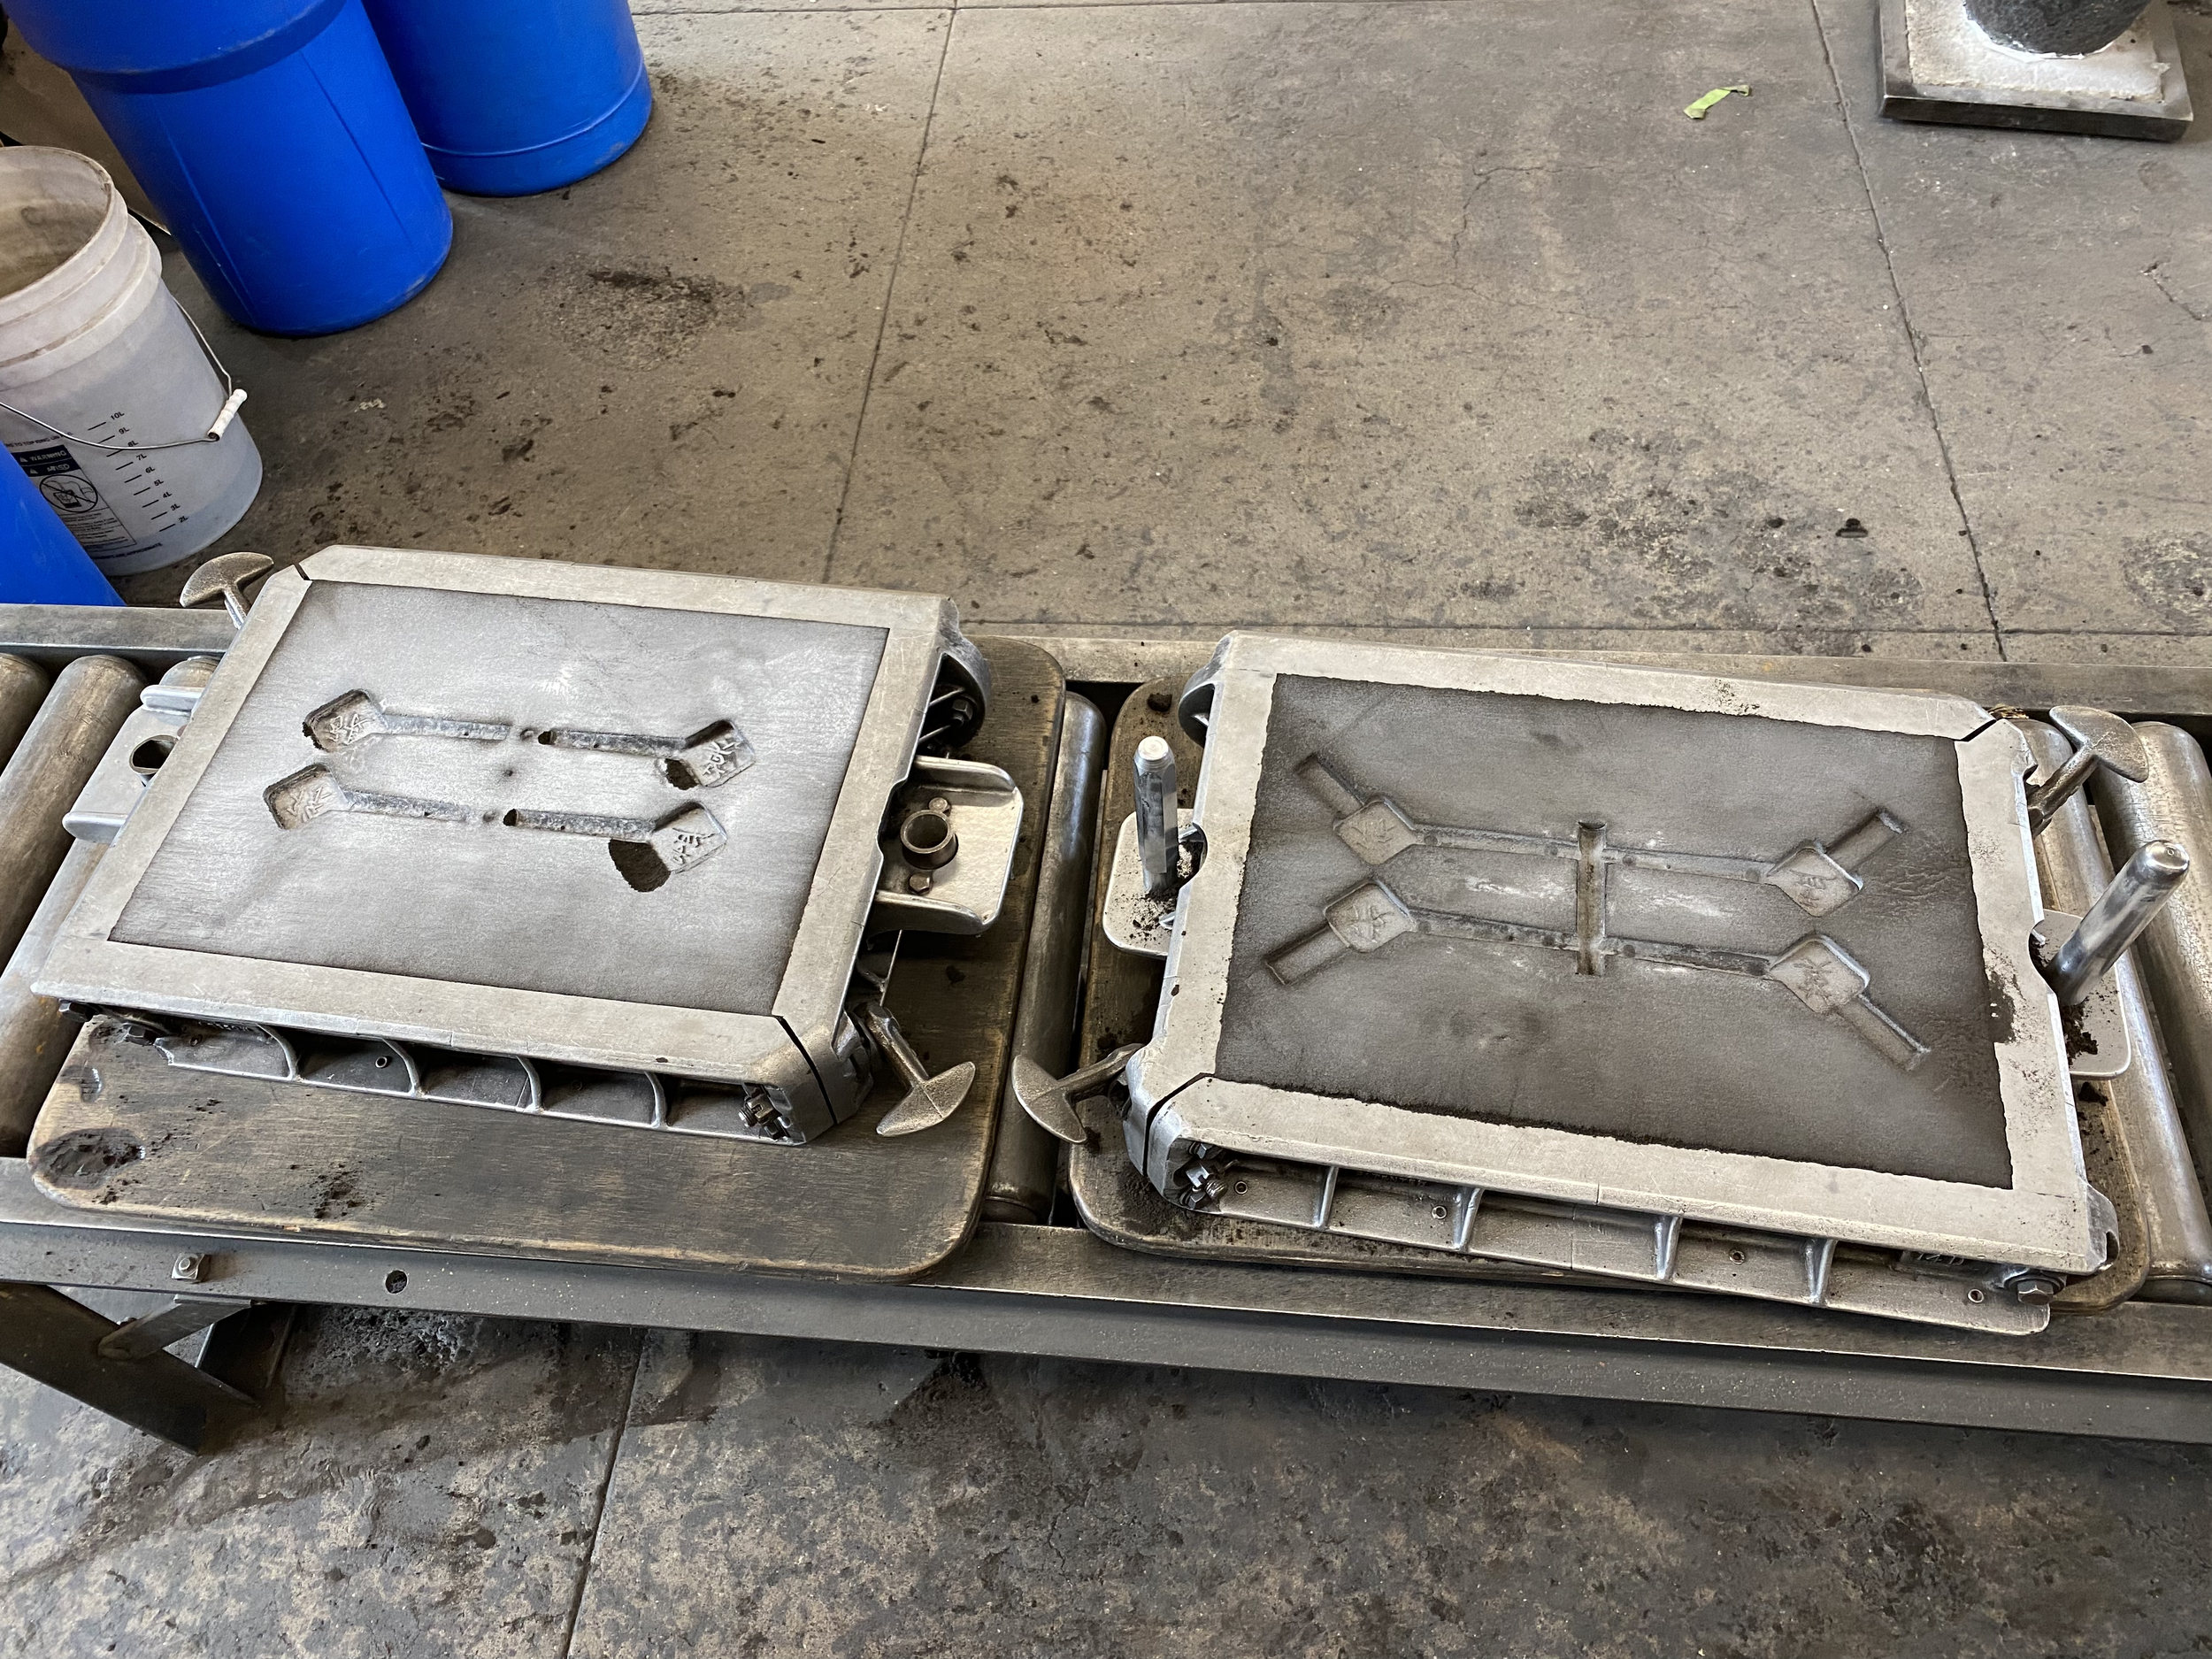
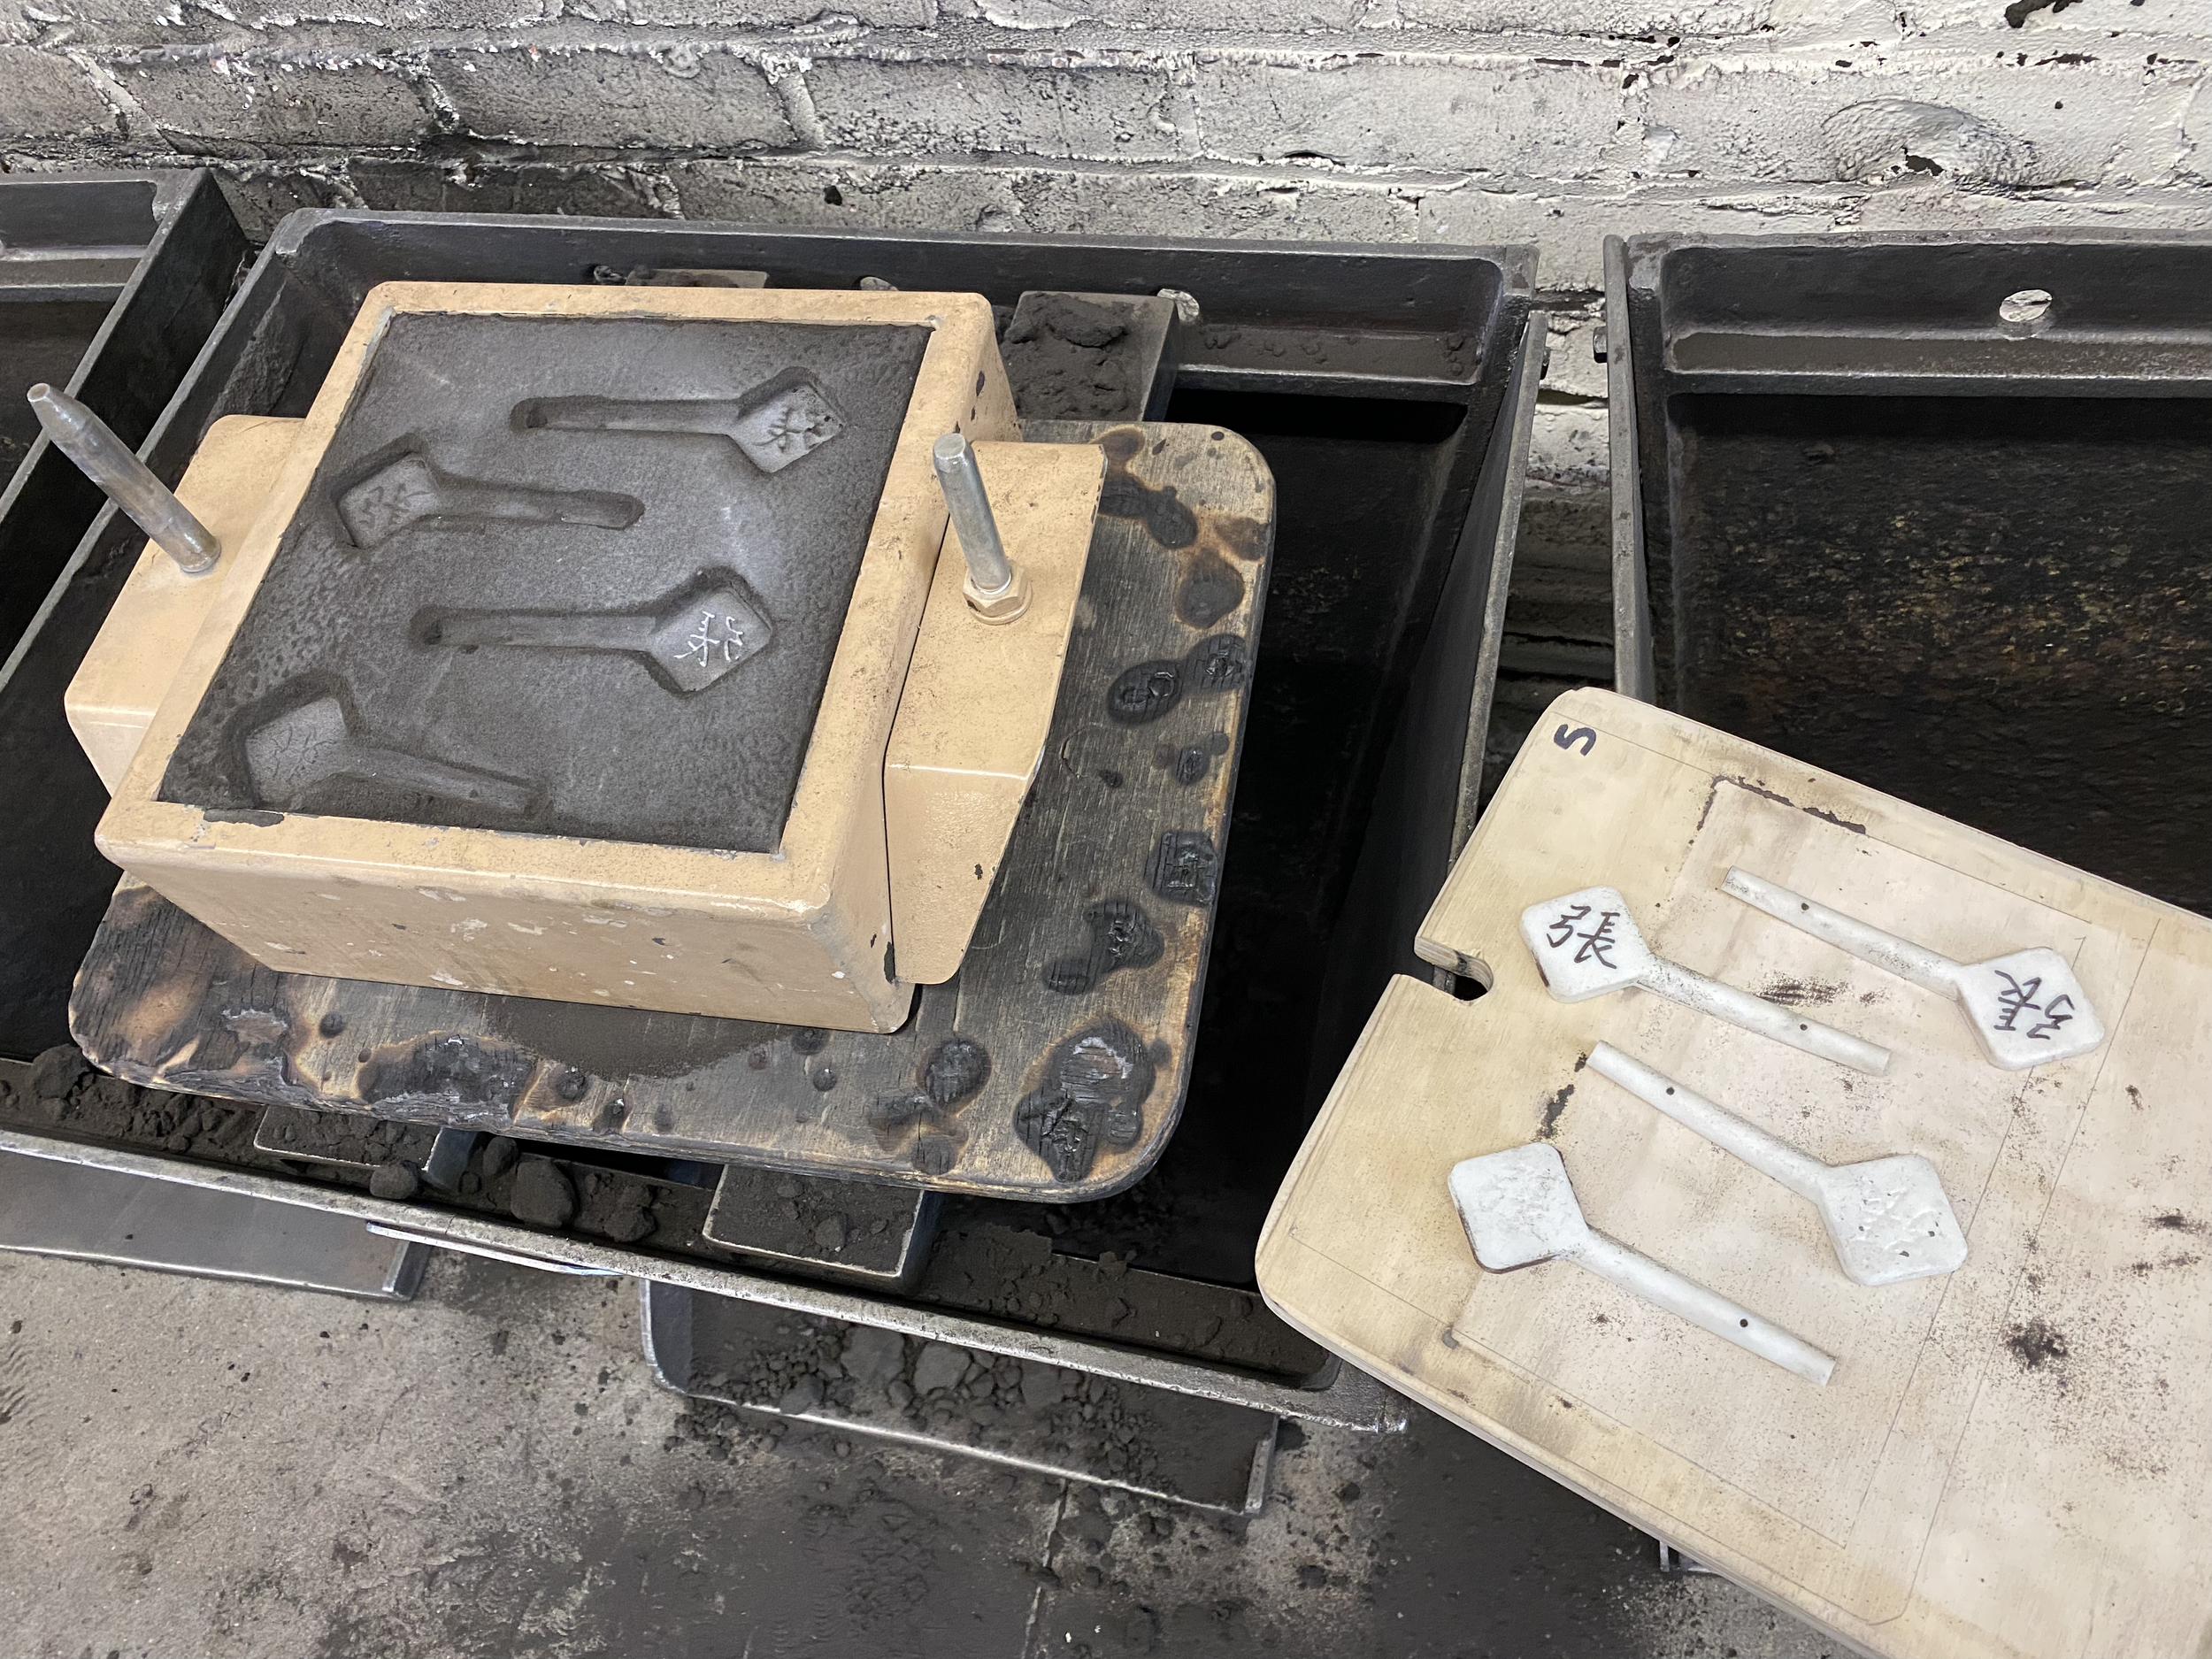
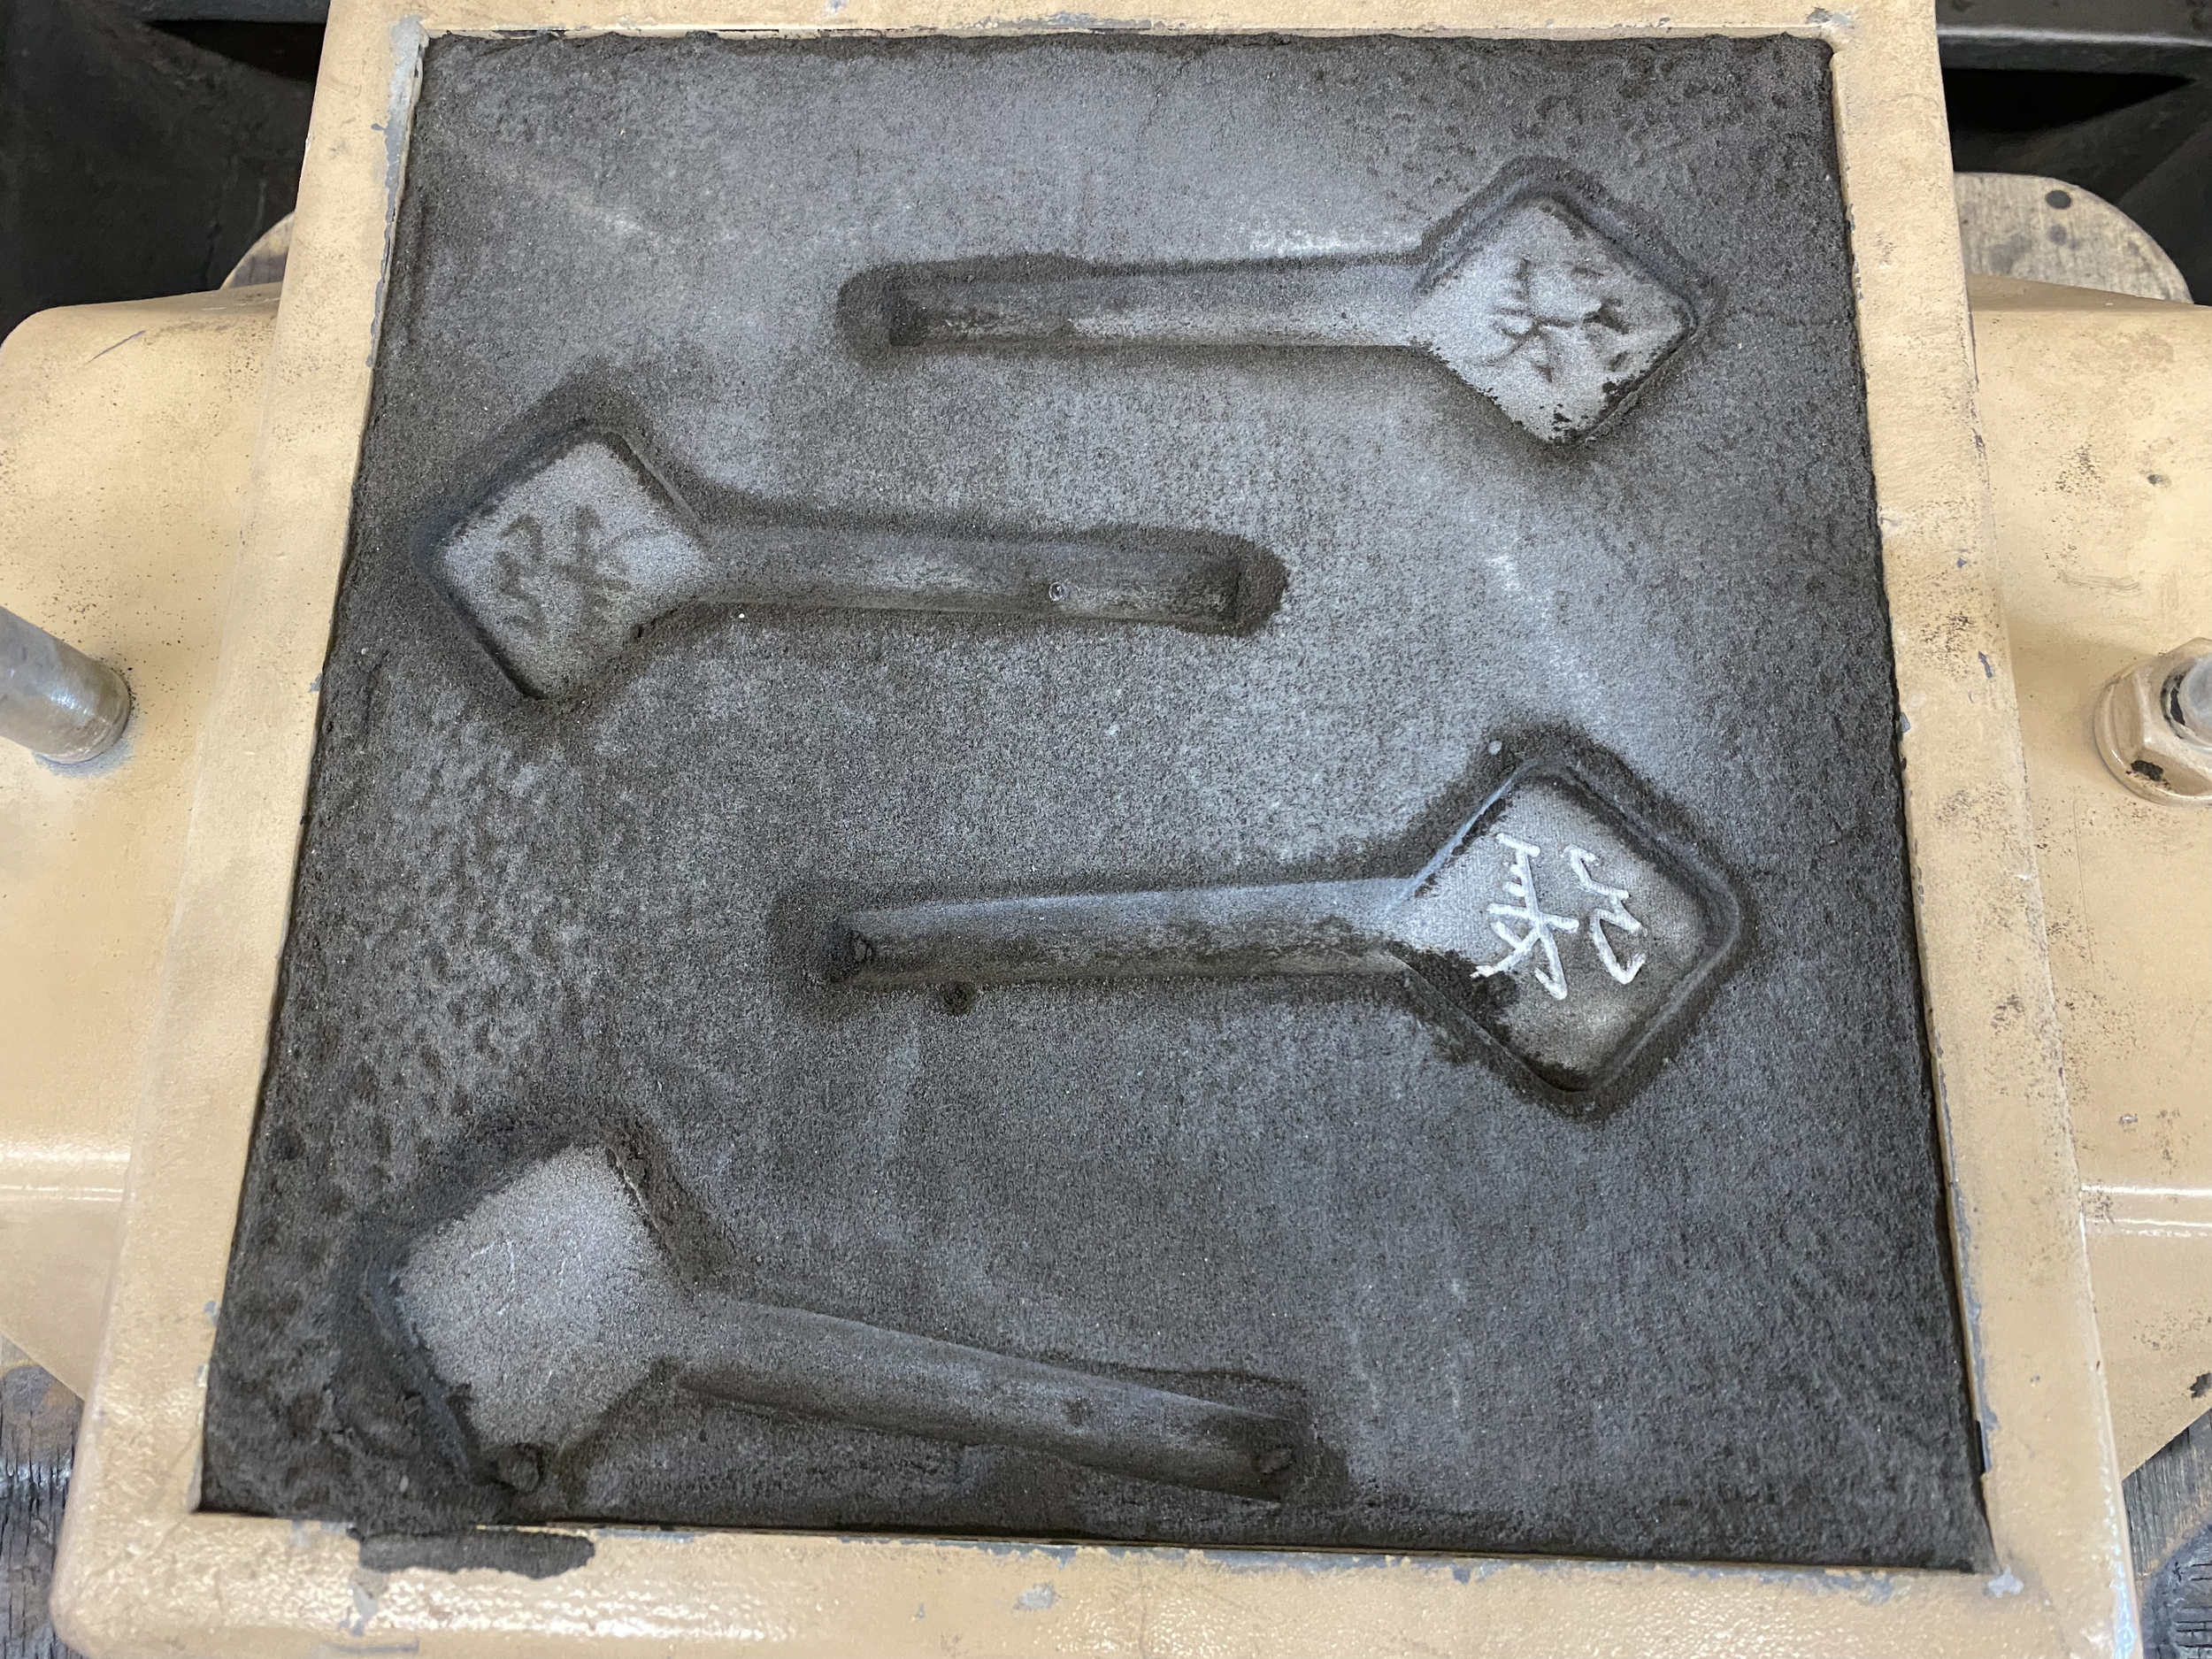
both halves of the sand cast mold

final sand cast mold, with central sprue + pouring cup
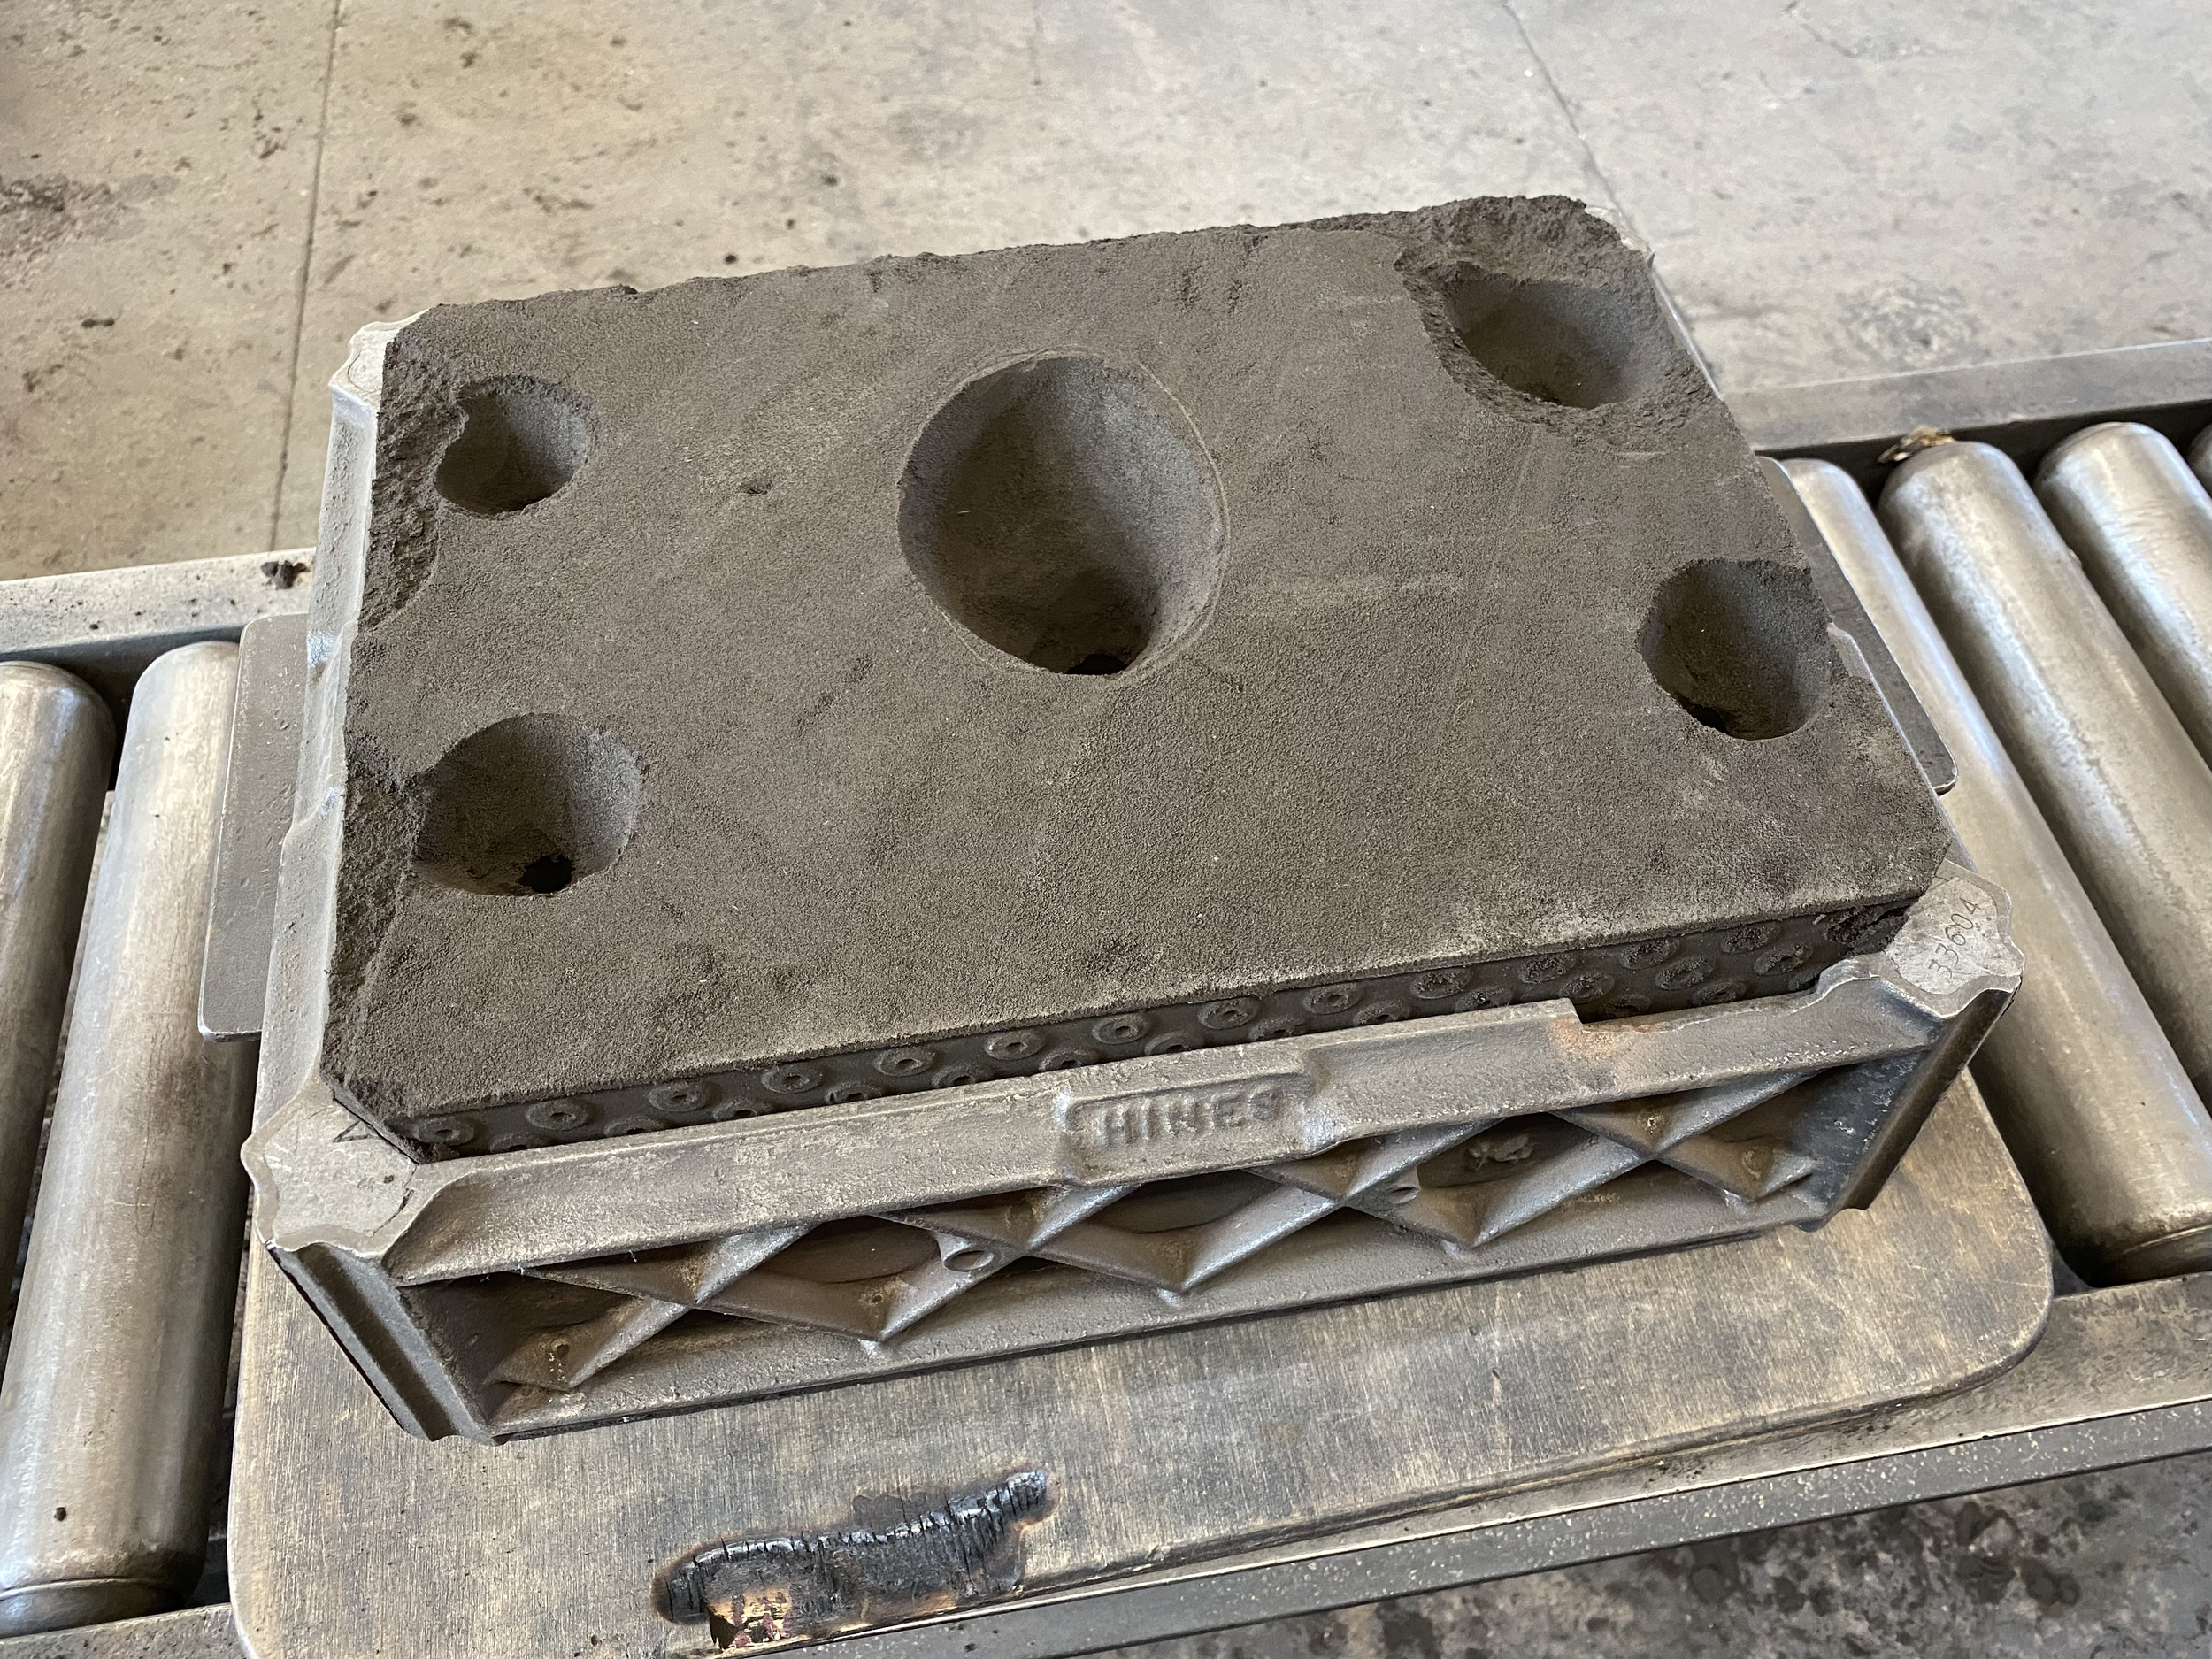
sand cast mold with fire jacket around it to prevent molten metal leaks

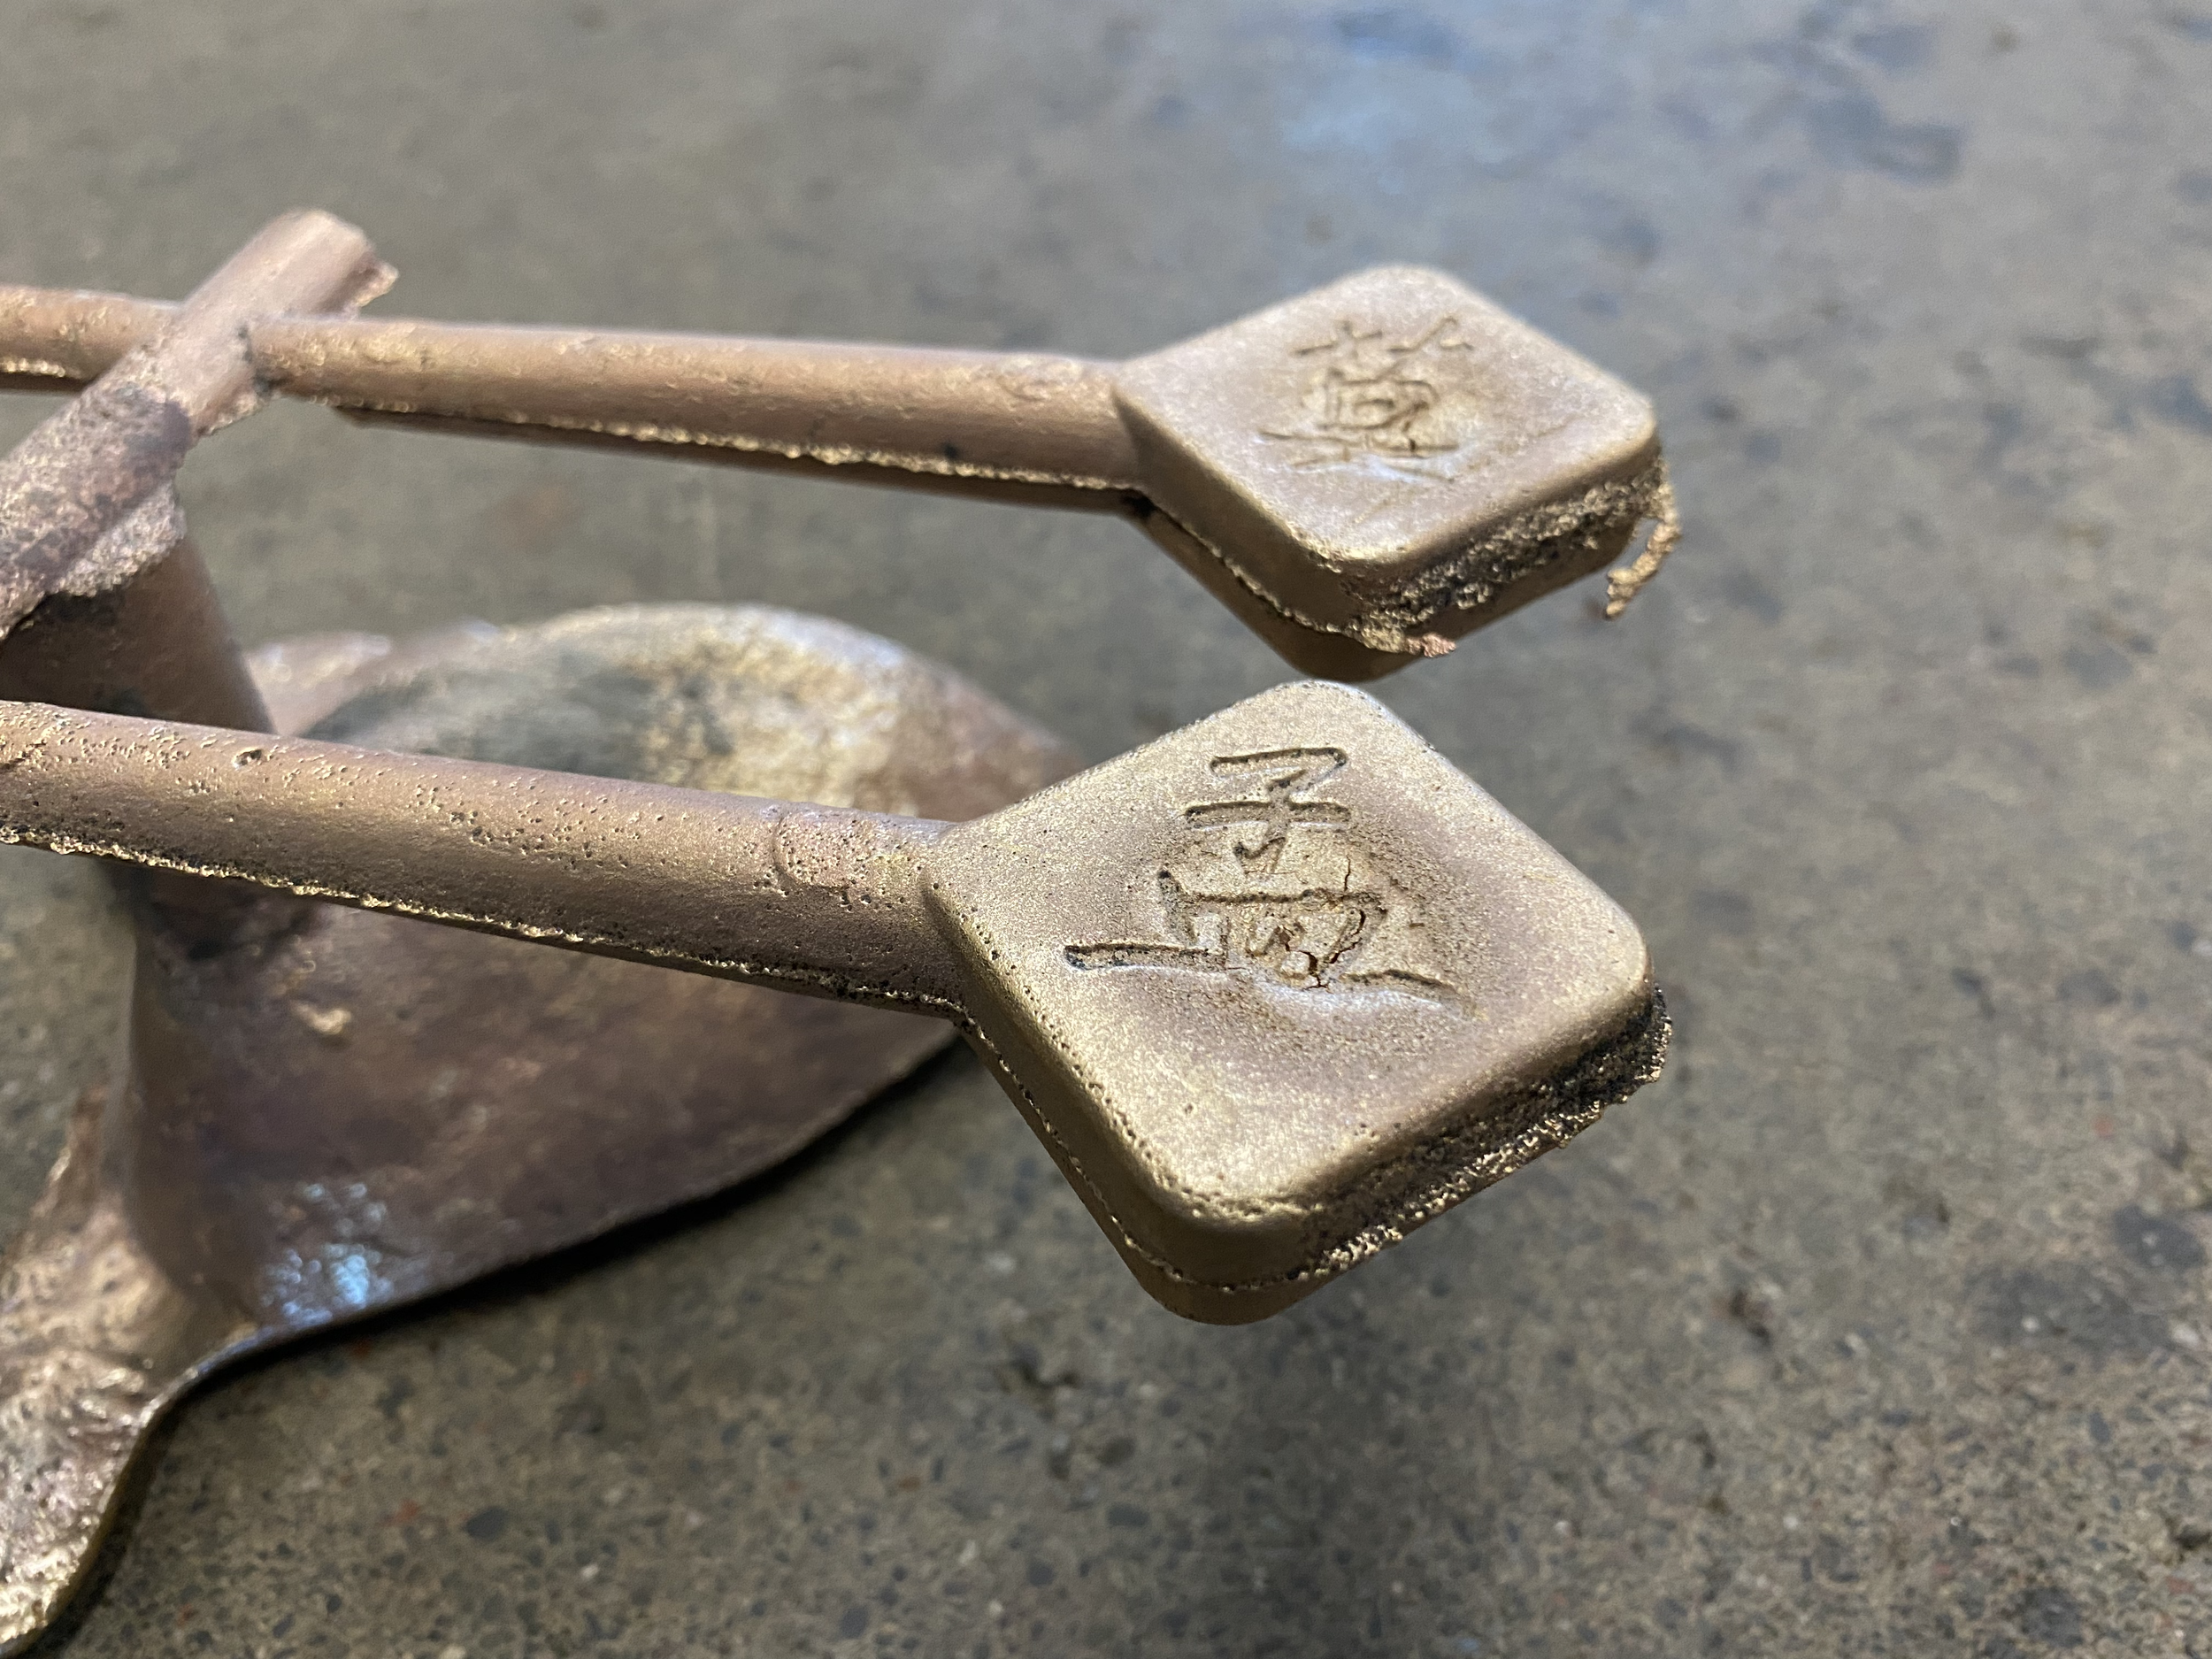
results of 2nd pour (much less sink due to successful risers)

results of 2nd pour, full cast

hacksawing parts off of cast
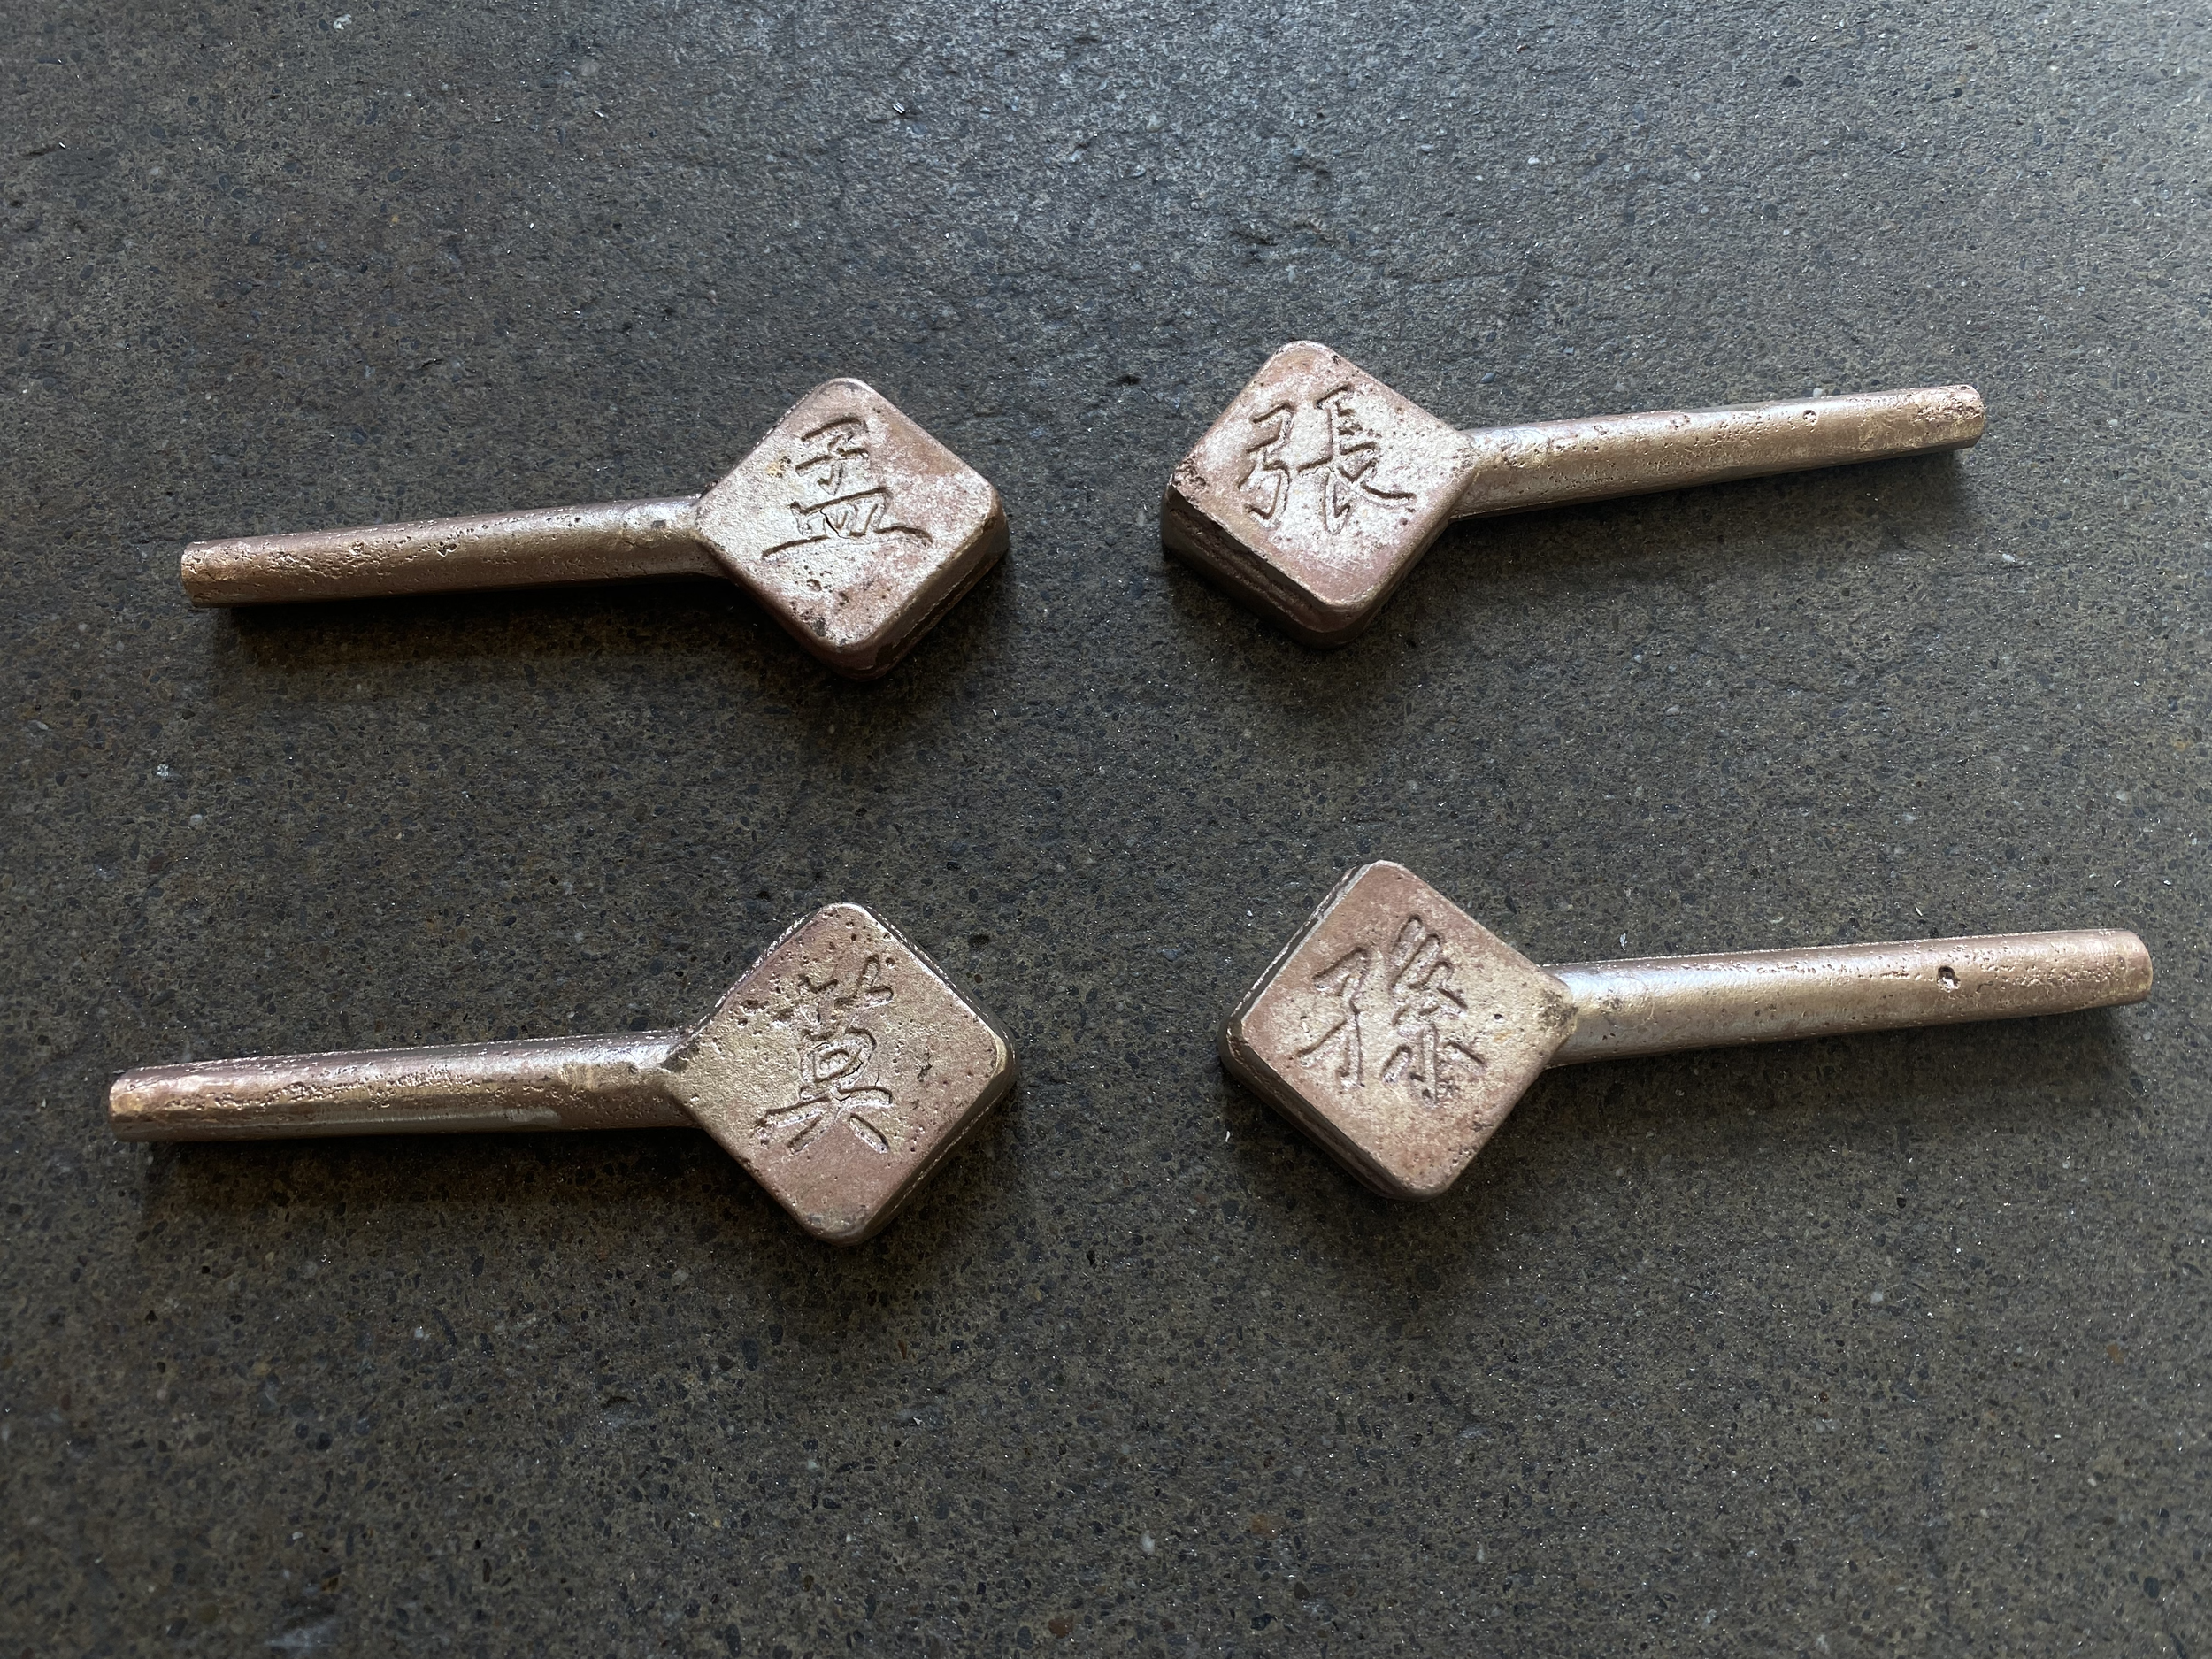
tuning pegs once roughly cleaned up
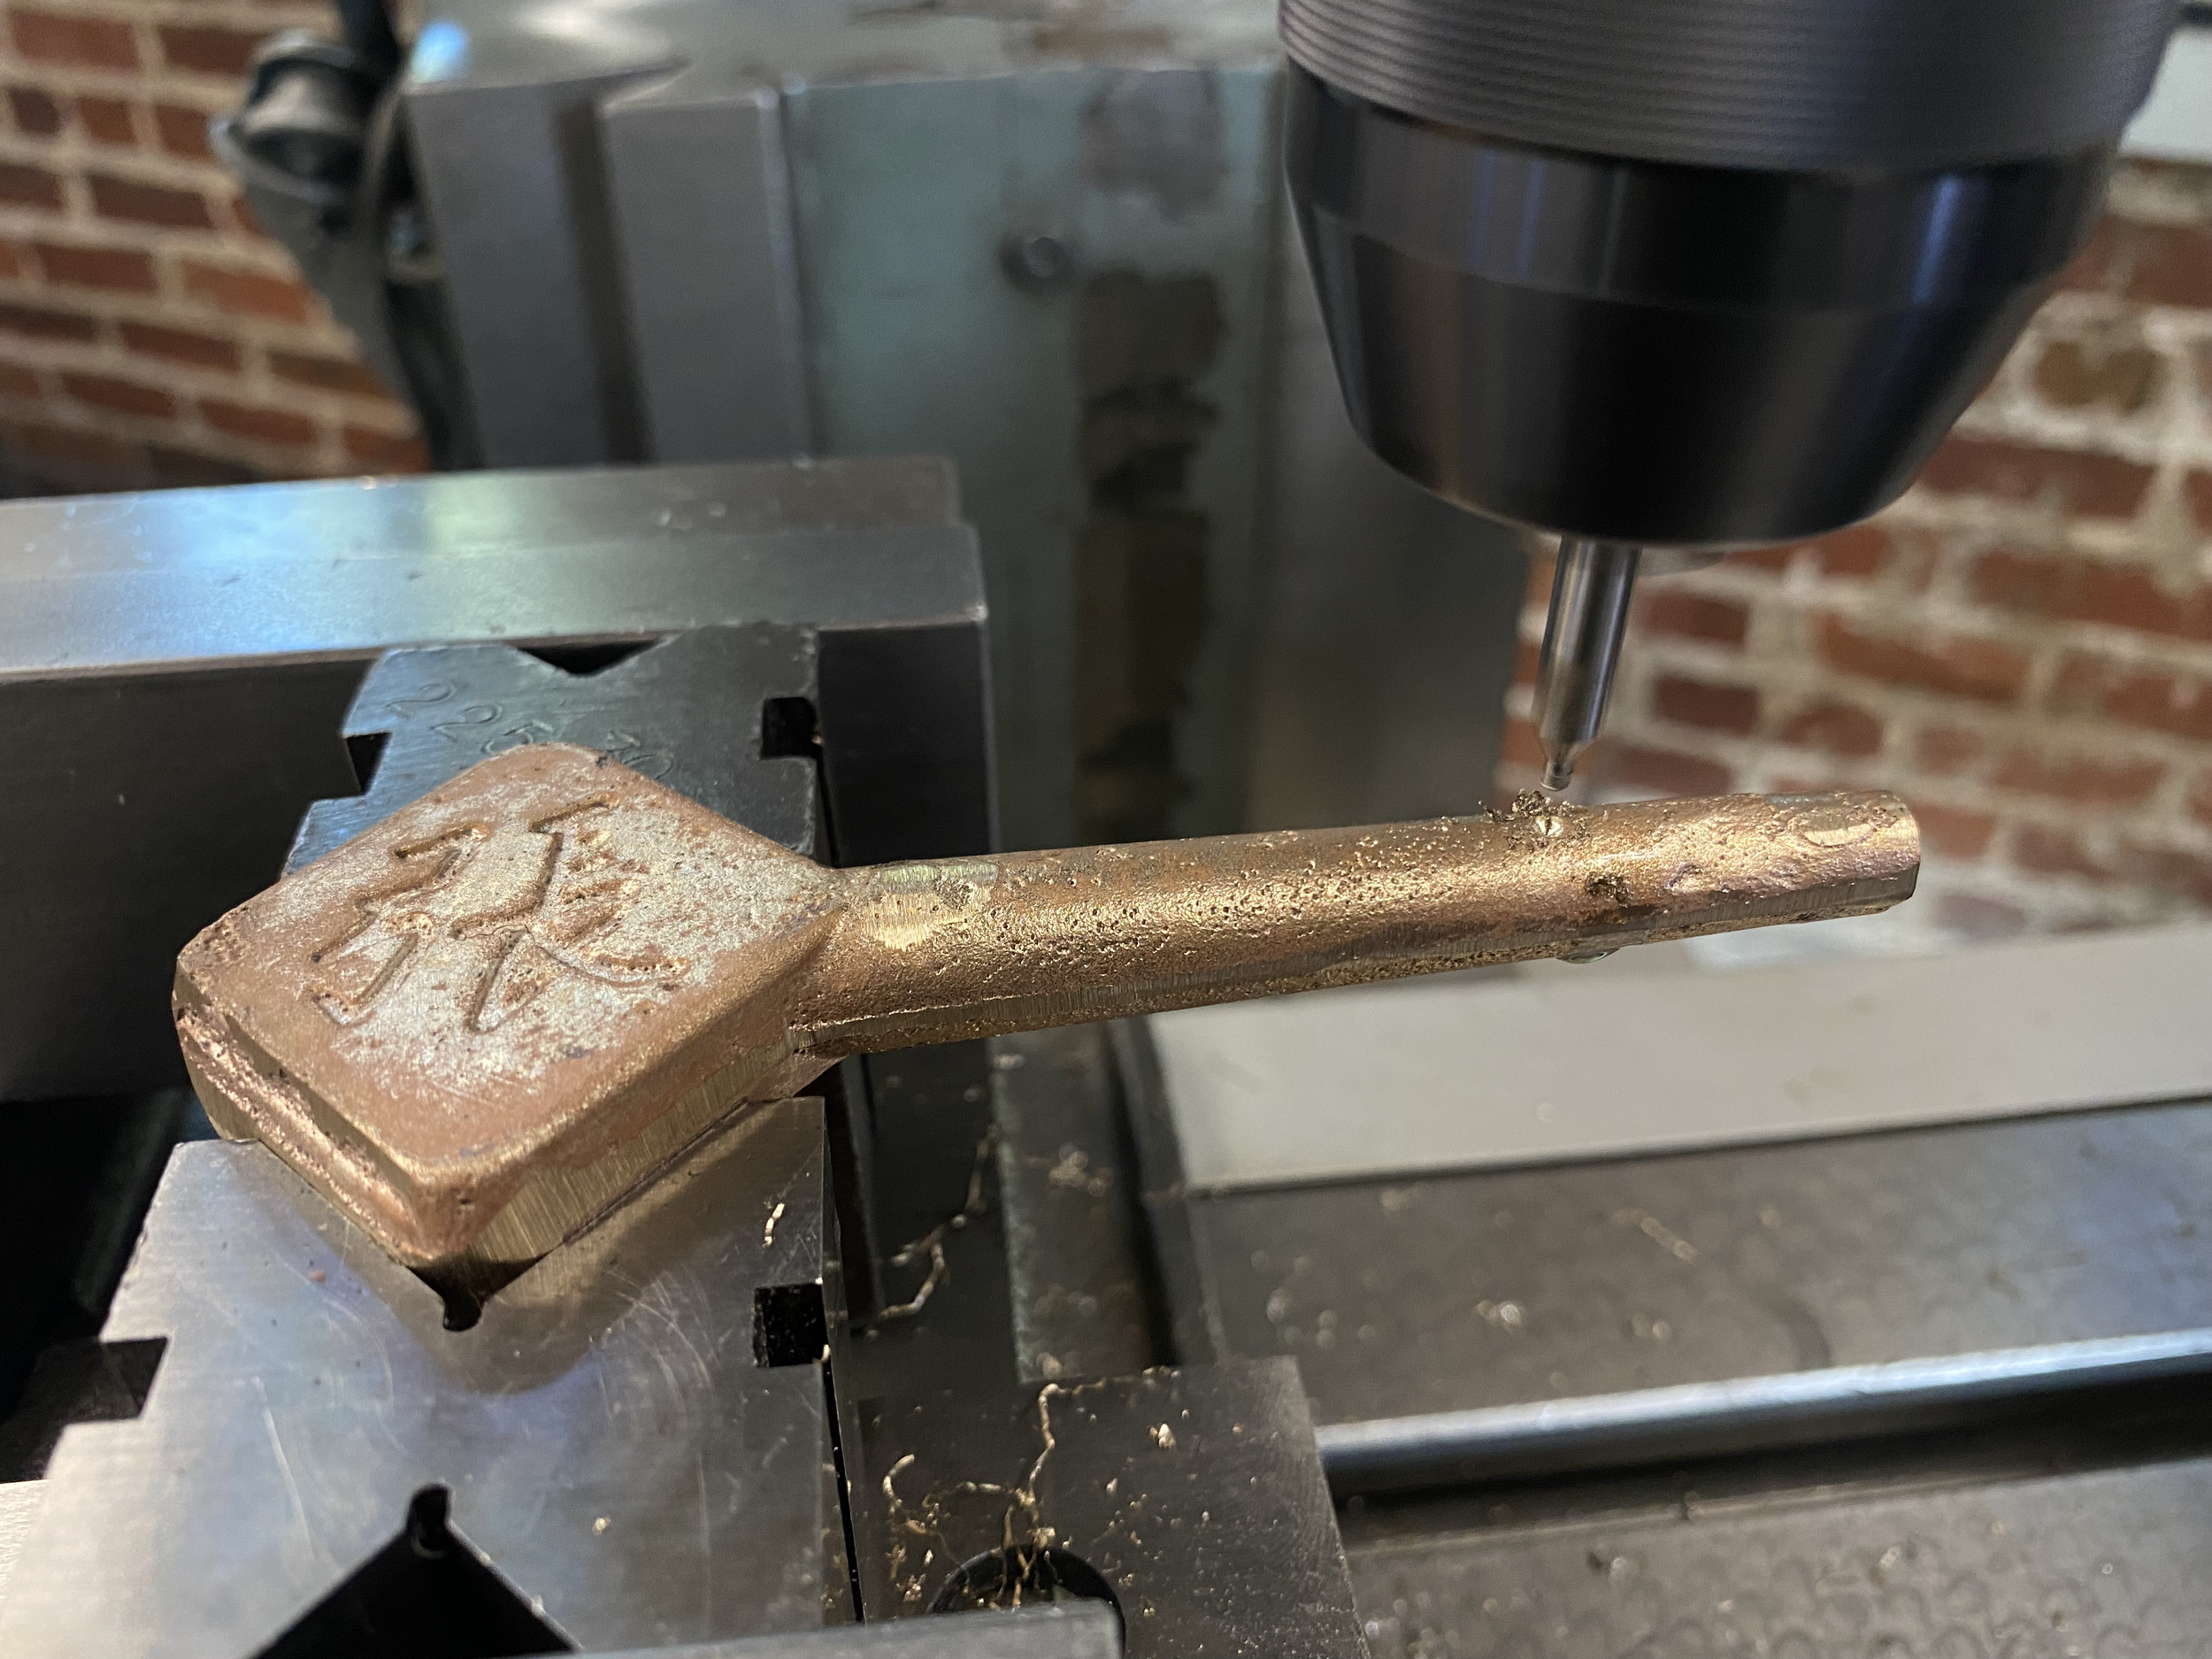
drilling holes (3/32") for strings using mill

roughly finished cast parts
lathe - tuning pegs
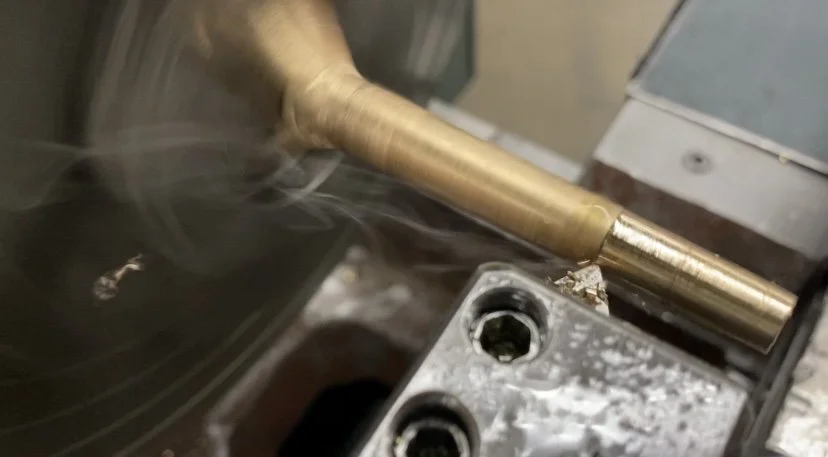
cutting taper of tuning peg shafts using the lathe w/ taper attachment

getting creative with fixturing + centering my cast parts on the lathe
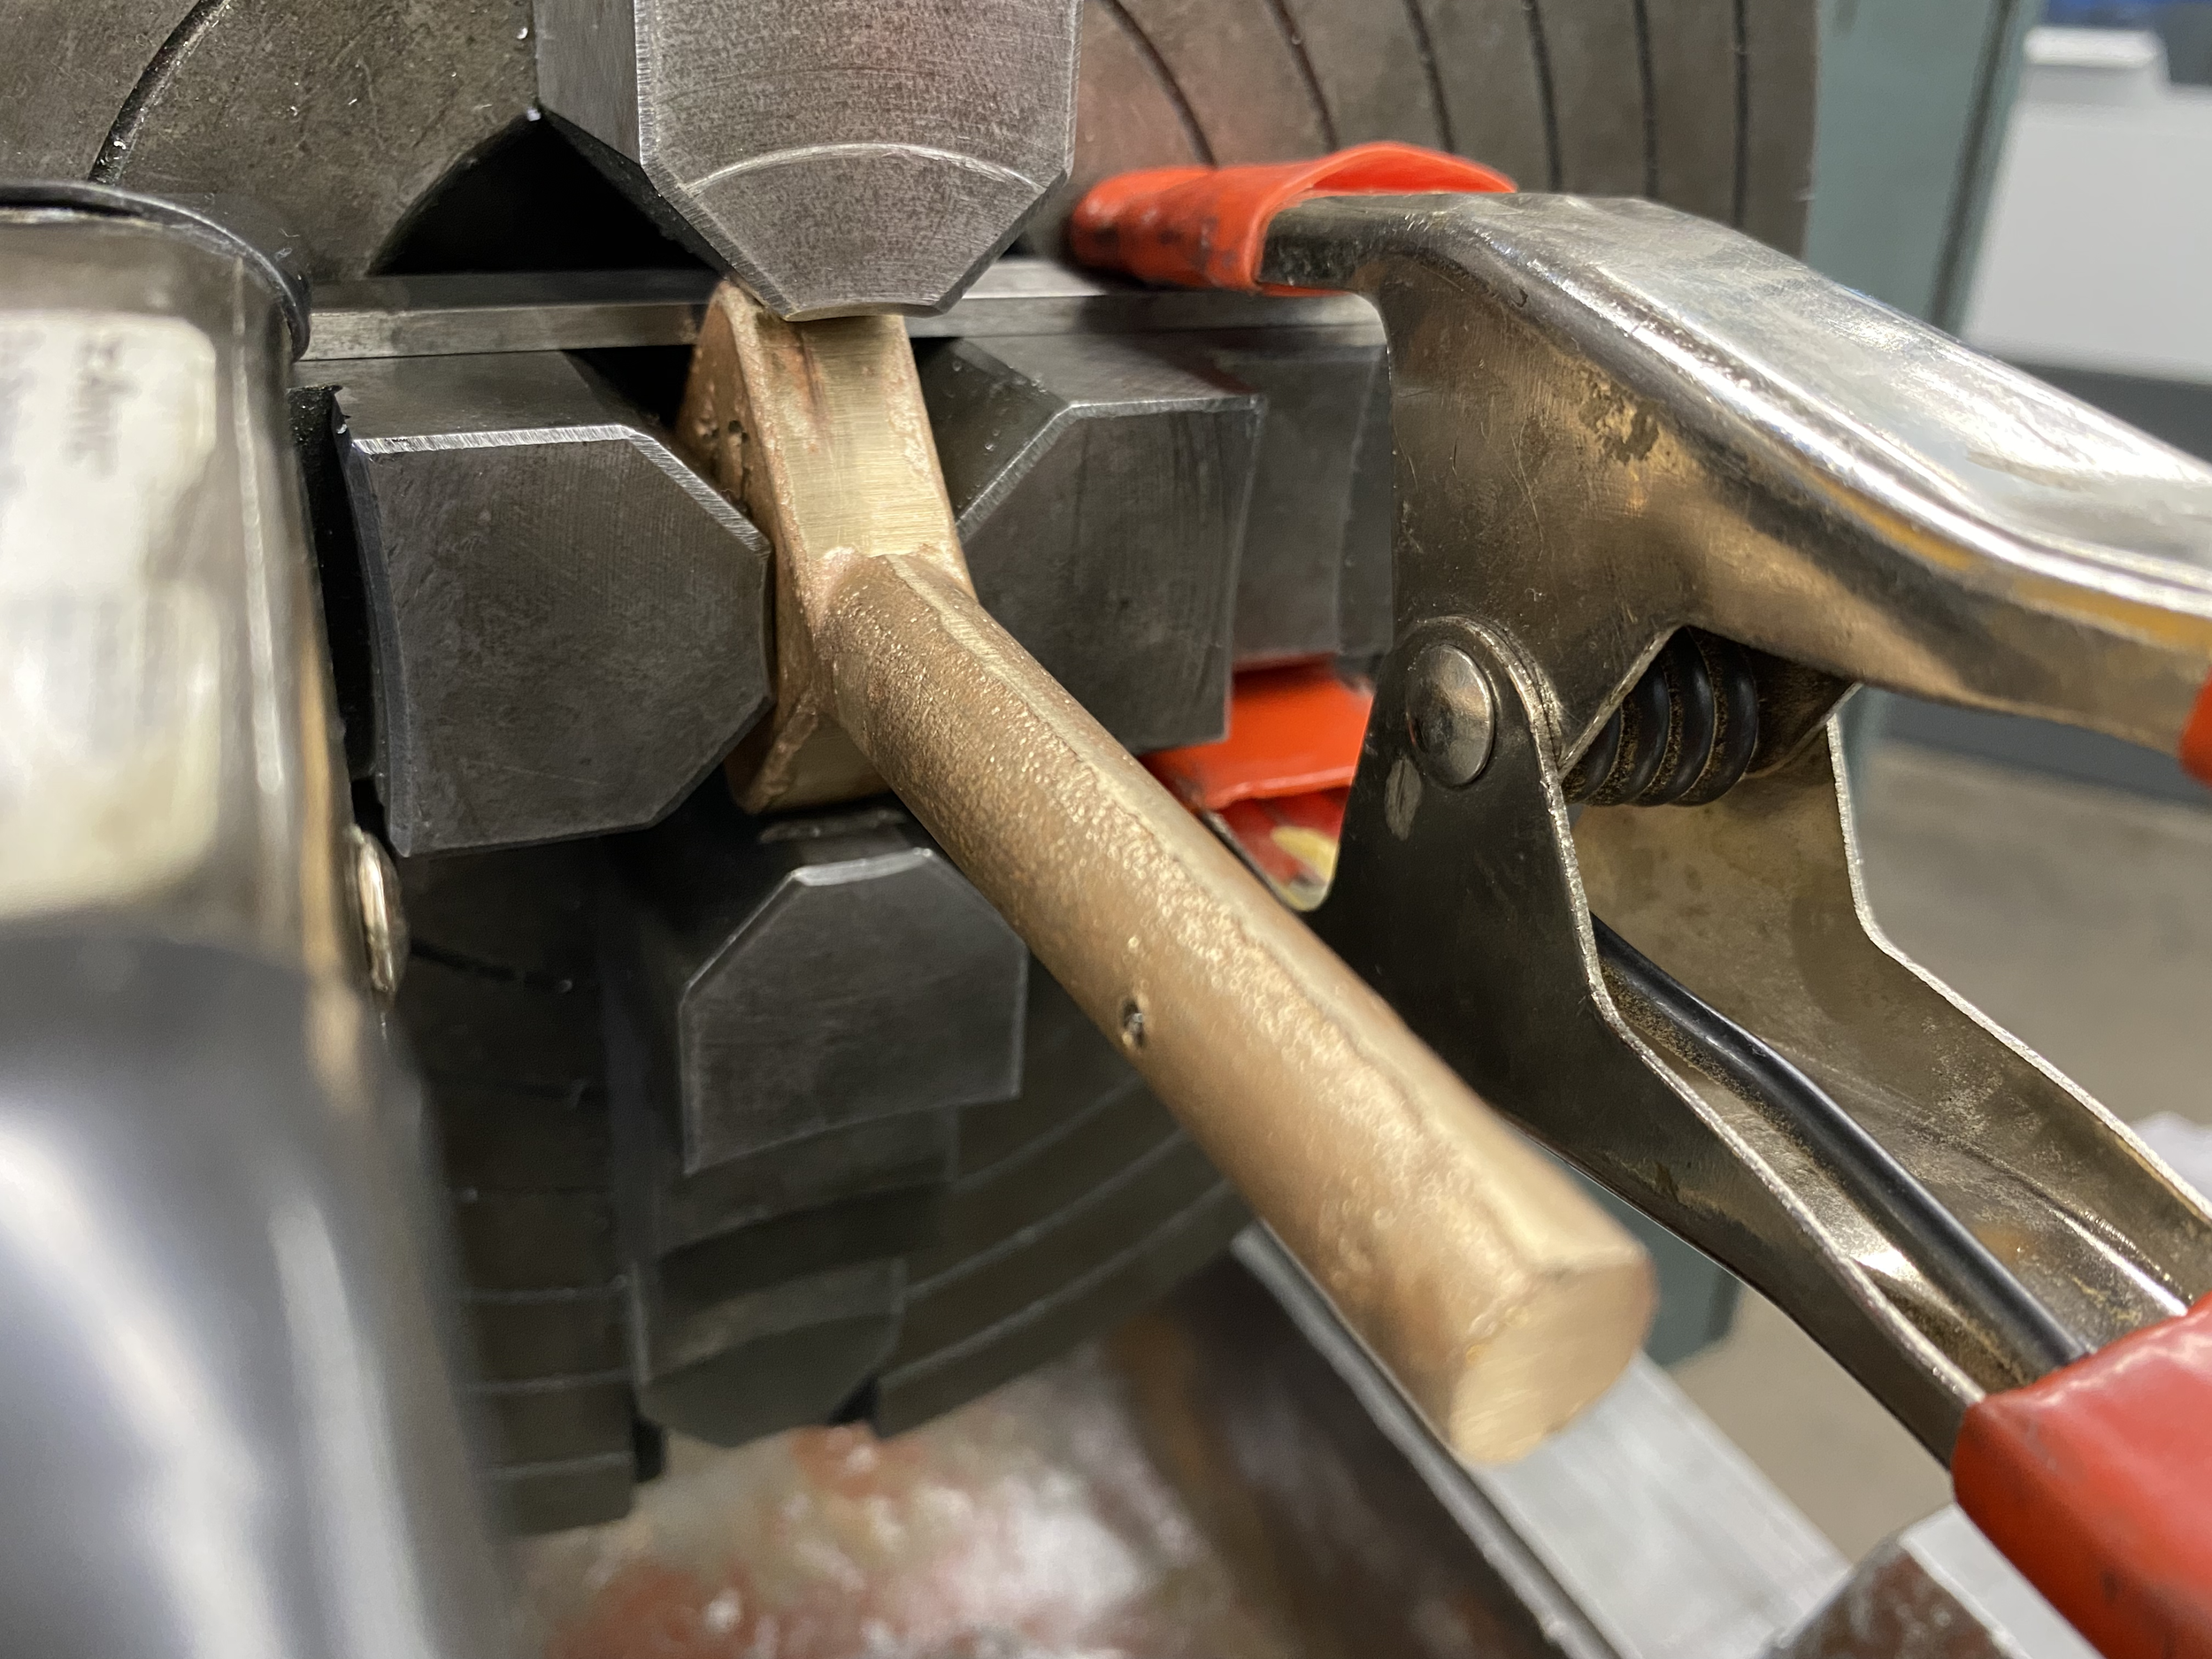
used the 4-jaw chuck + clamps + parallels to fixture tuning pegs on the lathe

angle of taper attachment set as close as possible to 1.271 degrees: the angle I calculated which was the minimum angle that could be cut based on my measurements of the cast parts
result: tapers cut on lathe
woodworking - body
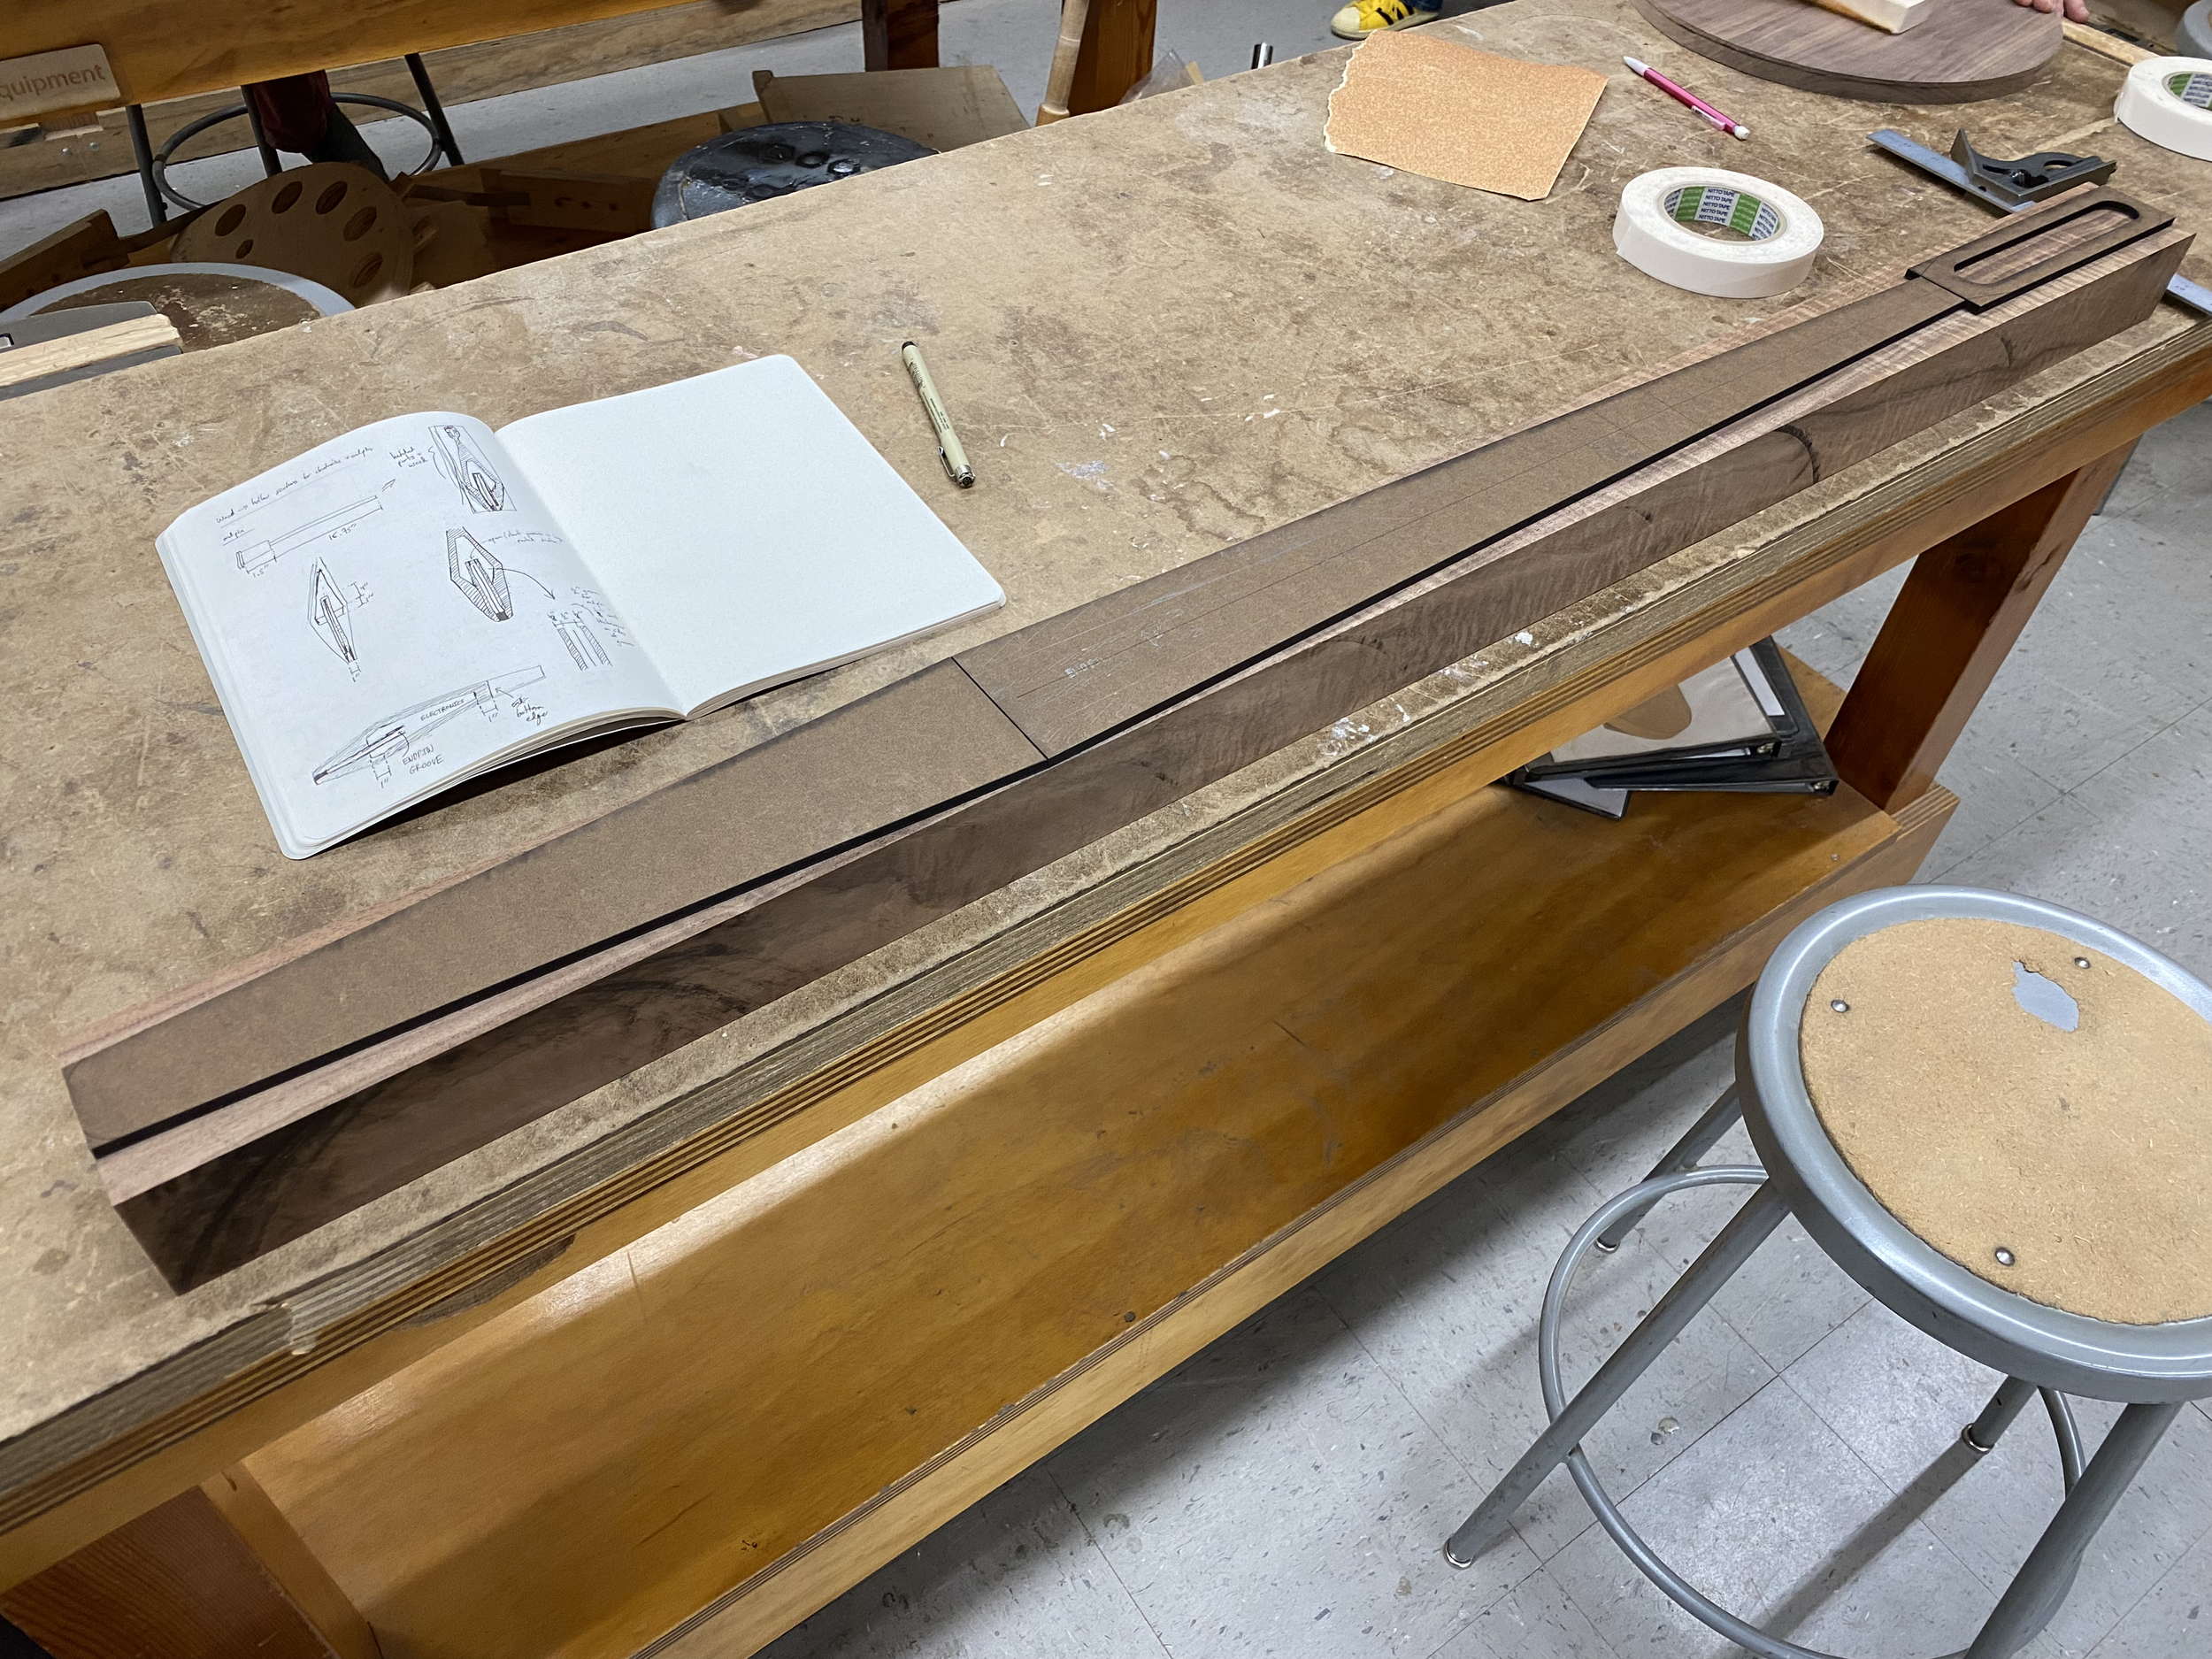
started with a single plank of wood + laser cut template
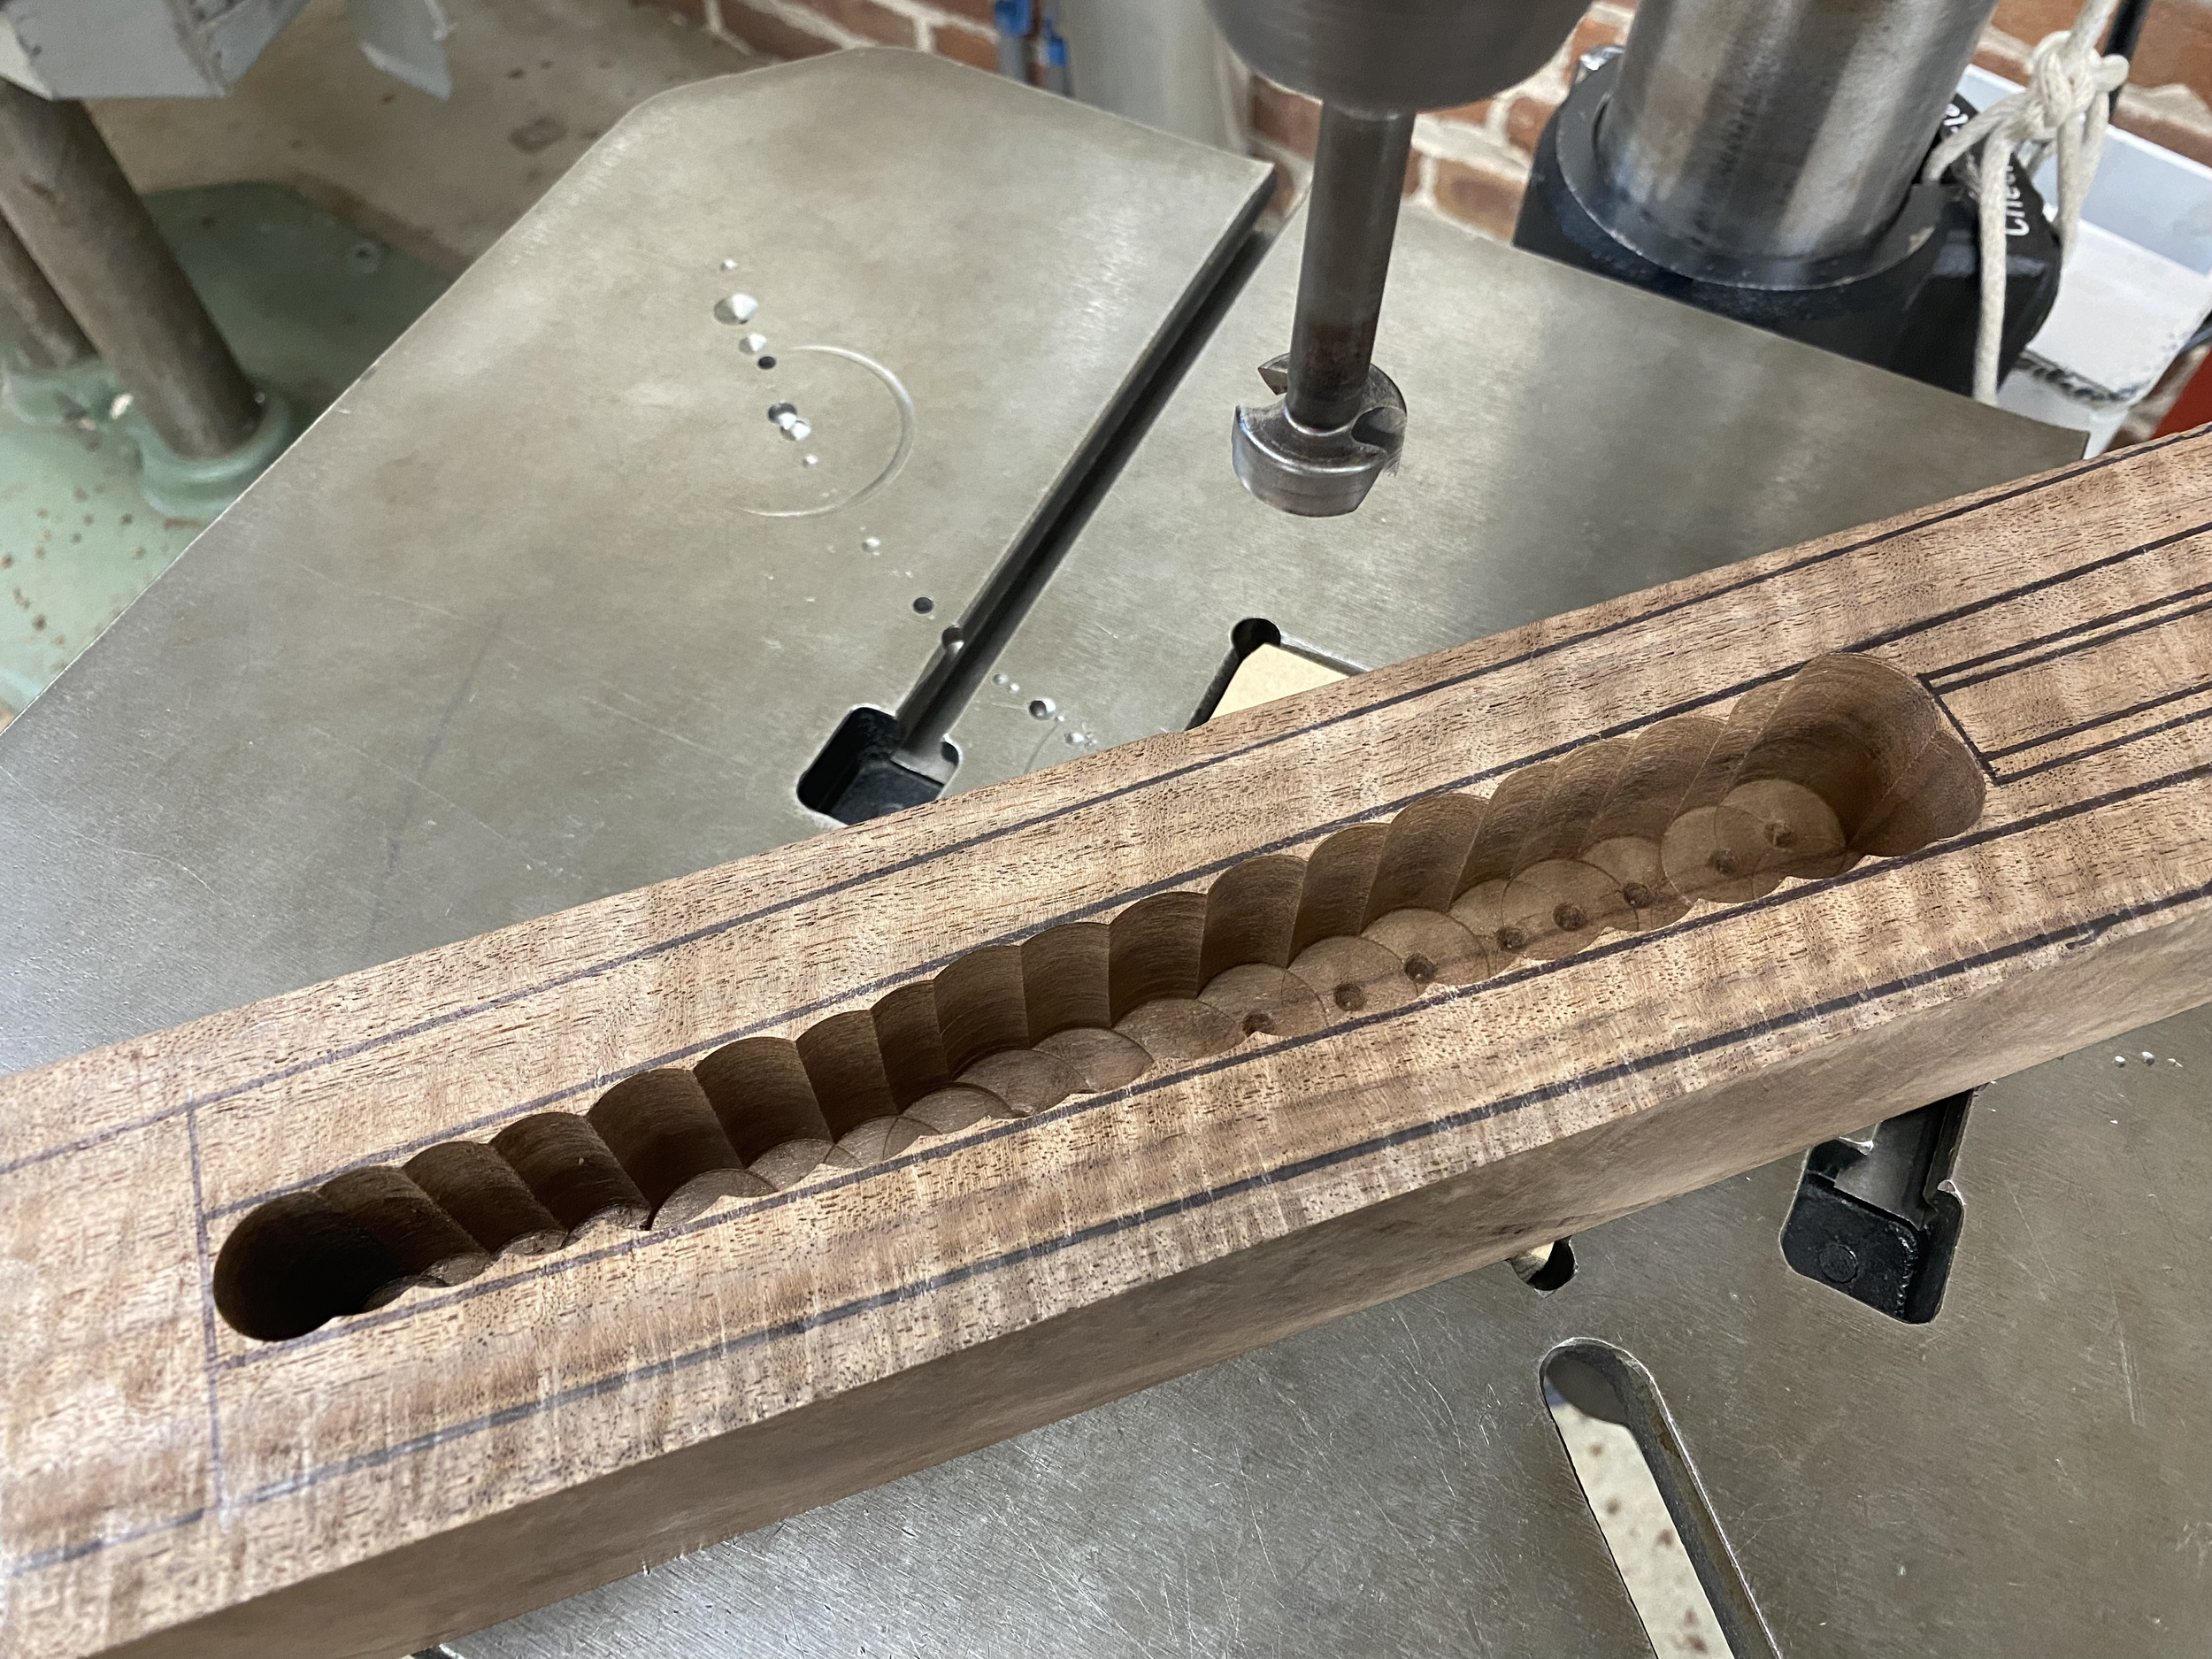
used drill press to "route" out cavity for electronics, roughly
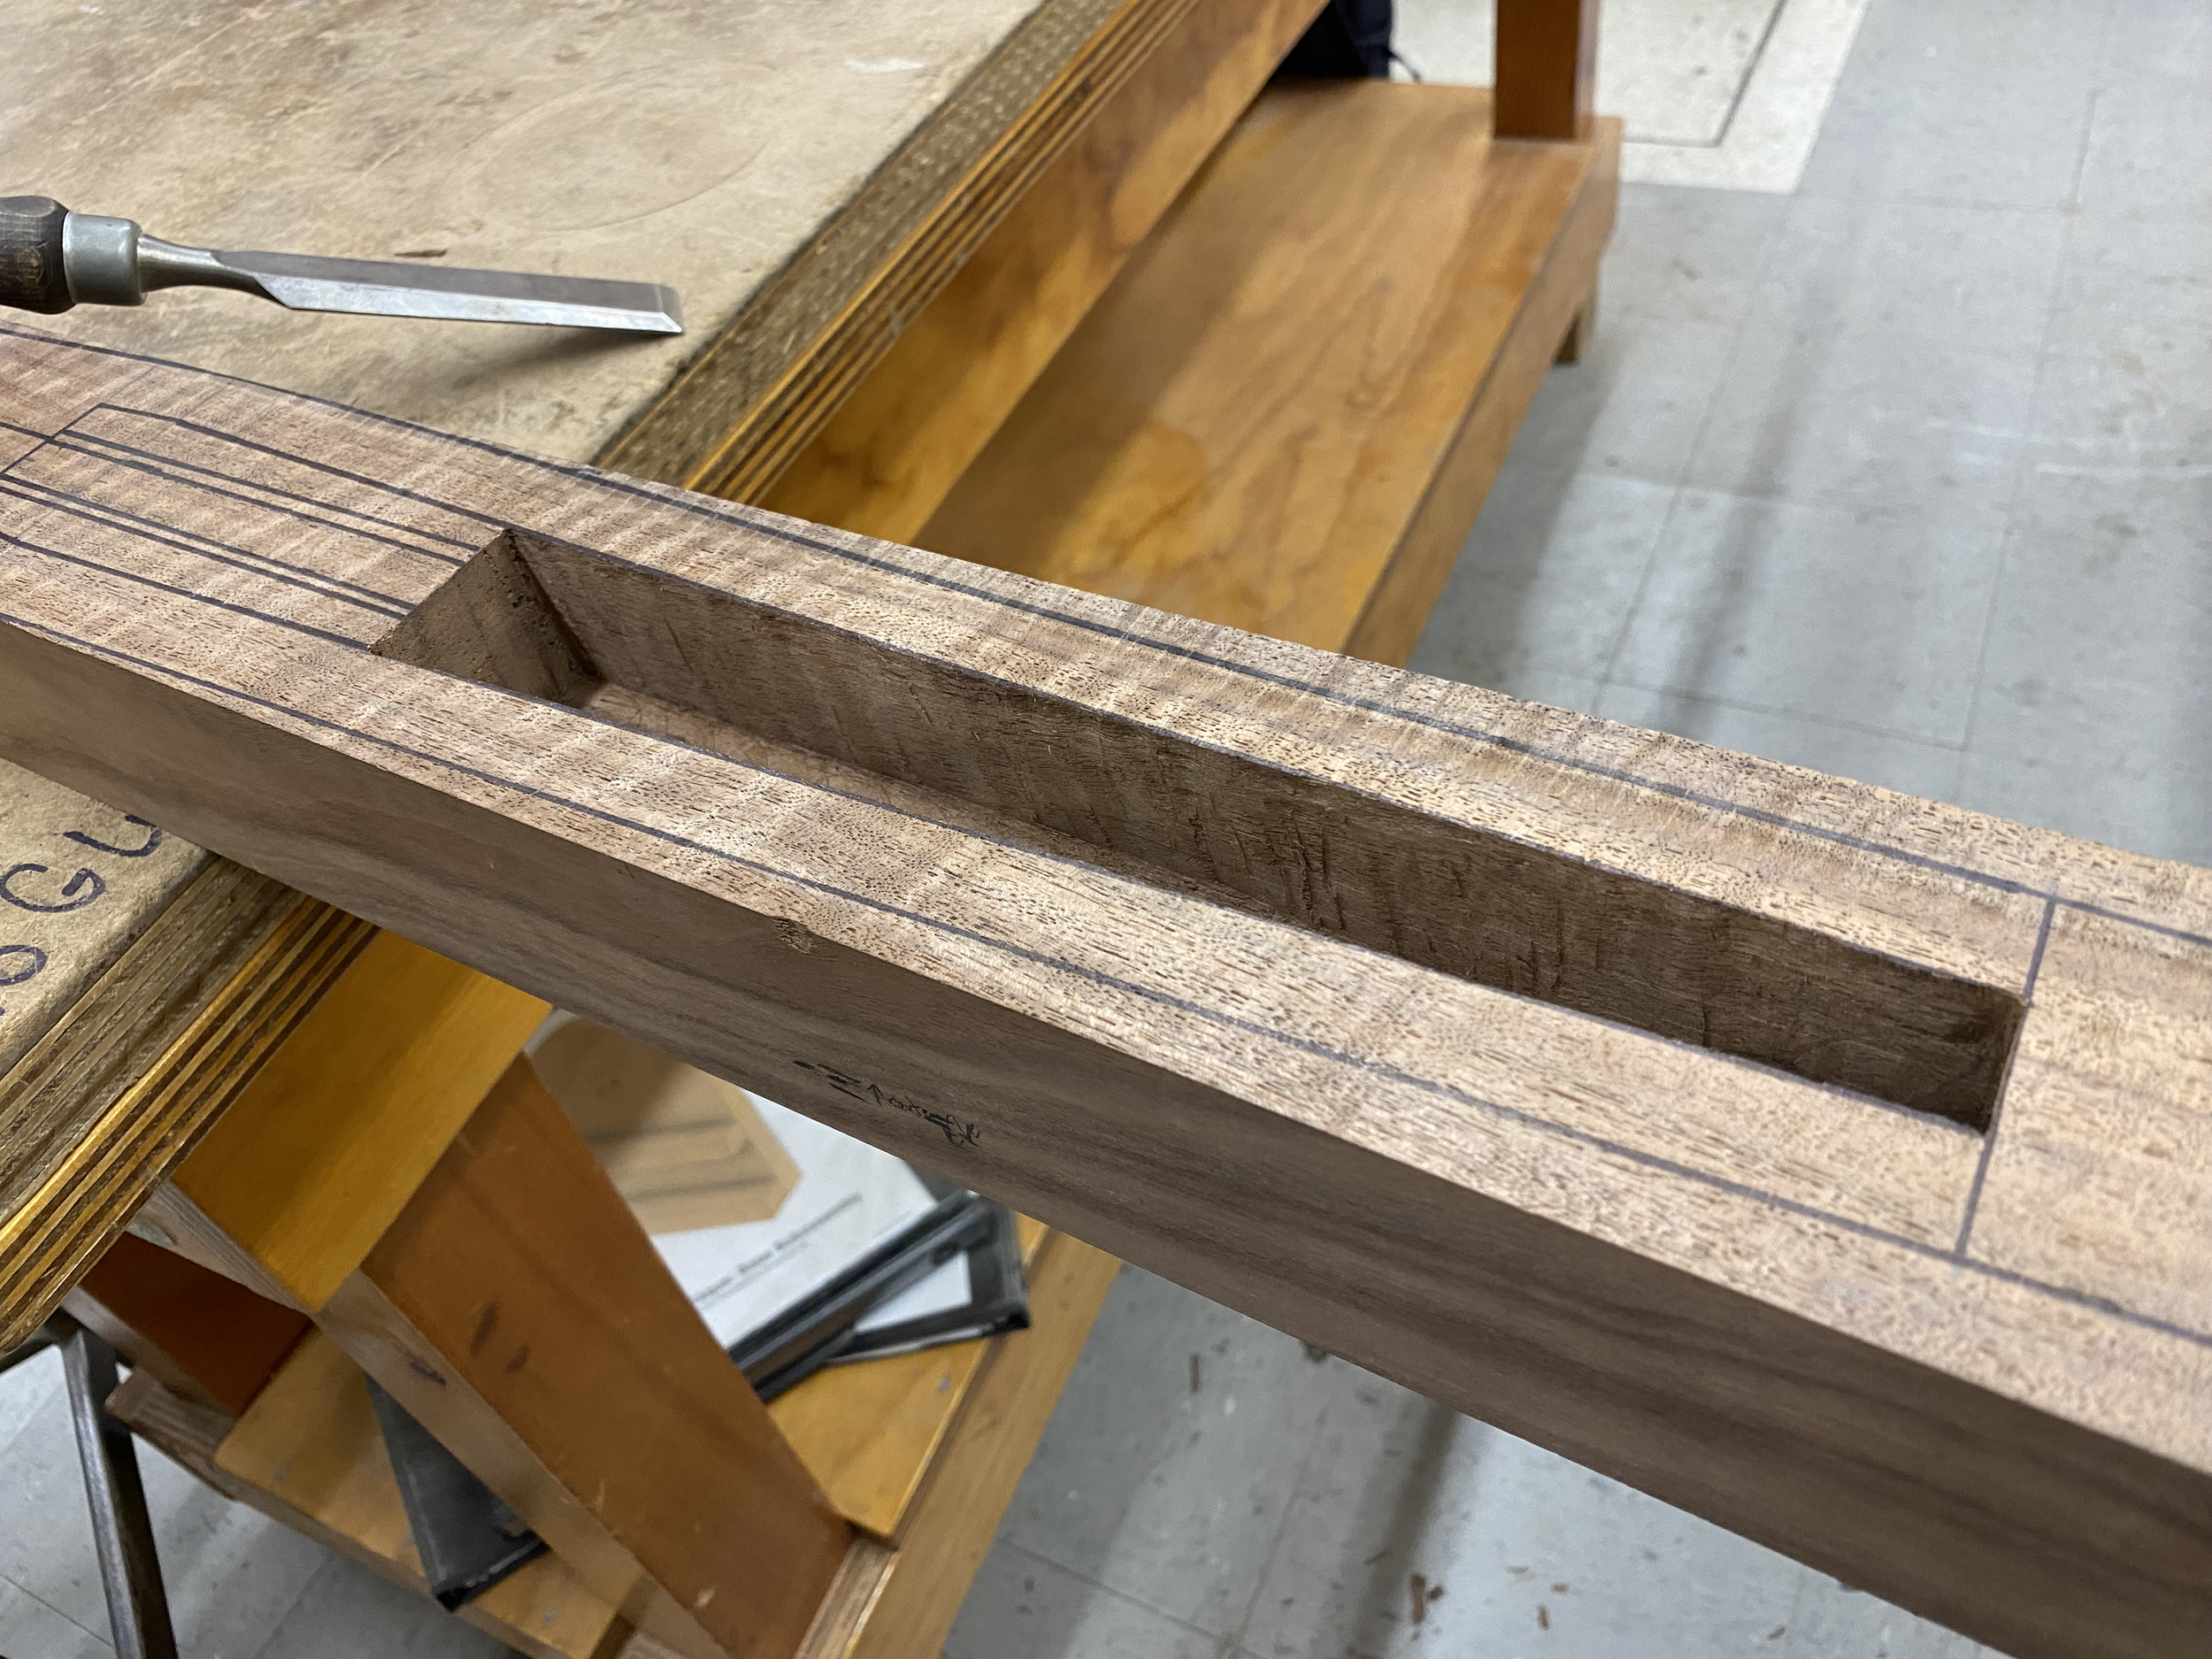
cleaned out cavity for electronics w/ chisels
drilled + carved the pegbox/scroll cavity

carving out the bottom of the electronics cavity
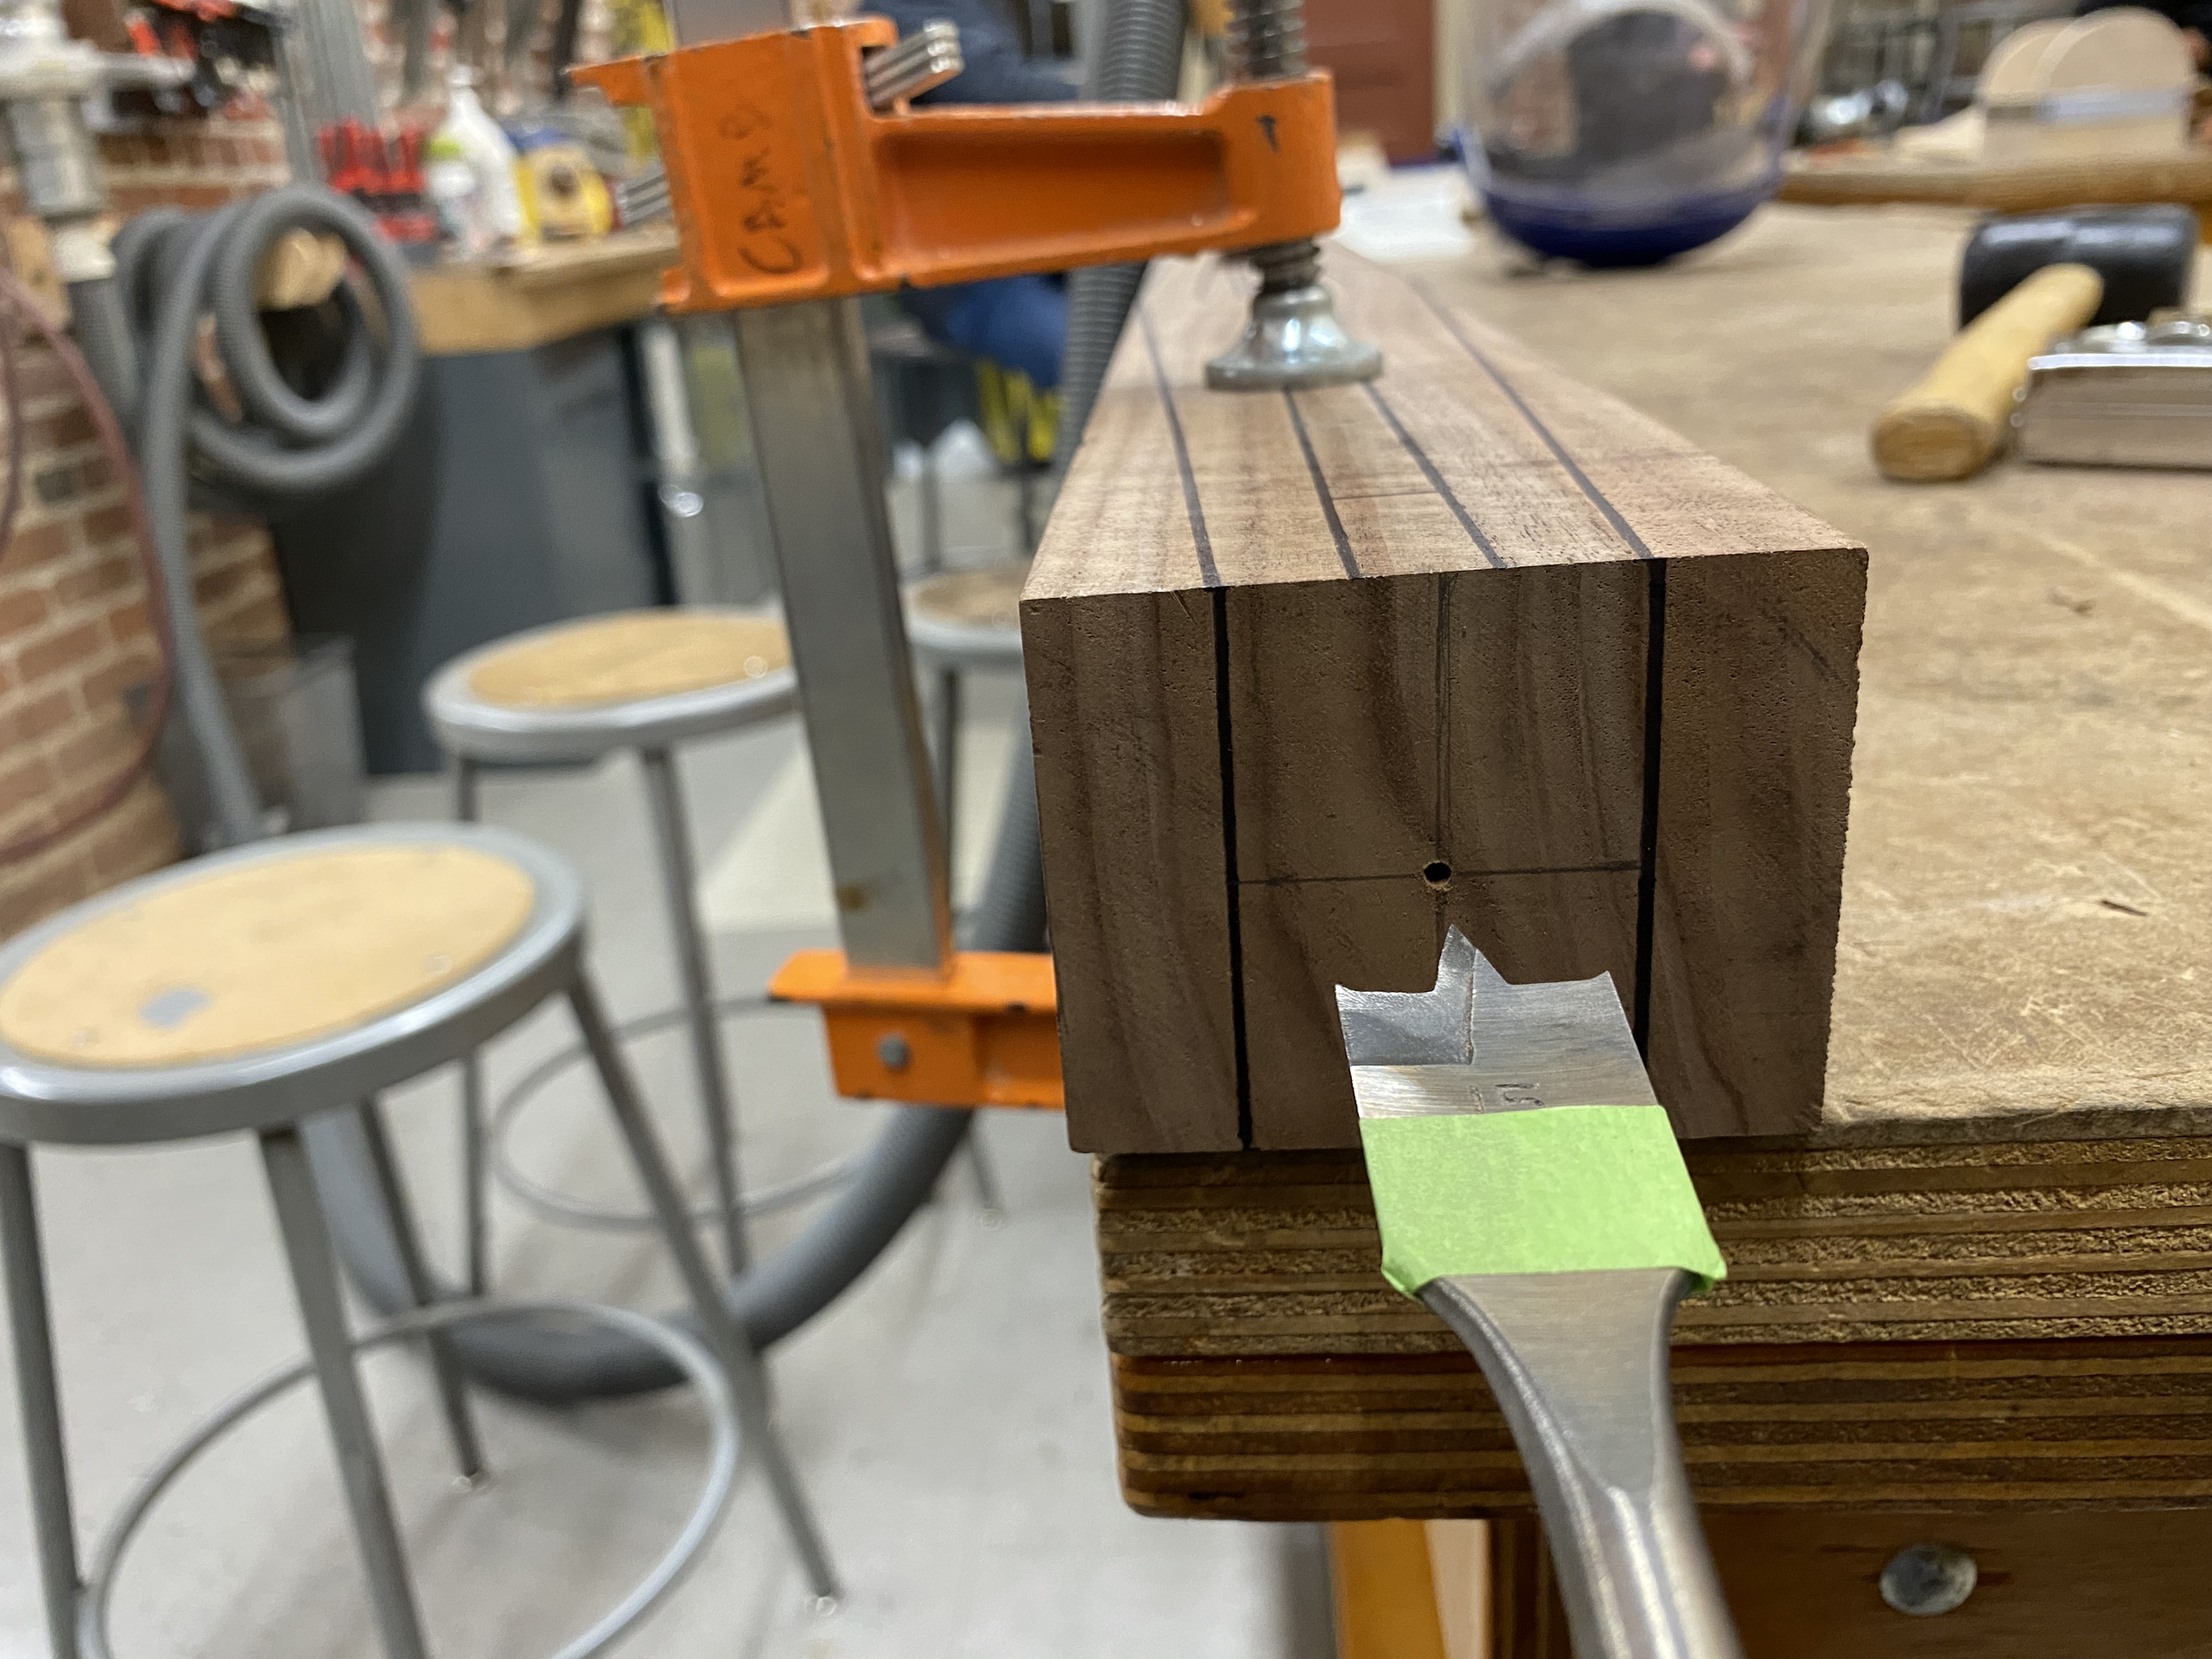
drilling hole for endpin plug
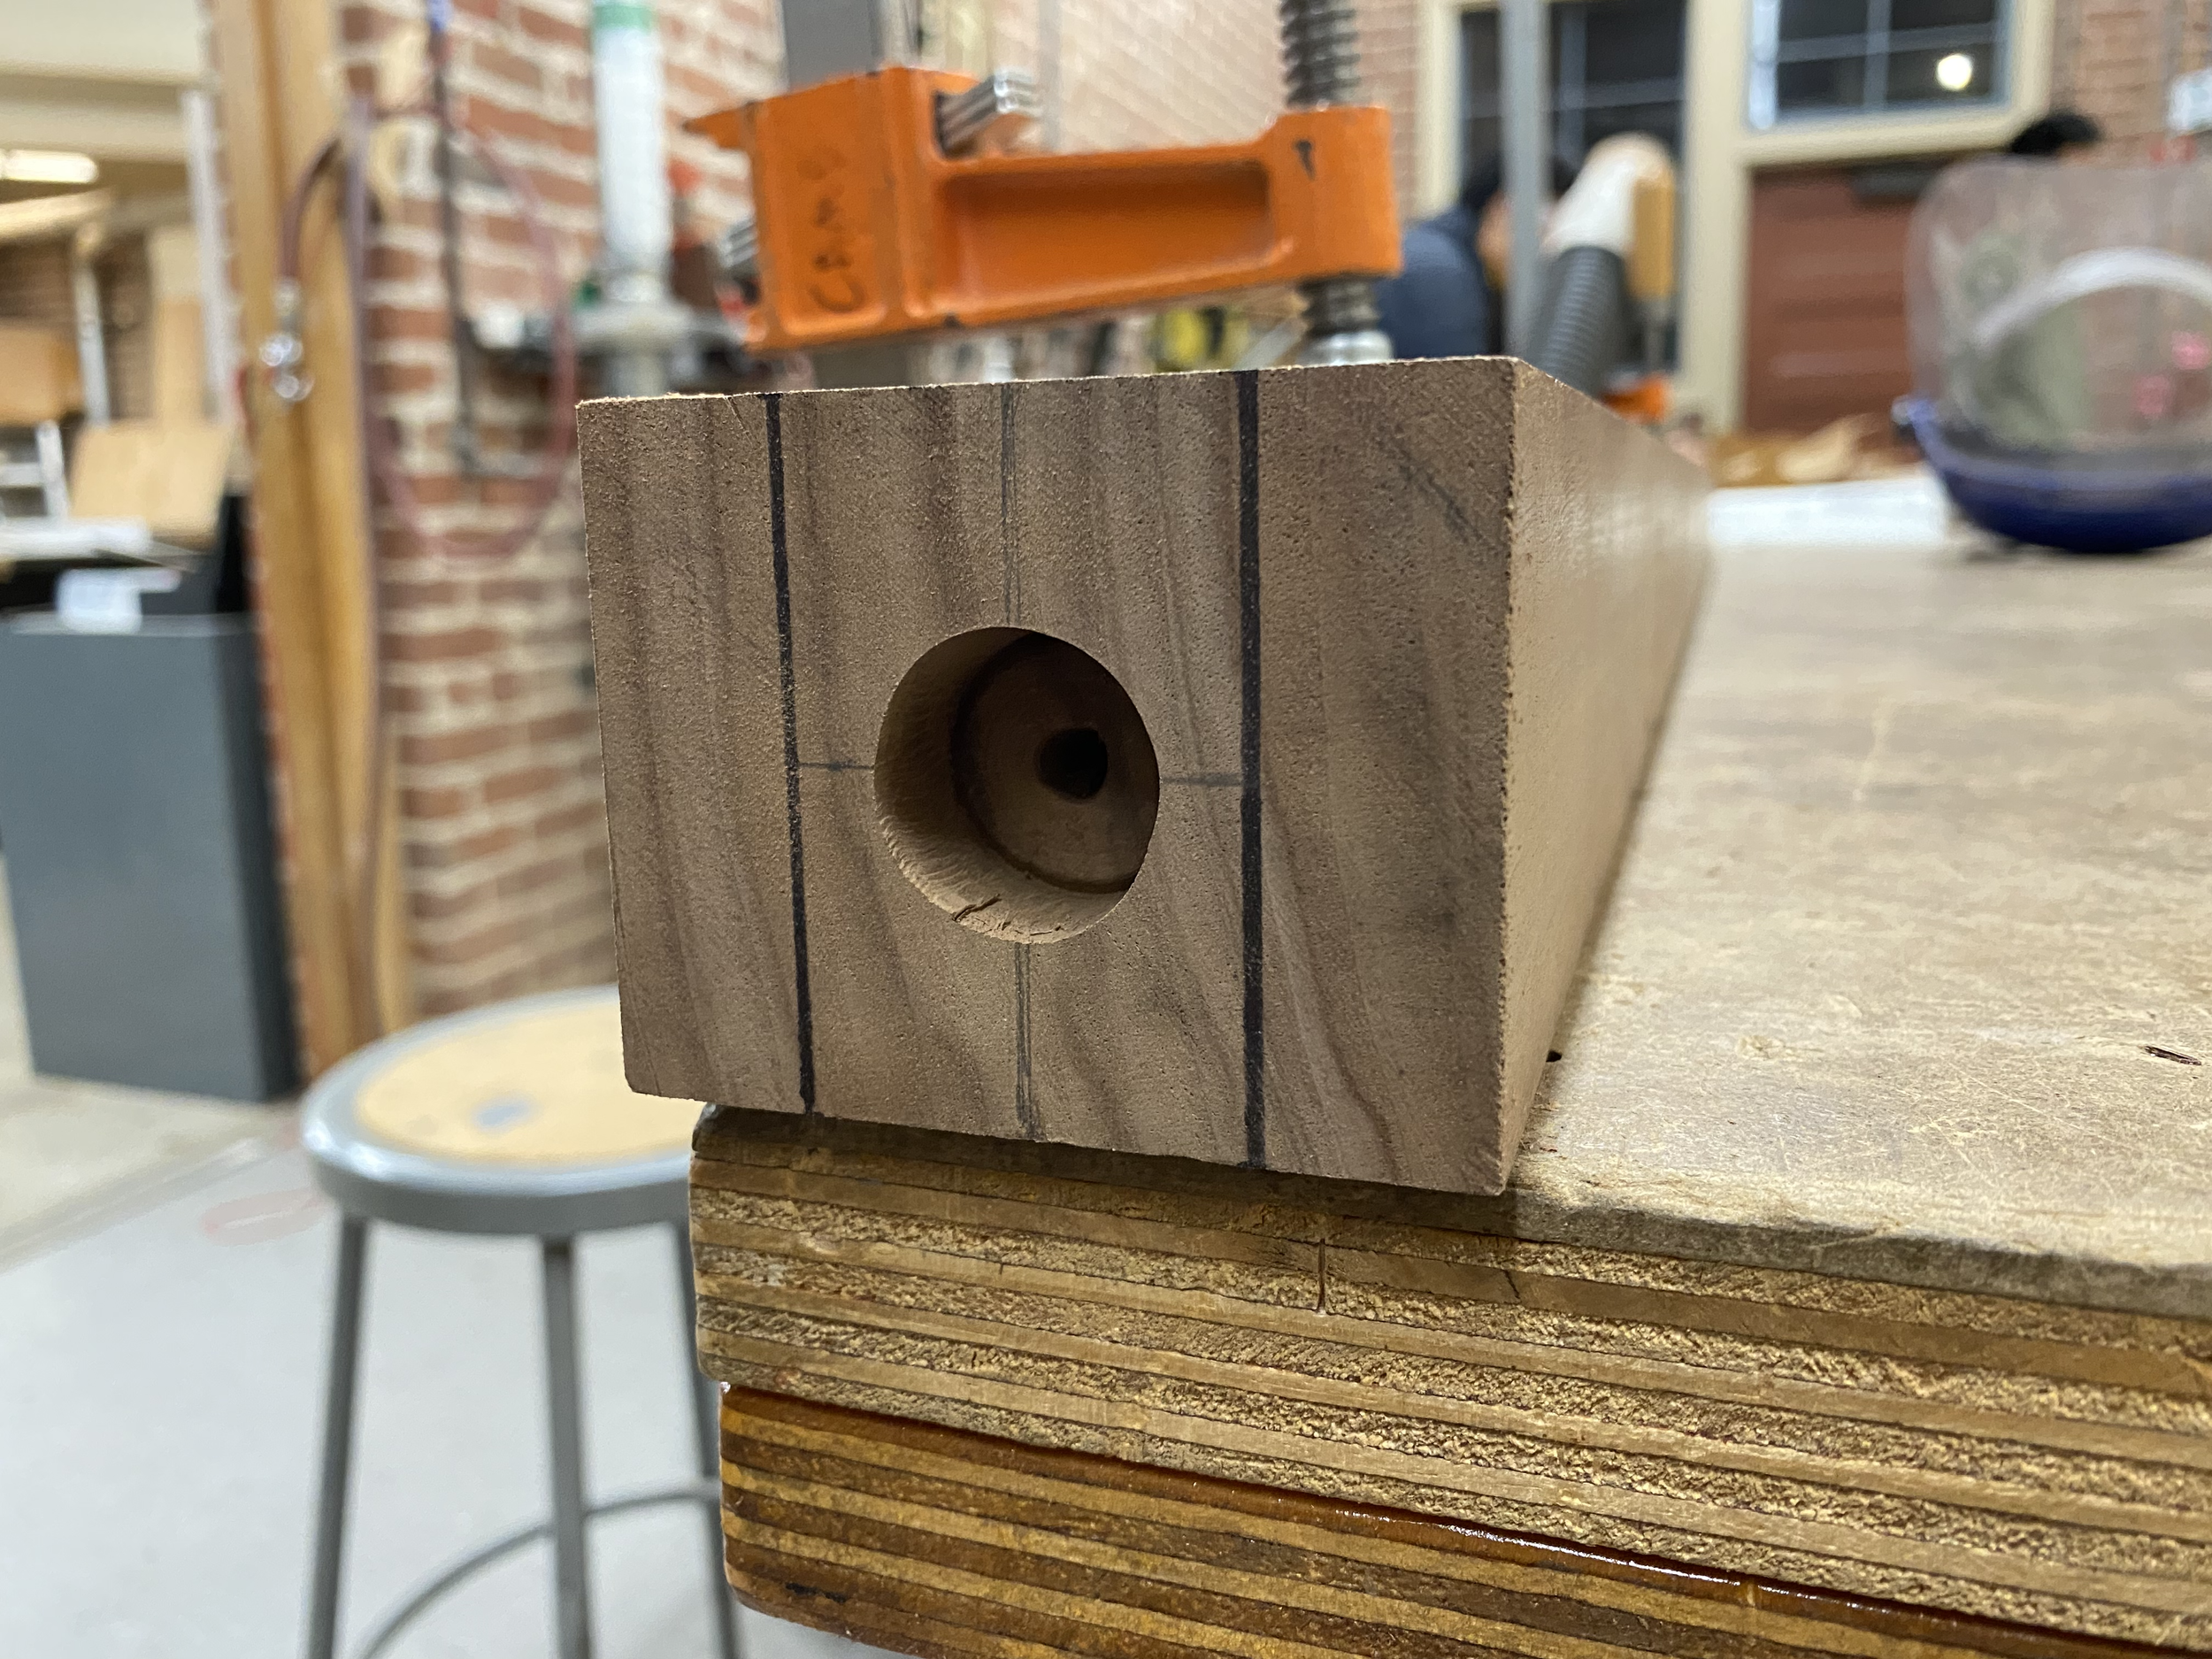
hole drilled successfully
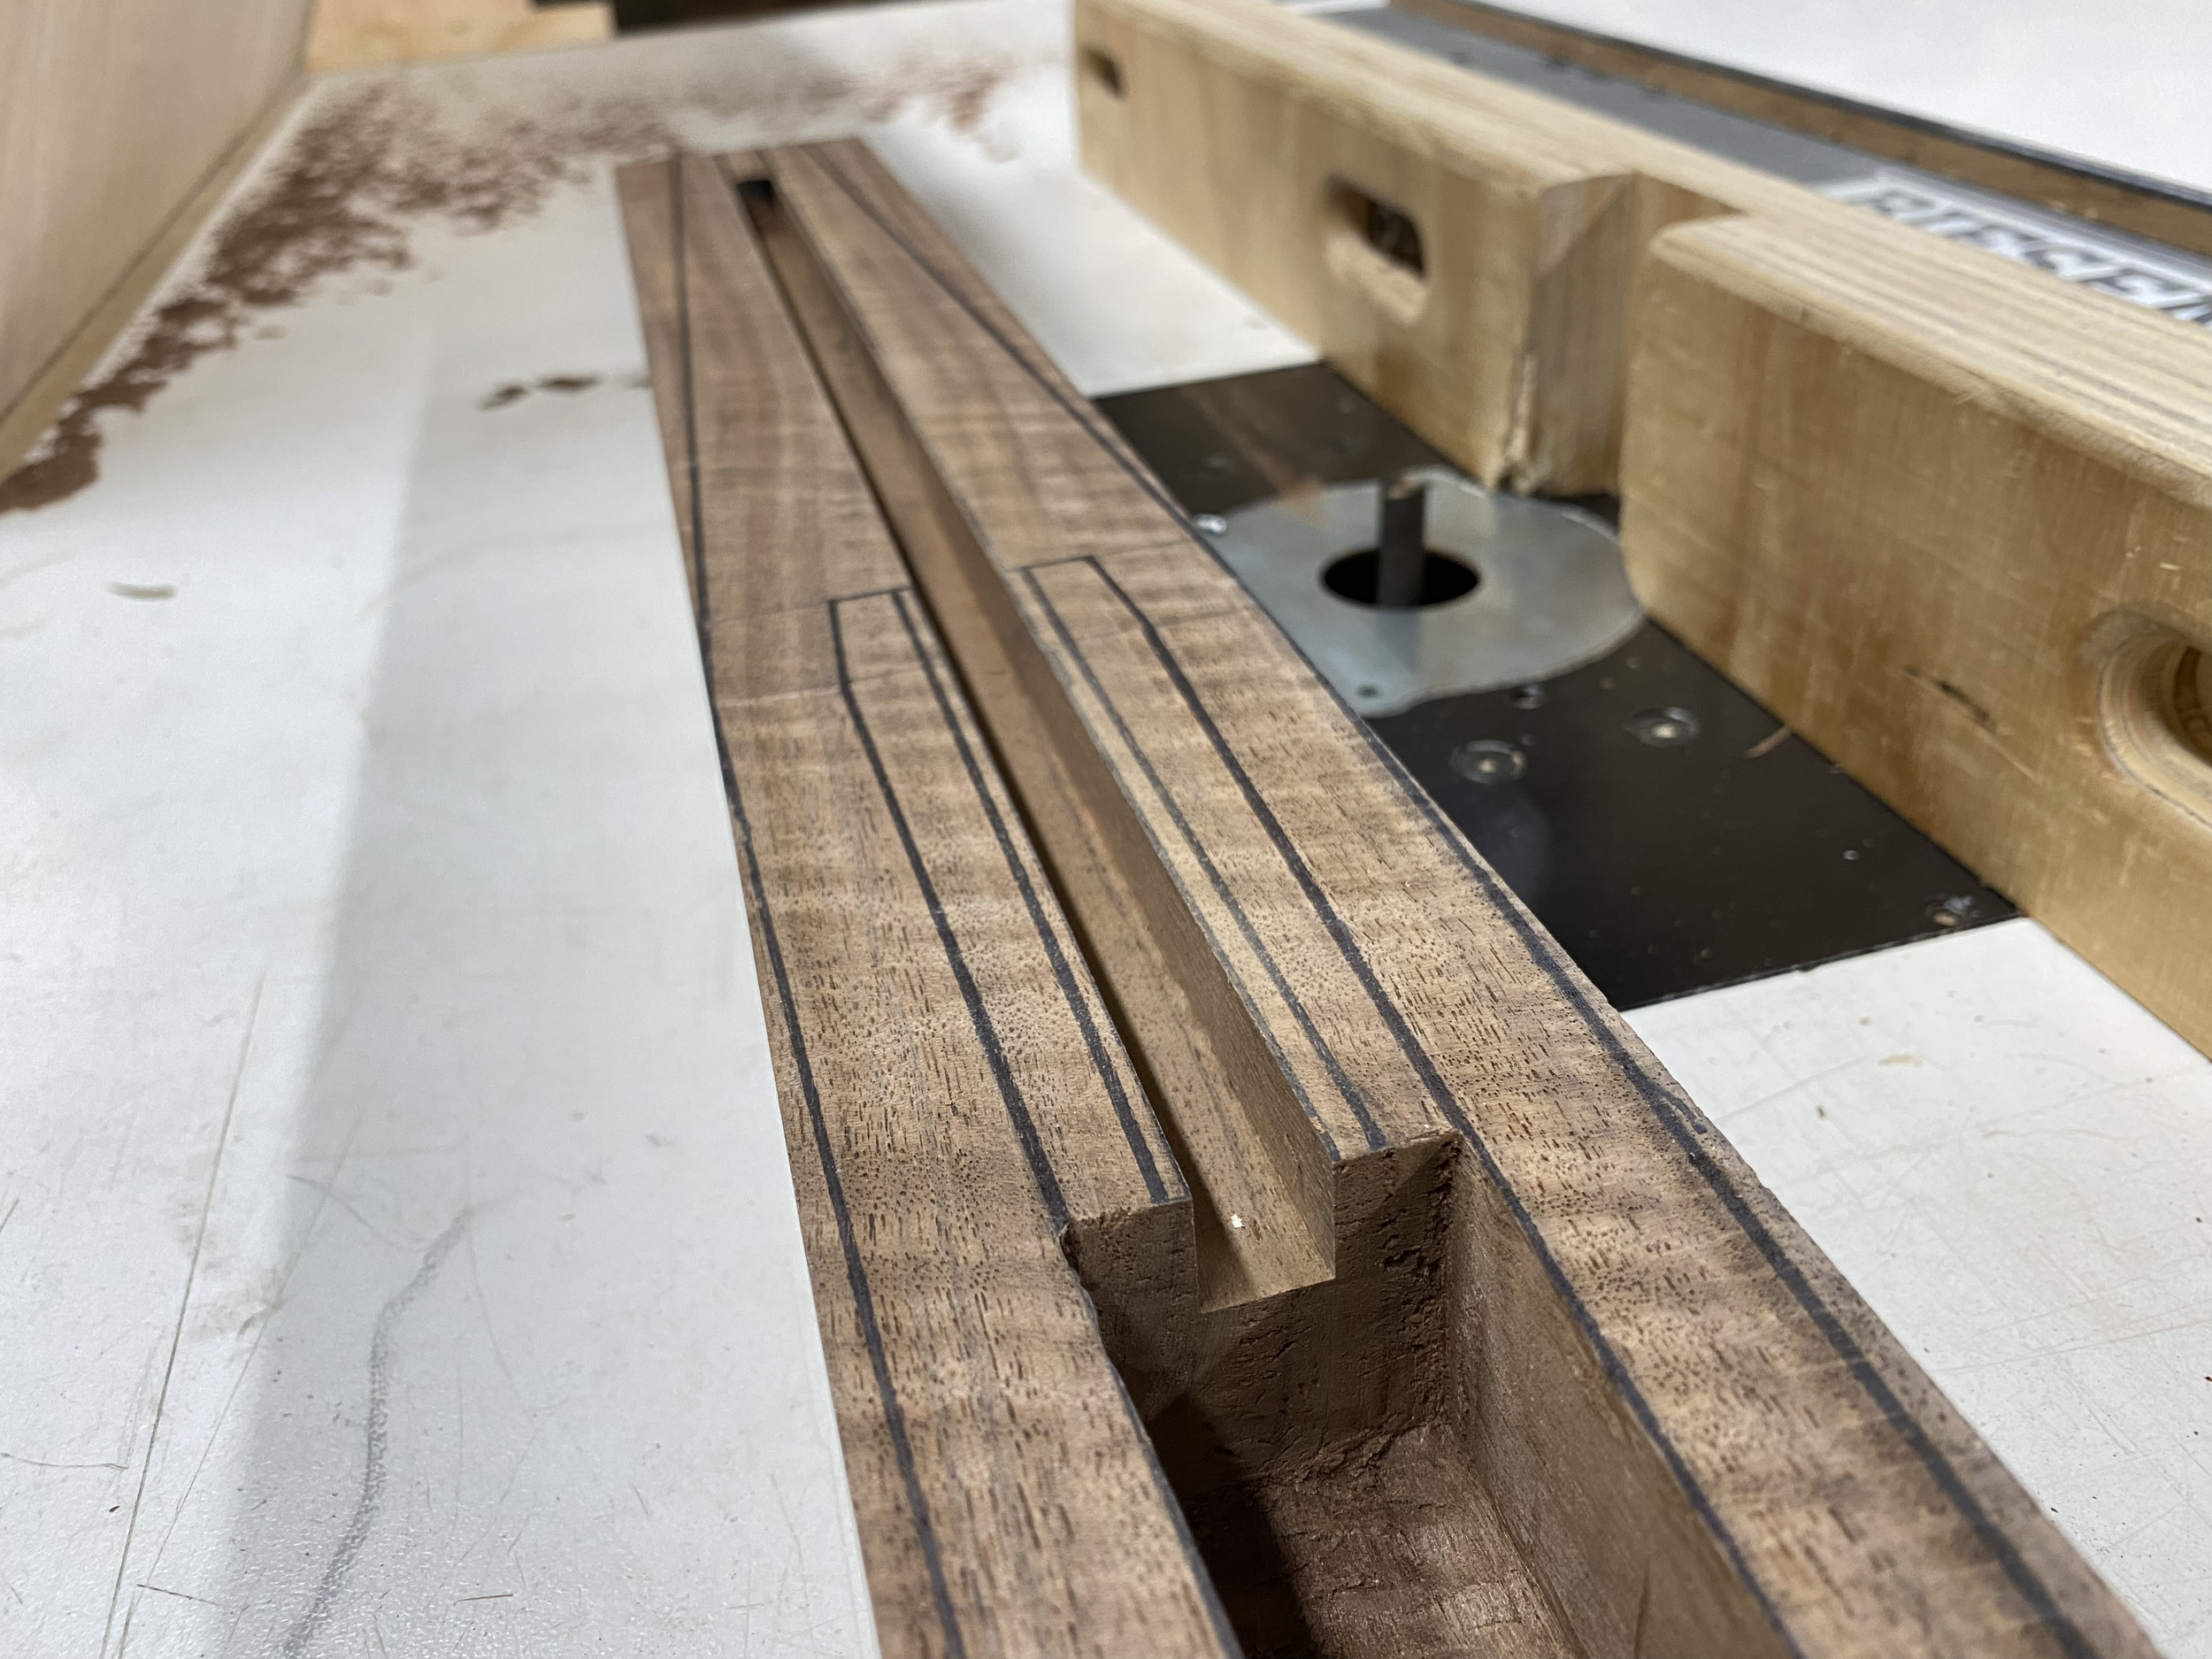
cut channel for endpin w/ table router
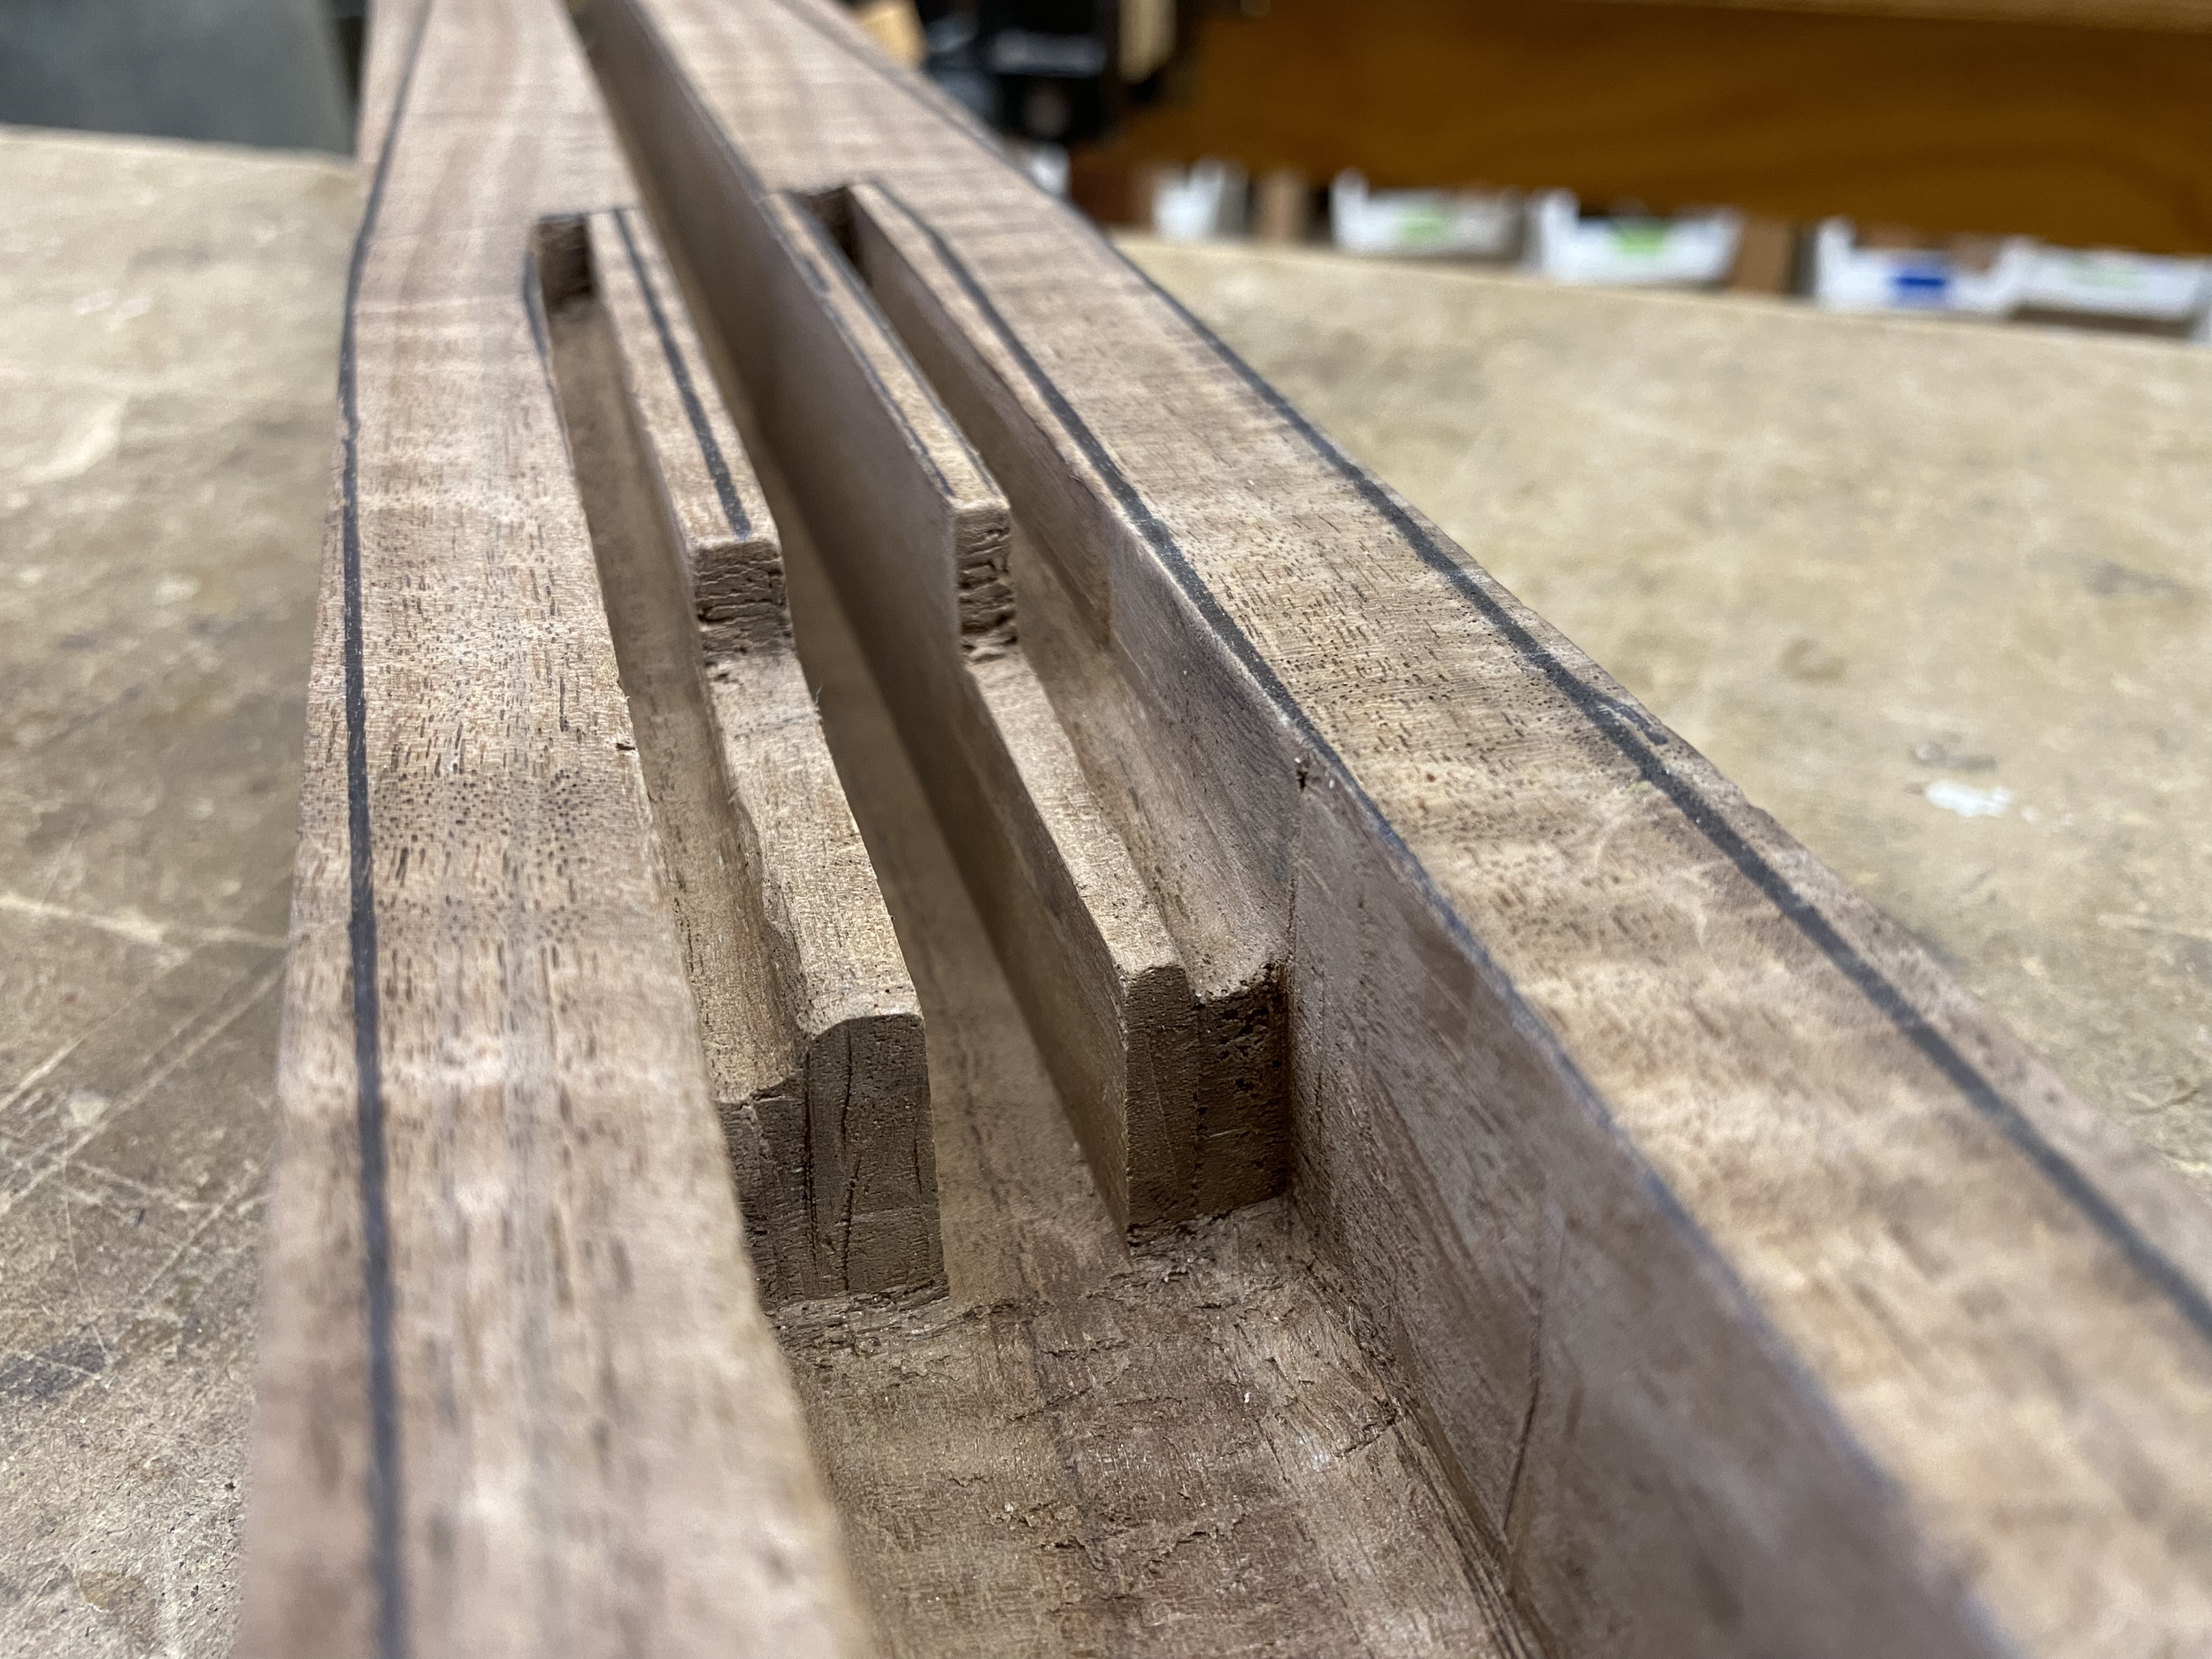
routed out grooves for piezo pickup wiring to be fed into the main electronics section
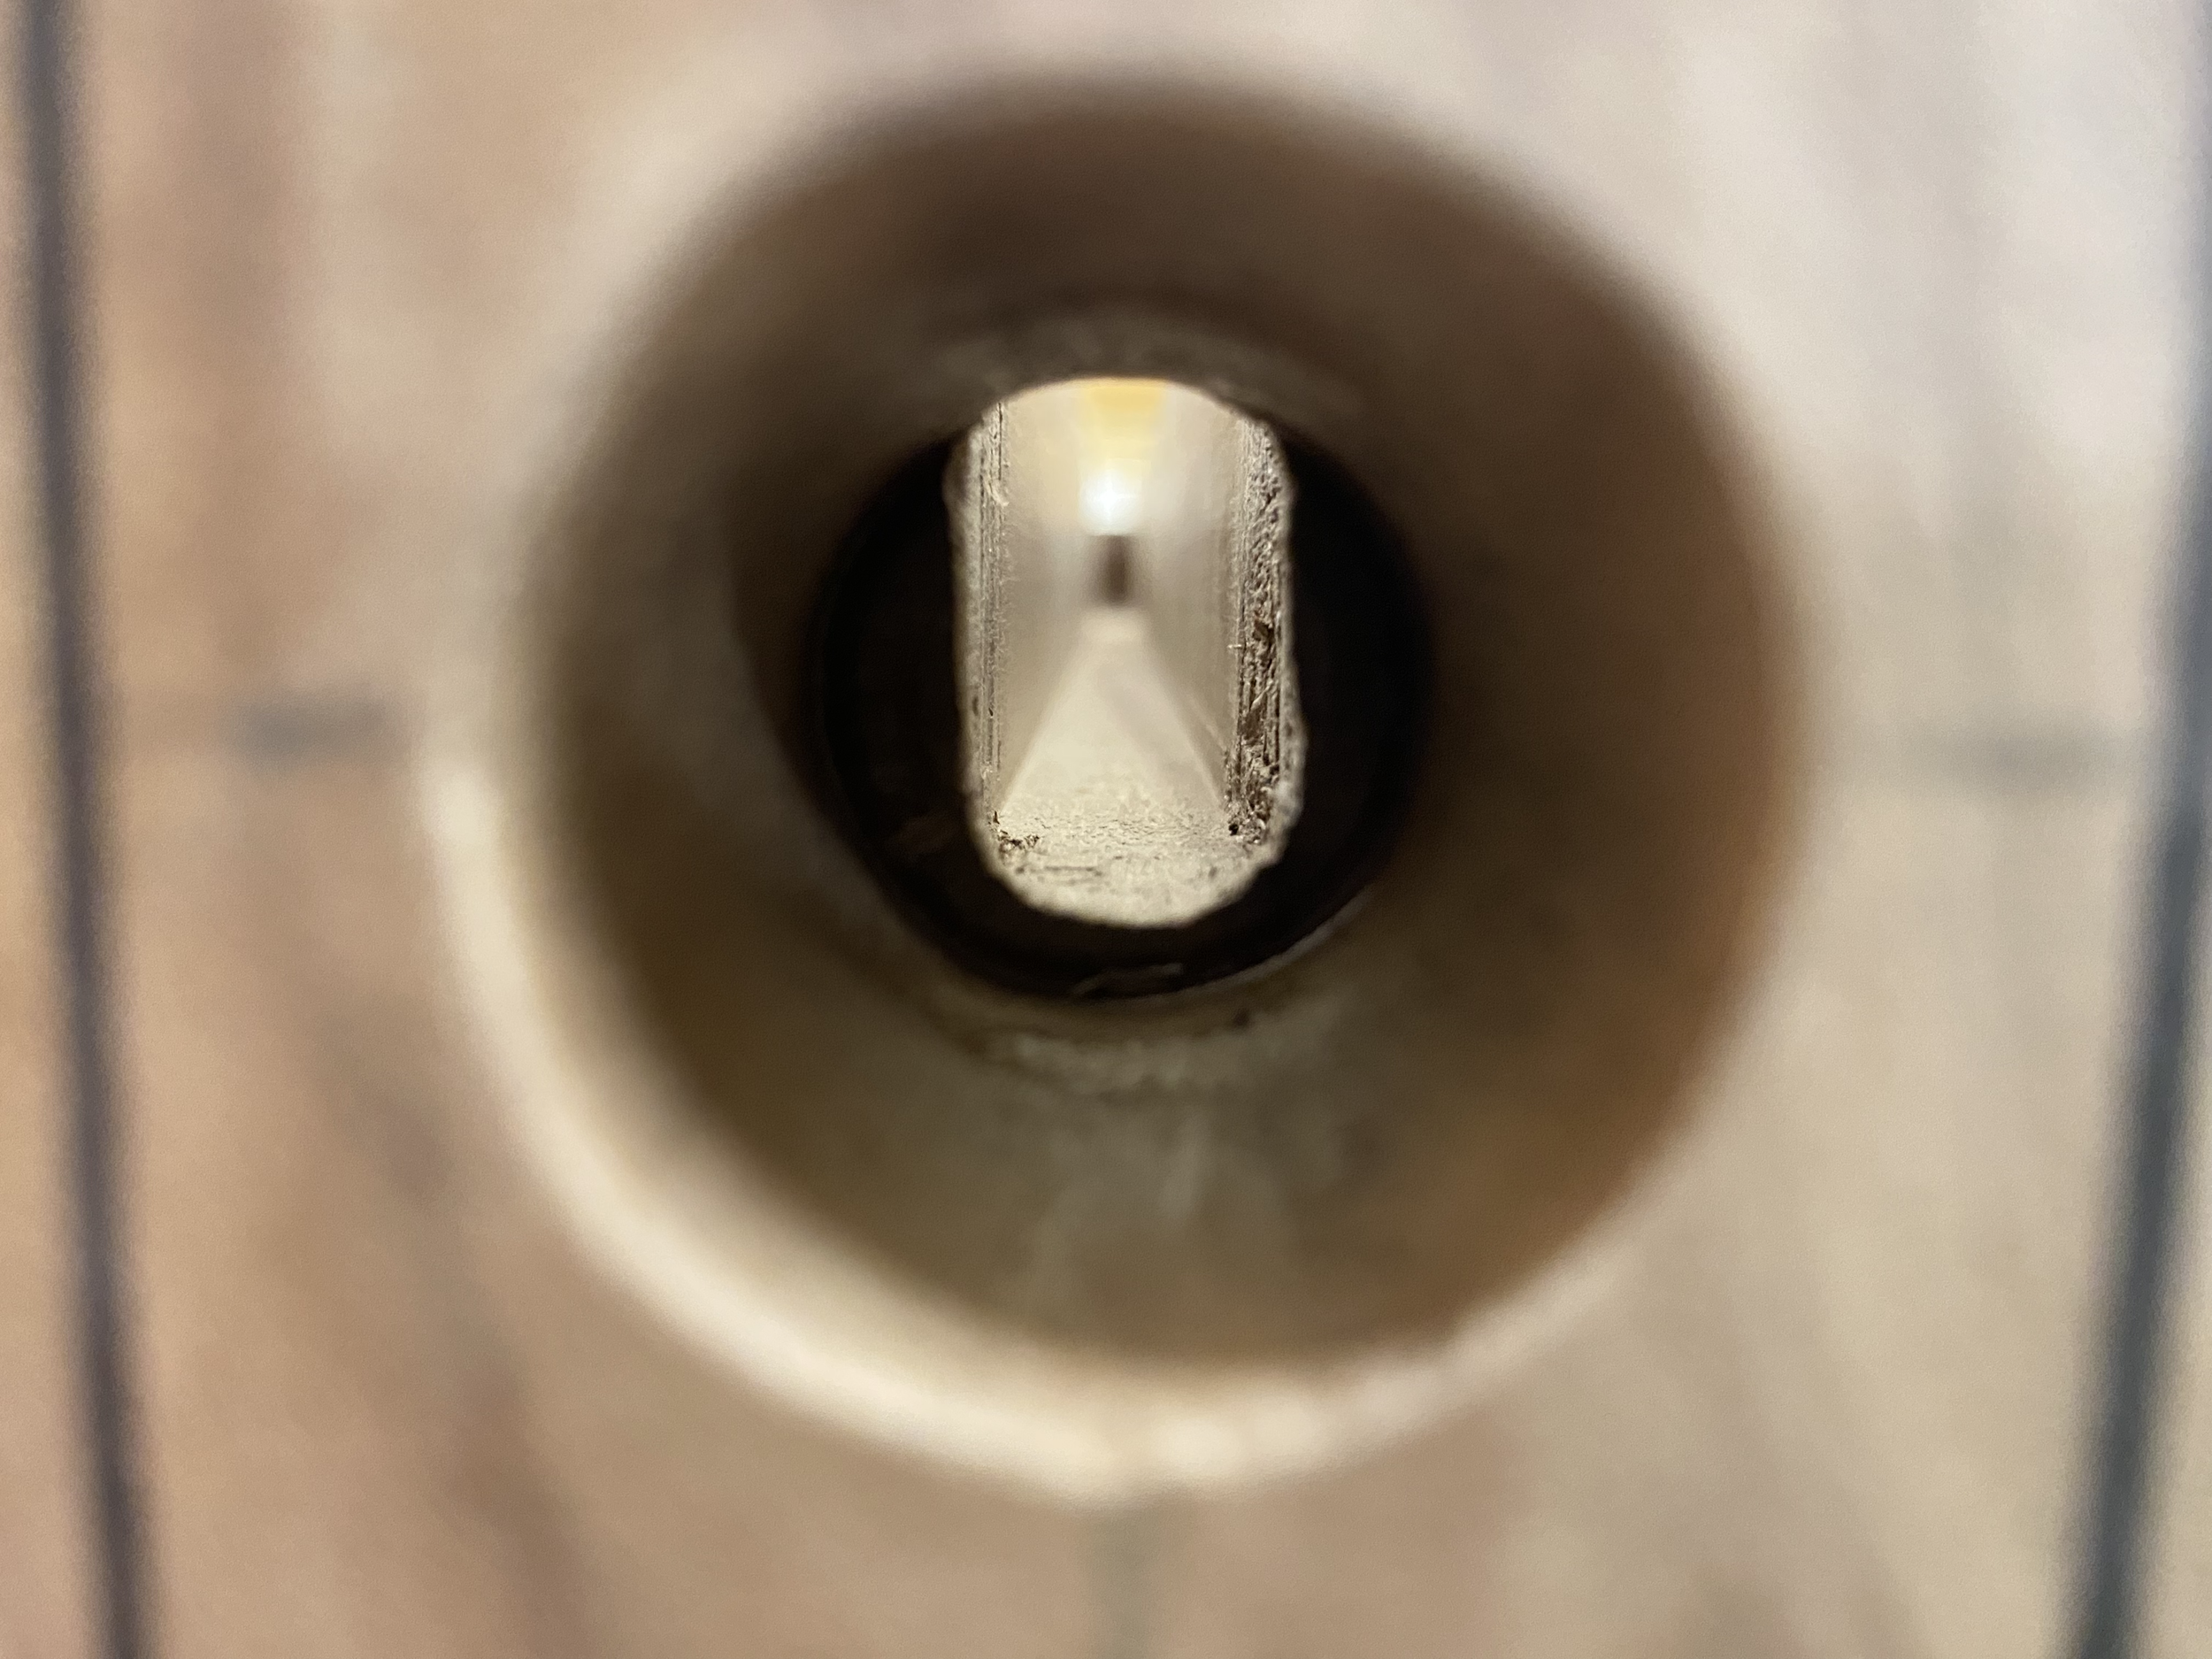
hole for endpin plug + routed channel

marked side profile w/ laser cut template

drilled holes for tuning pegs

made first cut on the table saw (proper order of operations was crucial for the cuts)

adjusting tuning peg hole sizes iteratively to achieve tight press fits

cutting the side profile w/ band saw (made relief cuts first)

cleaning up neck w/ spindle sander

cutting the main outline w/ band saw

endpin free to move within routed channel

endpin w/ a tight press fit (secured within body by friction)

carving recesses for the sheet metal flanges to sit in, using chisels

testing that the frame sits flat in flange recesses

completed carving flange recesses
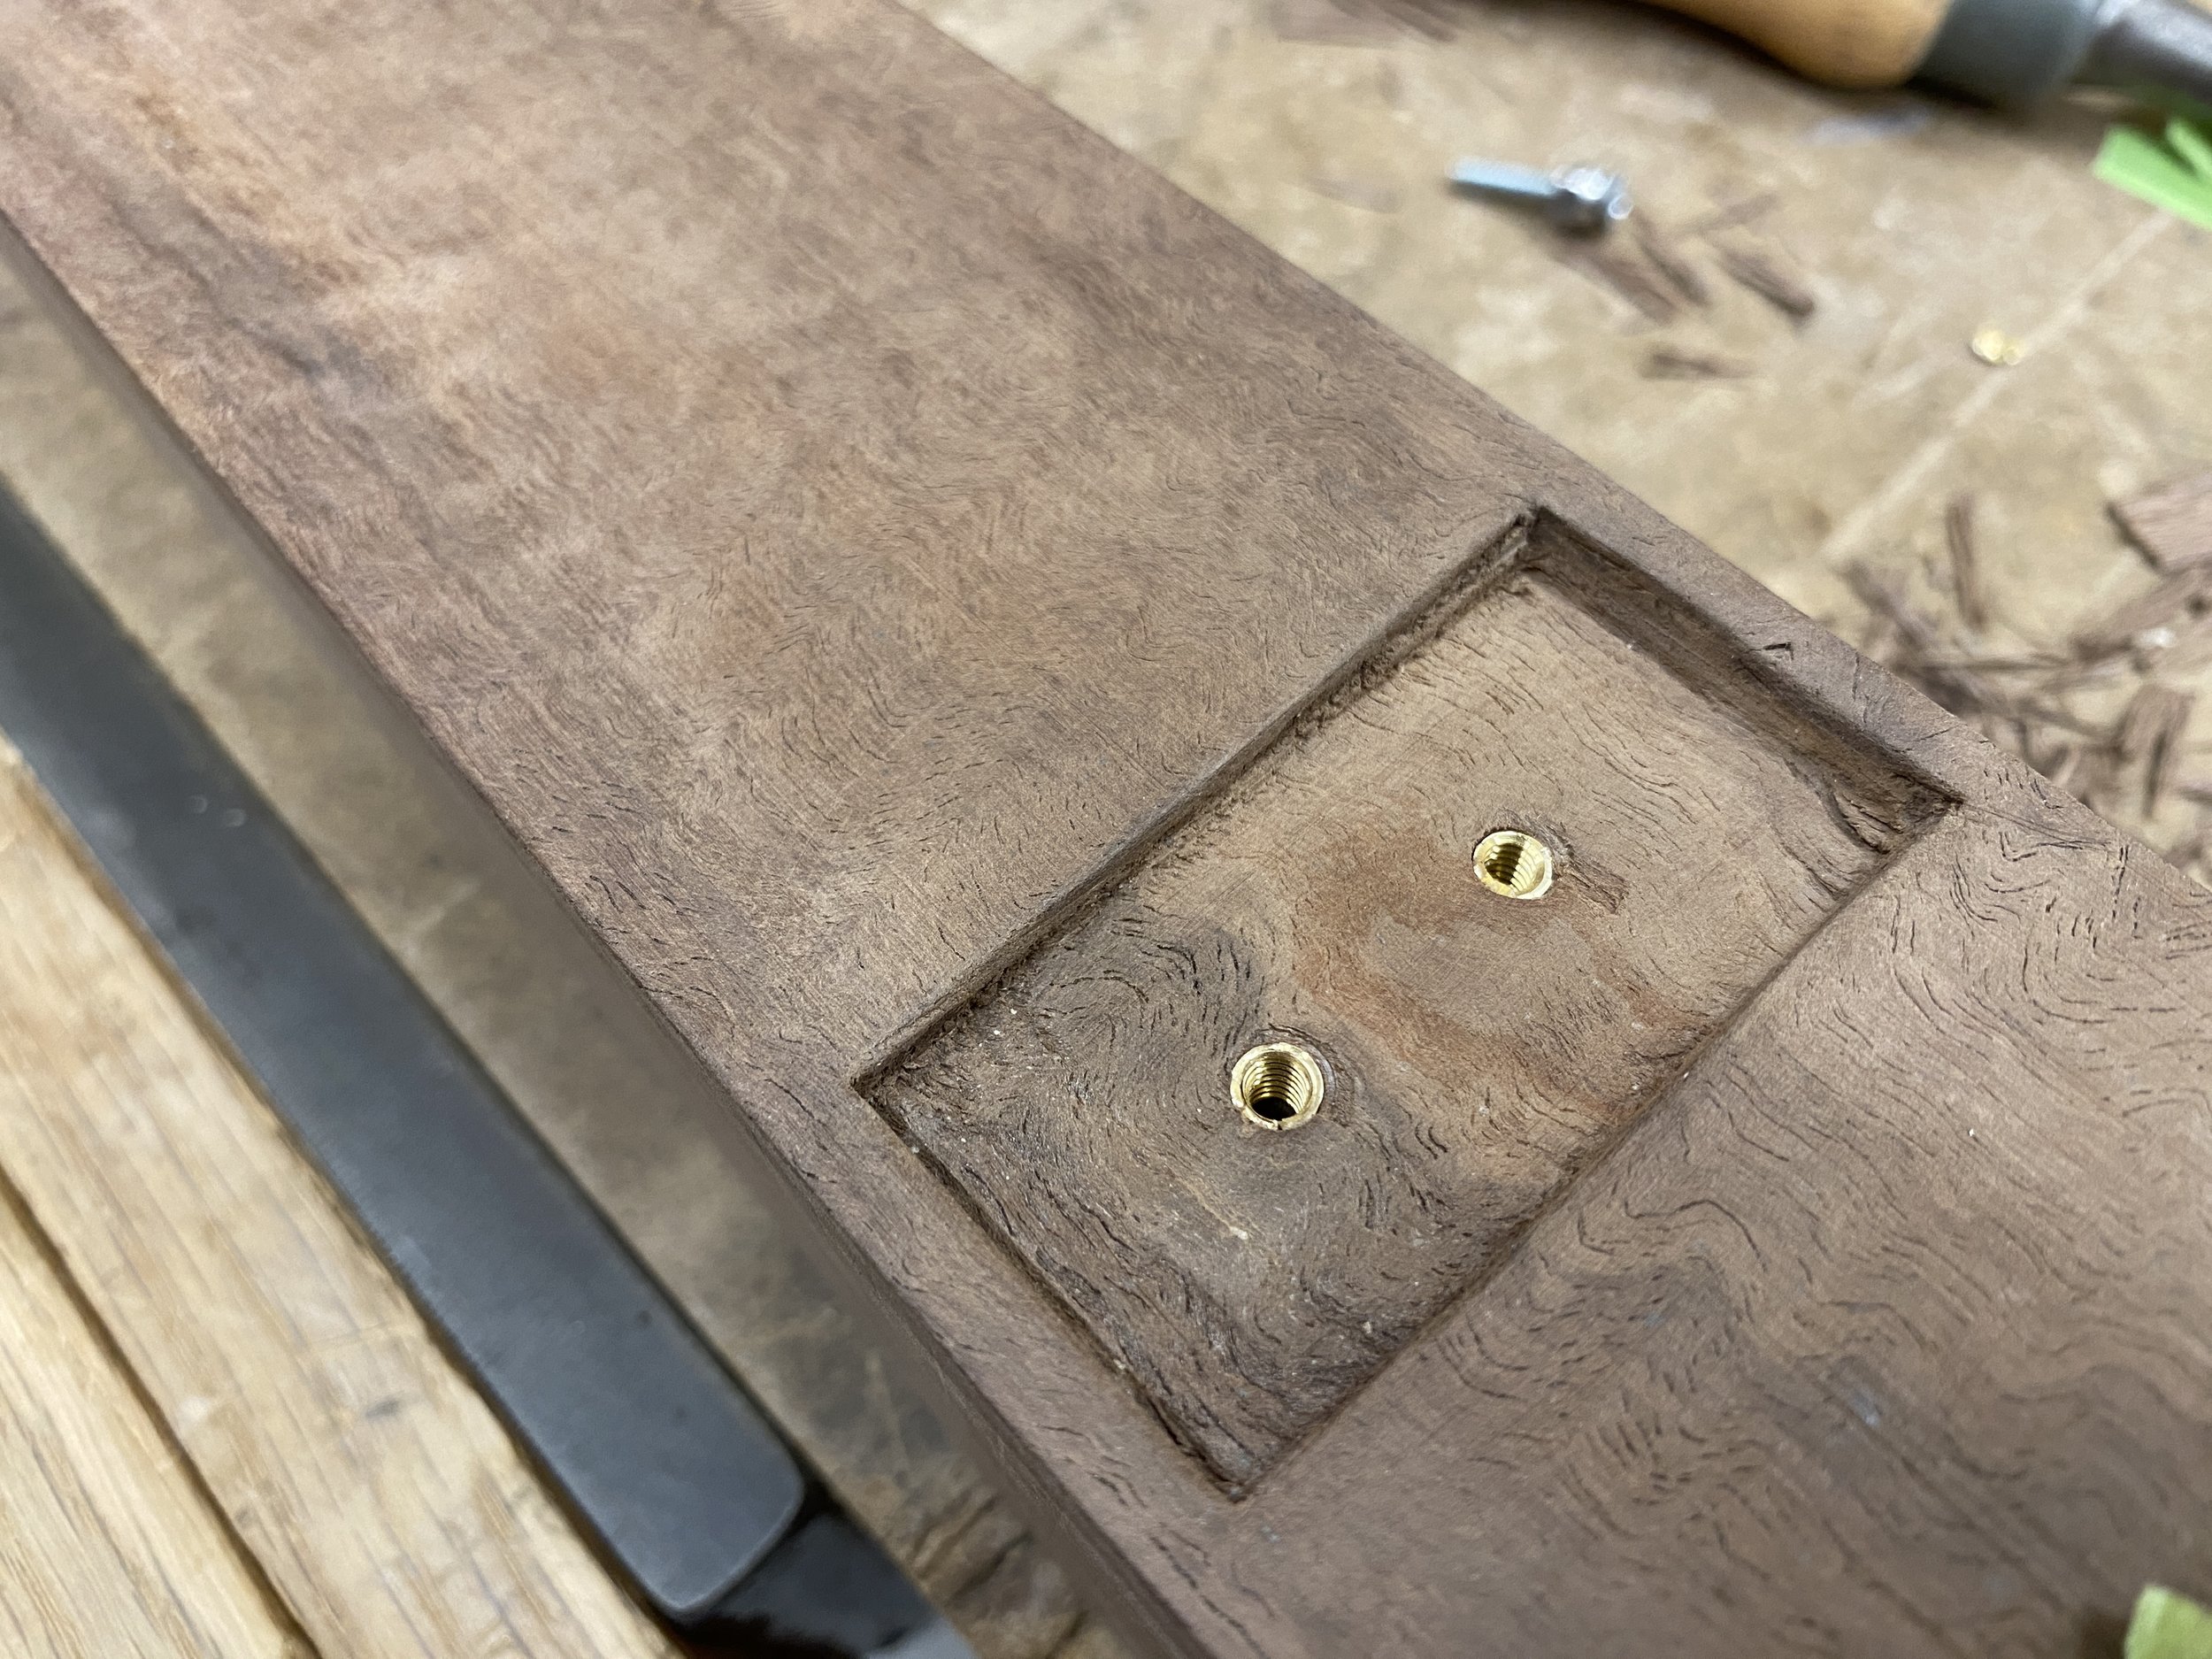
installed wood inserts (for 6-32 machine screws) in flange recesses

wood inserts on end, surrounding endpin hole

test of sheet metal to wood interface

assembled all parts to test that everything fit

finished wood with 3 coatings of linseed oil + beeswax
sheet metal - frame
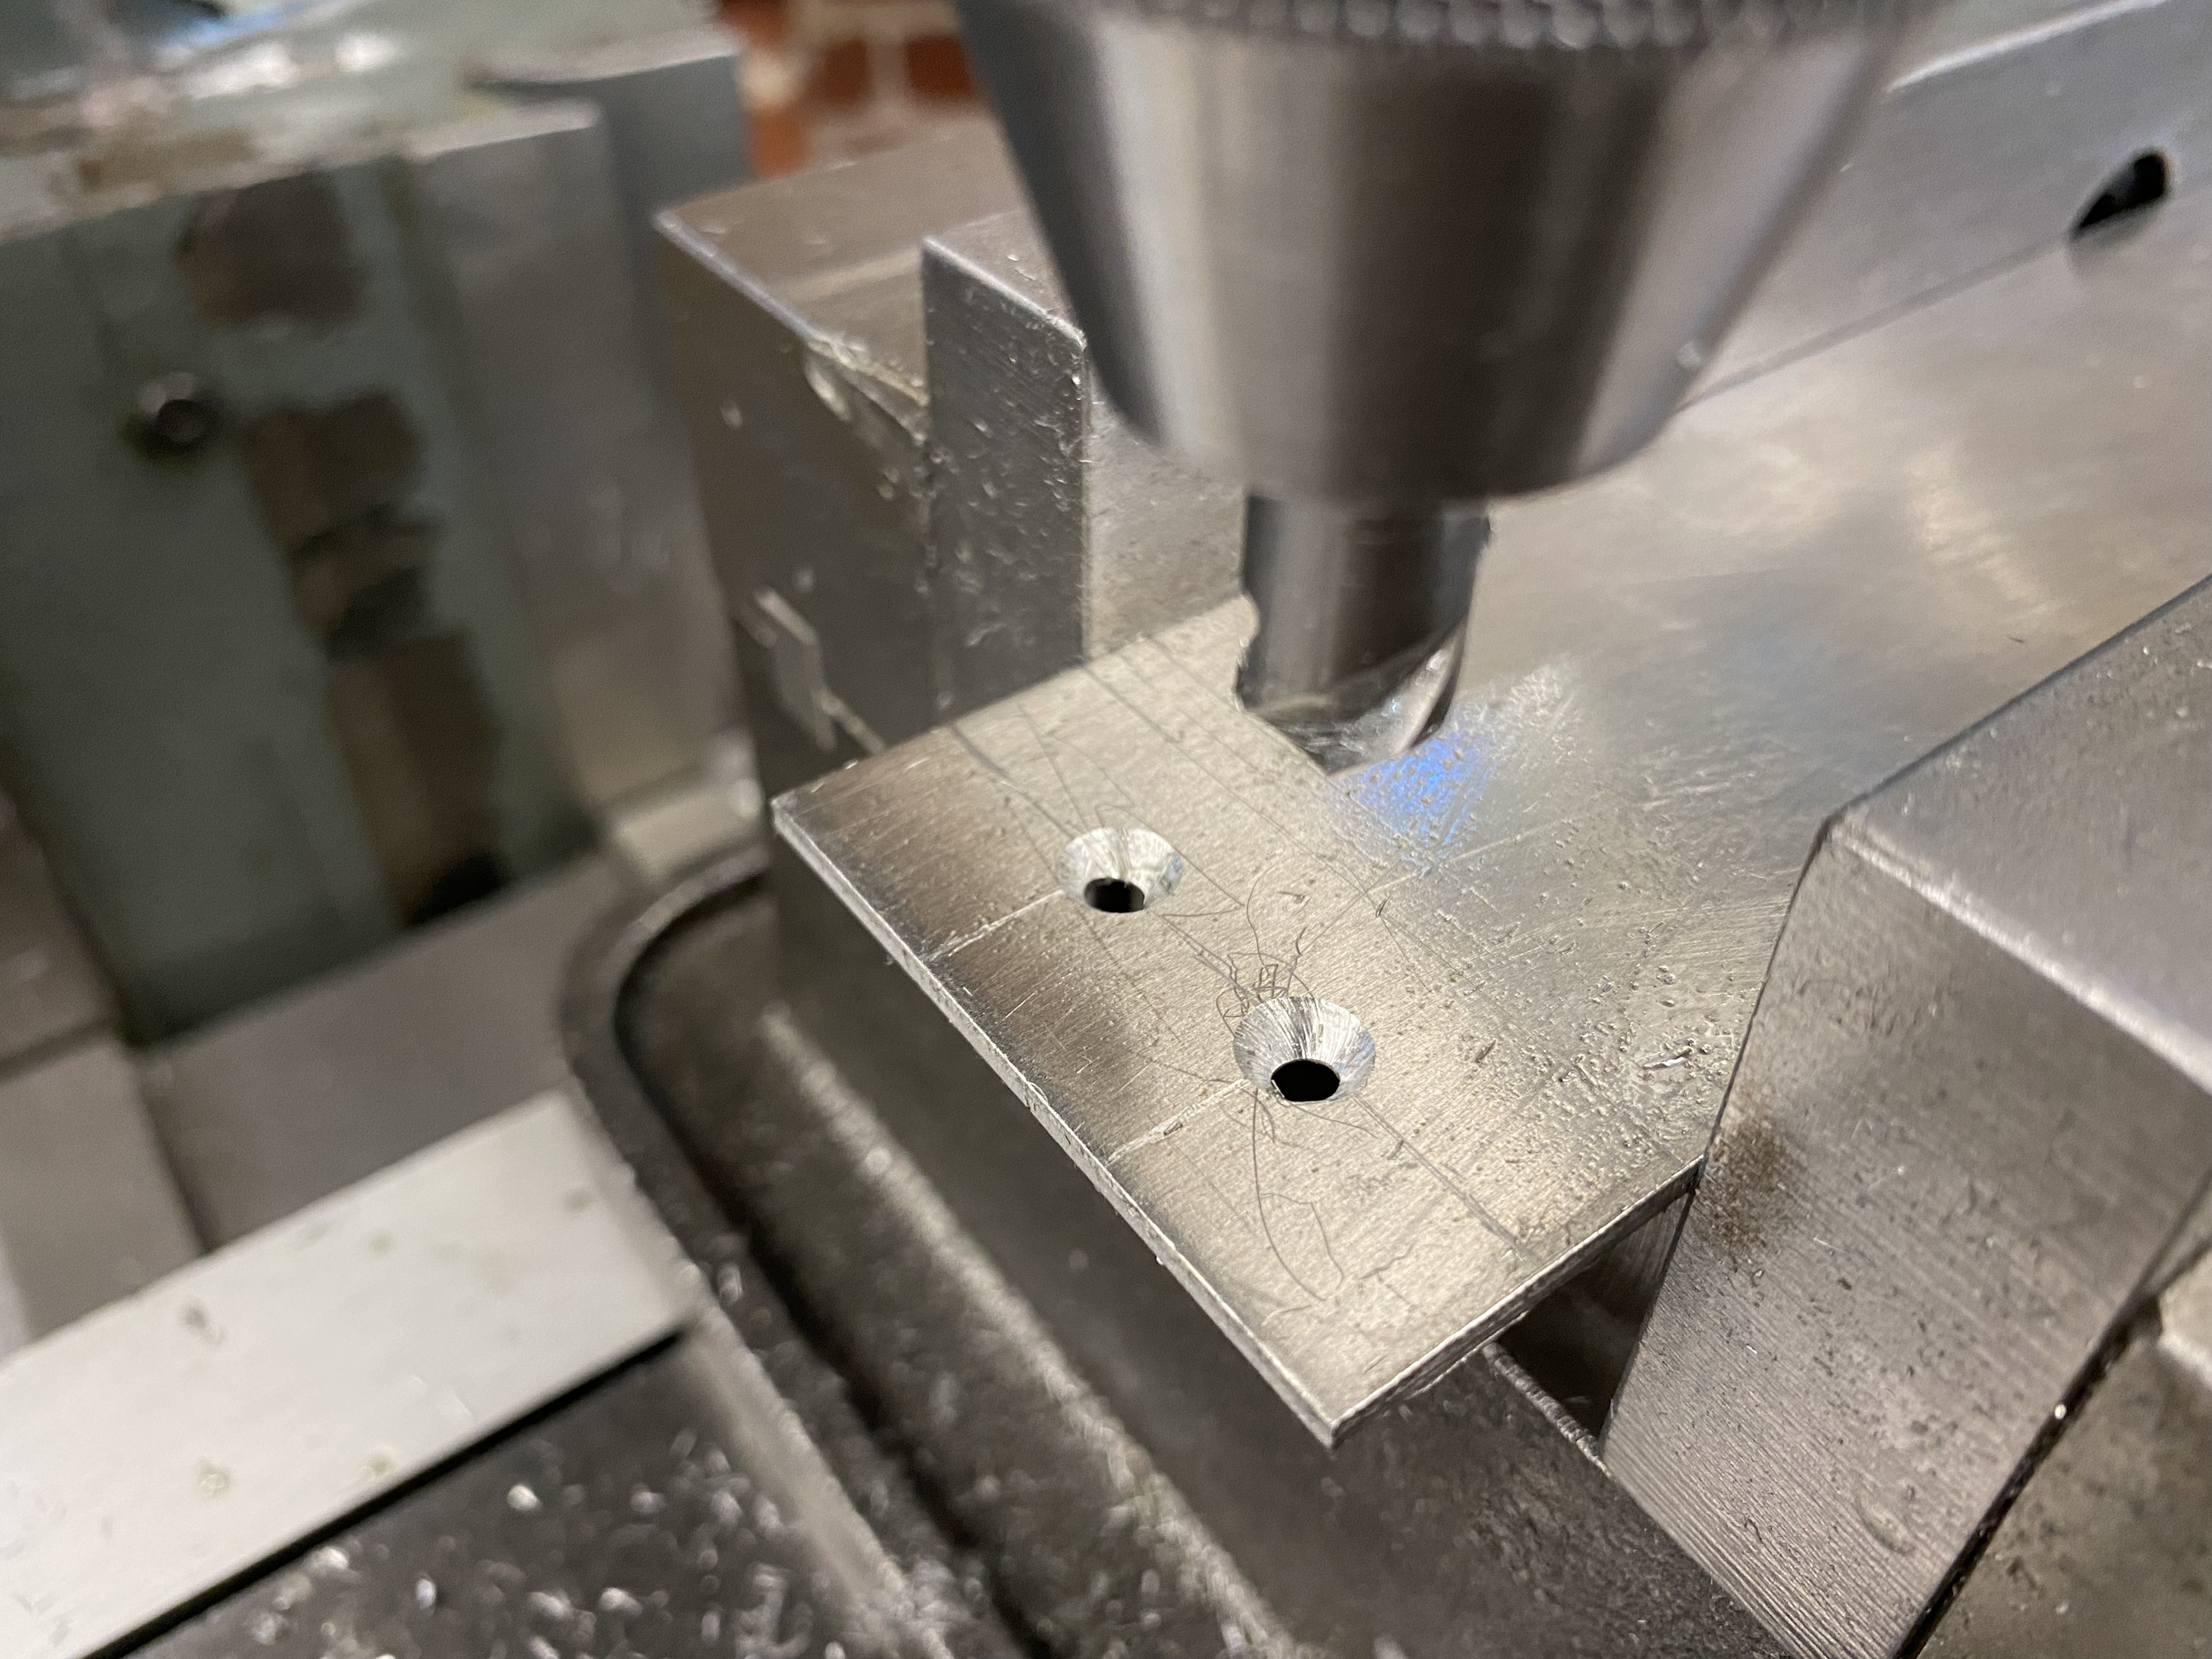
created countersinks for screws (to sit flush in sheet metal) w/ mill
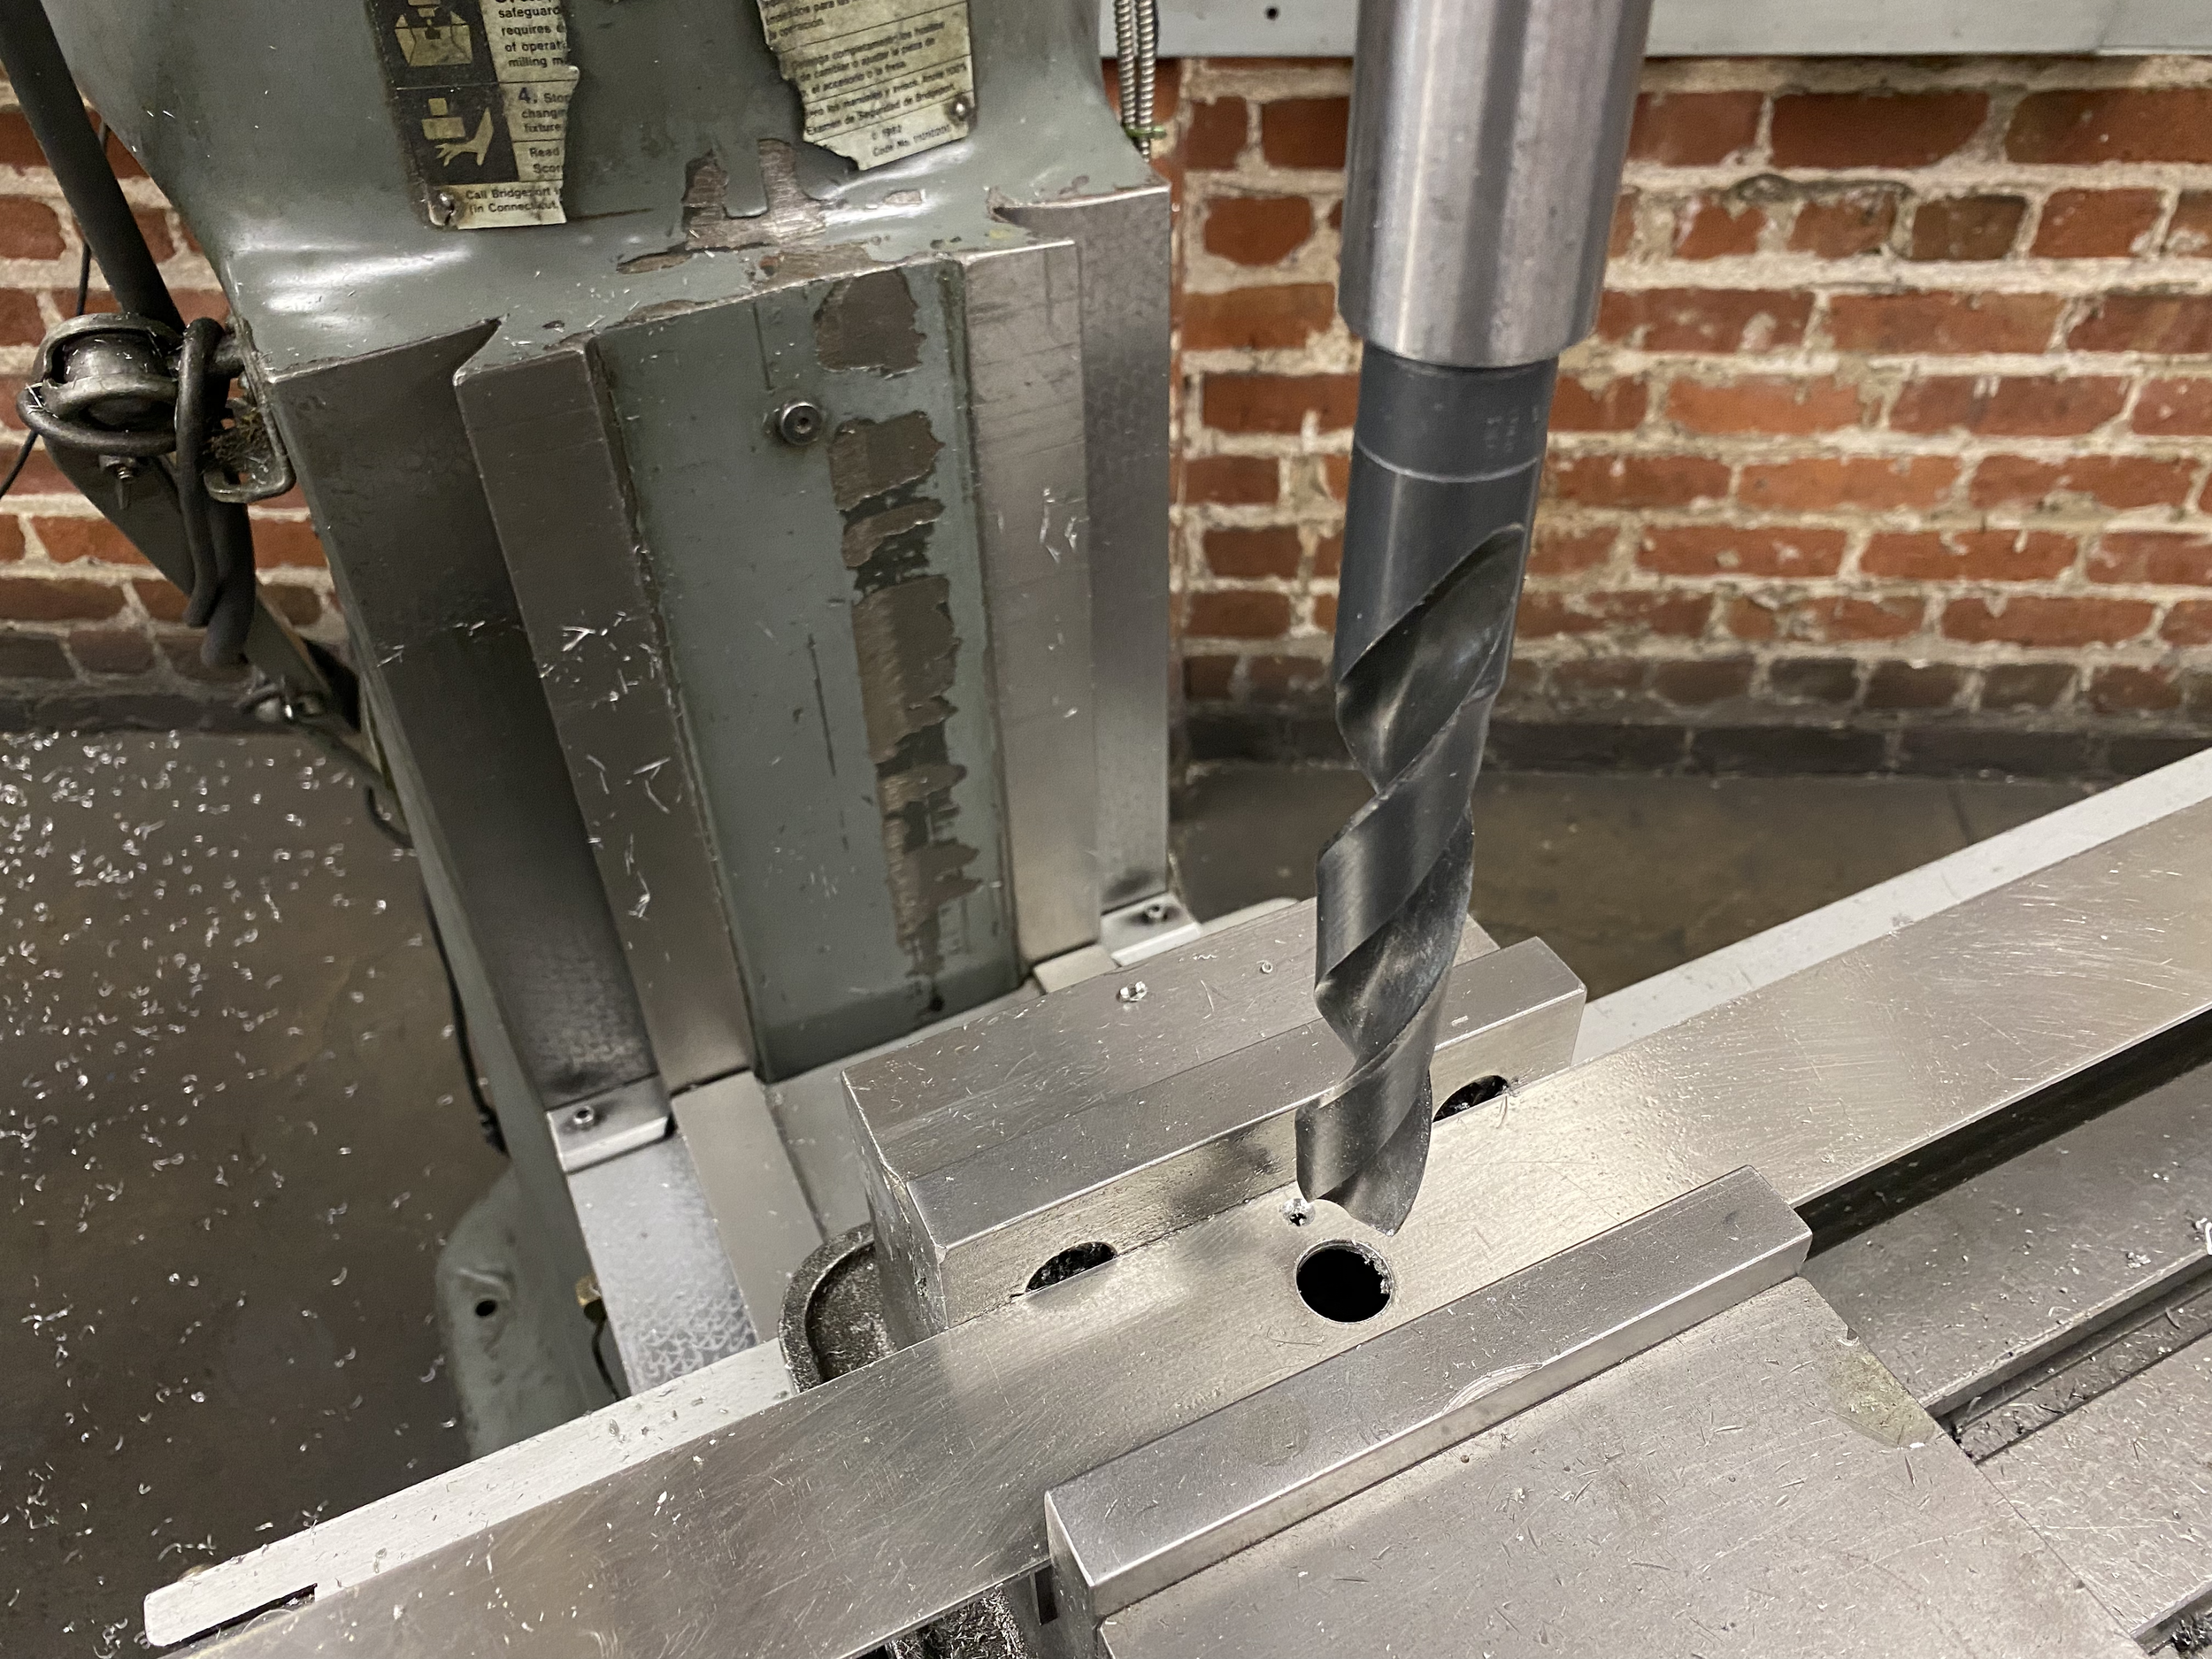
drilled large hole (63/64") for endpin
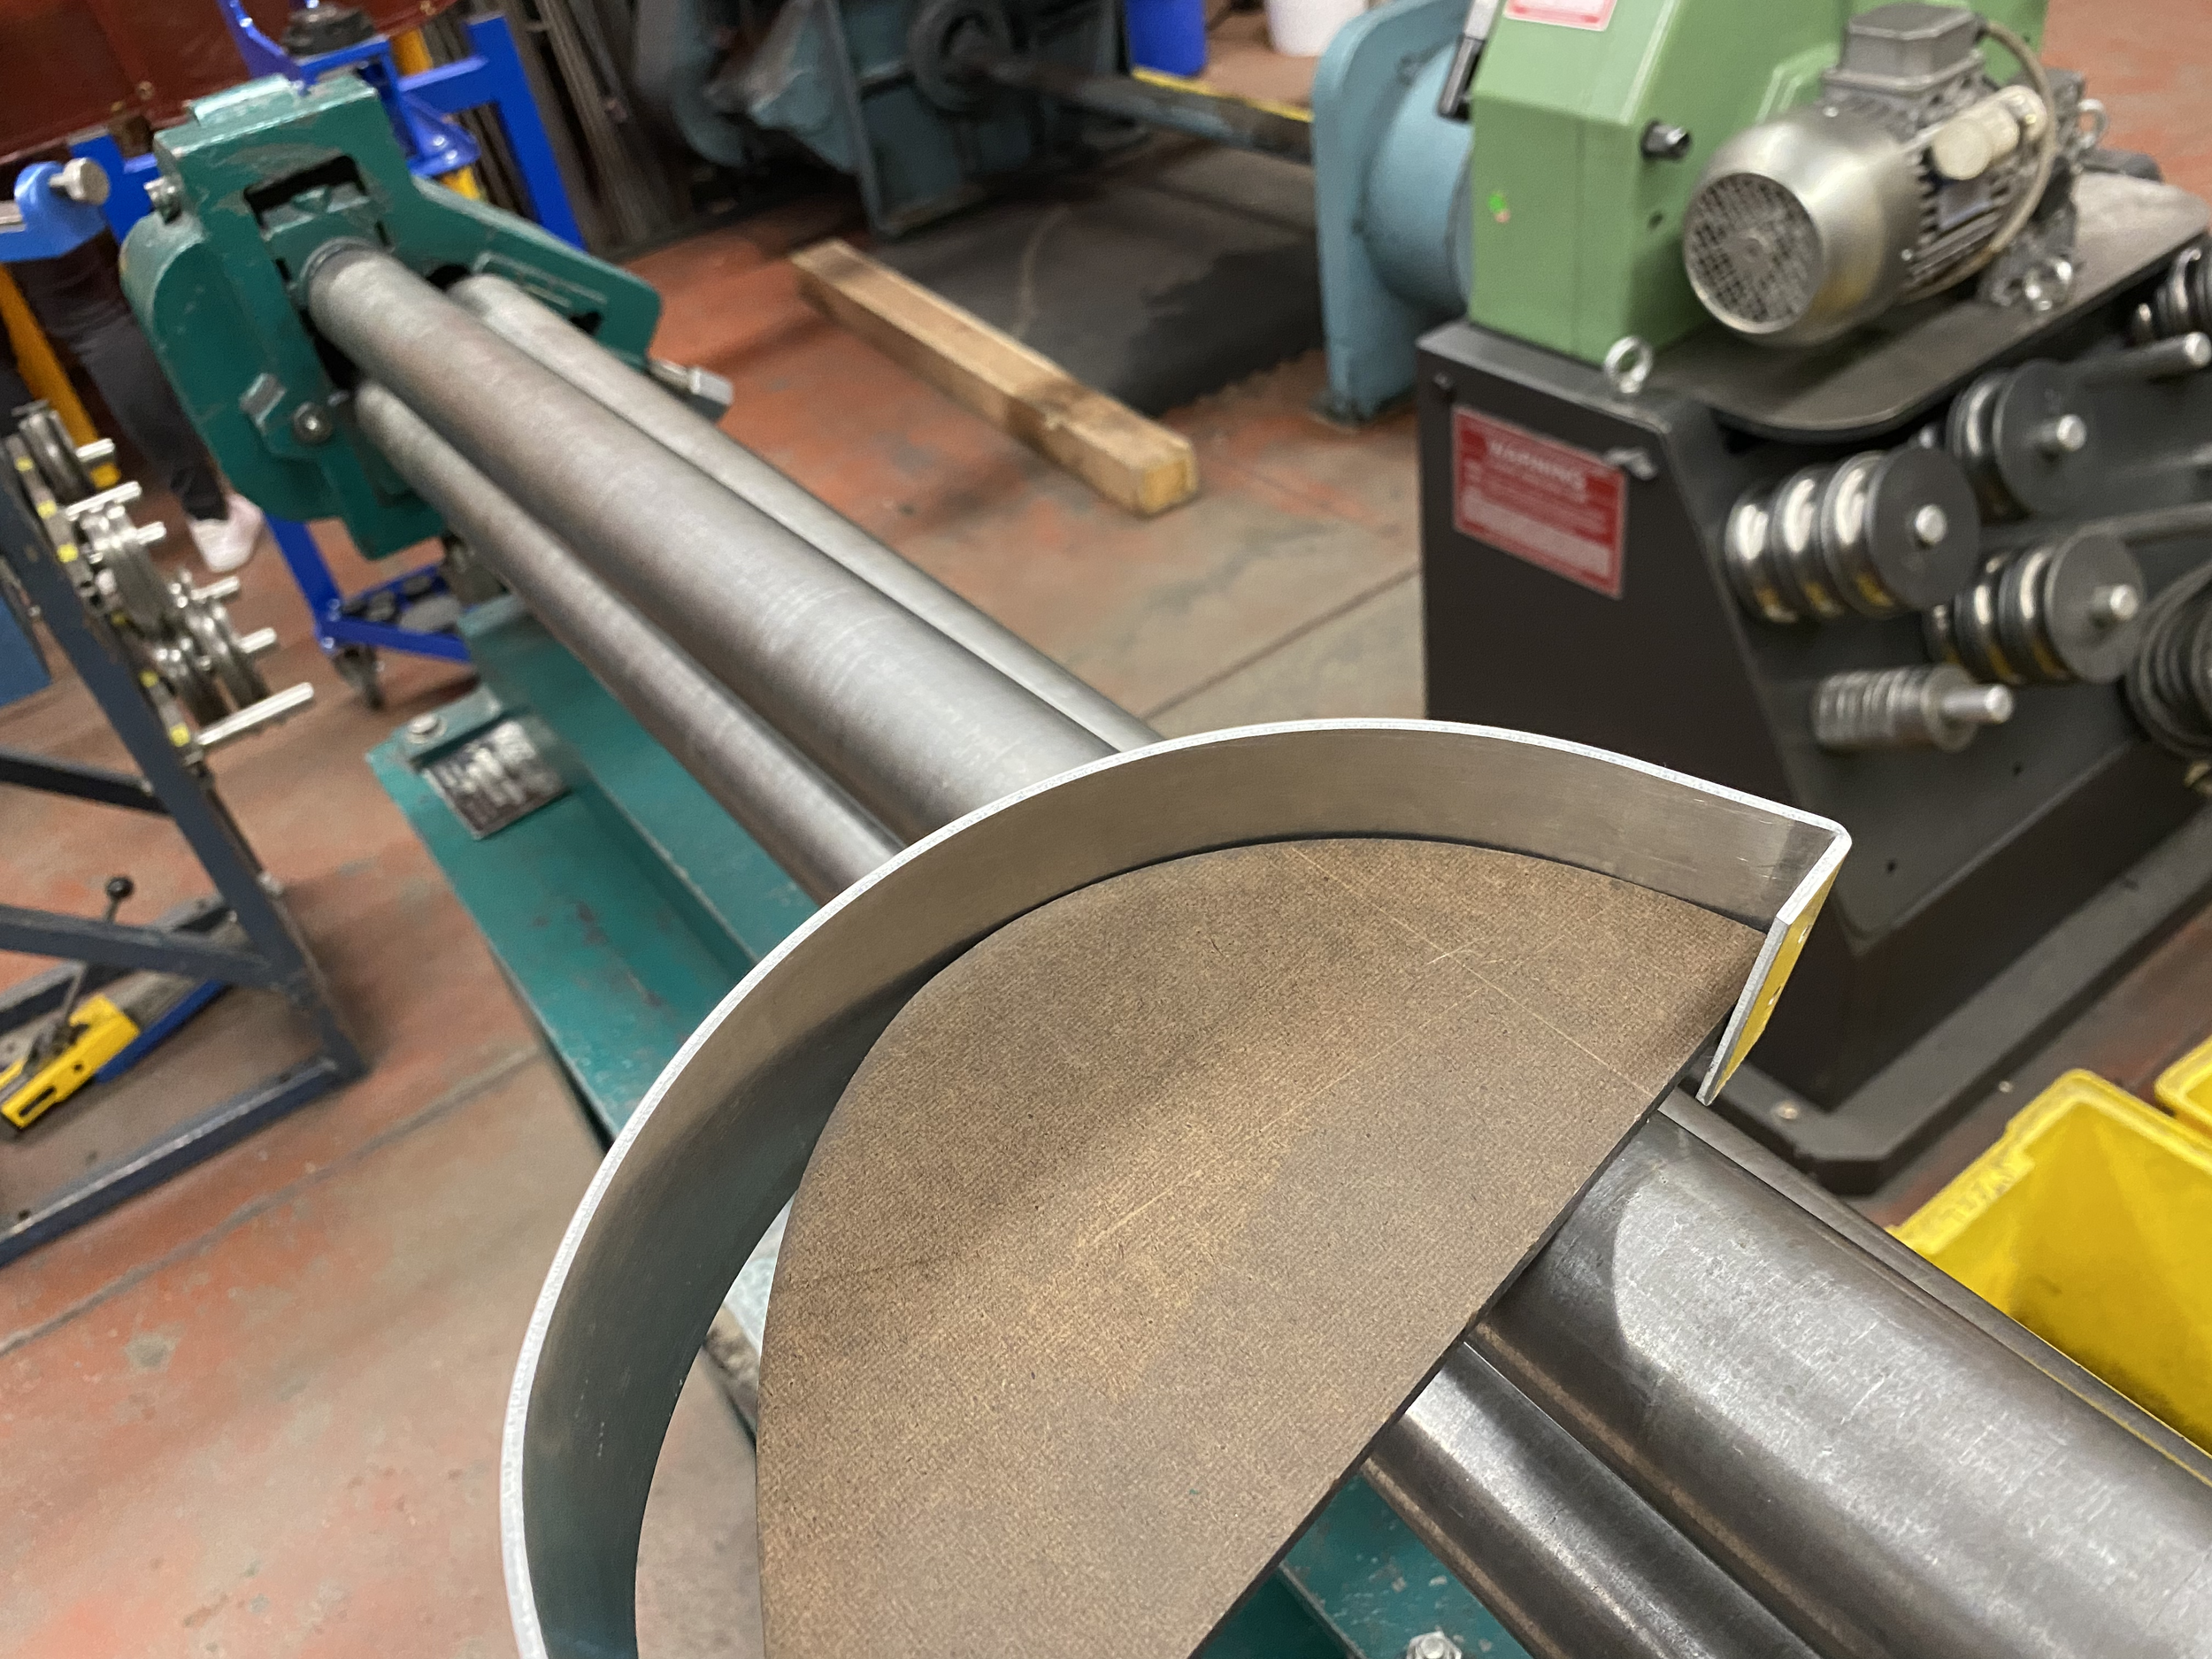
iteratively forming sheet metal curves w/ slip roller
first sheet metal curve, before bending final flange
first sheet metal curve, completed shape

using a propane torch + hammer to manually form the larger curves
unplanned incident: bottom curve fractured (split into two parts) due to sparse material along width and decreased strength due to heat treatment + forming

completed shape of curves for the frame, close to template form

aluminum frame after a lot of sanding

finished sheet metal parts after bead blasting
final assembly - cello

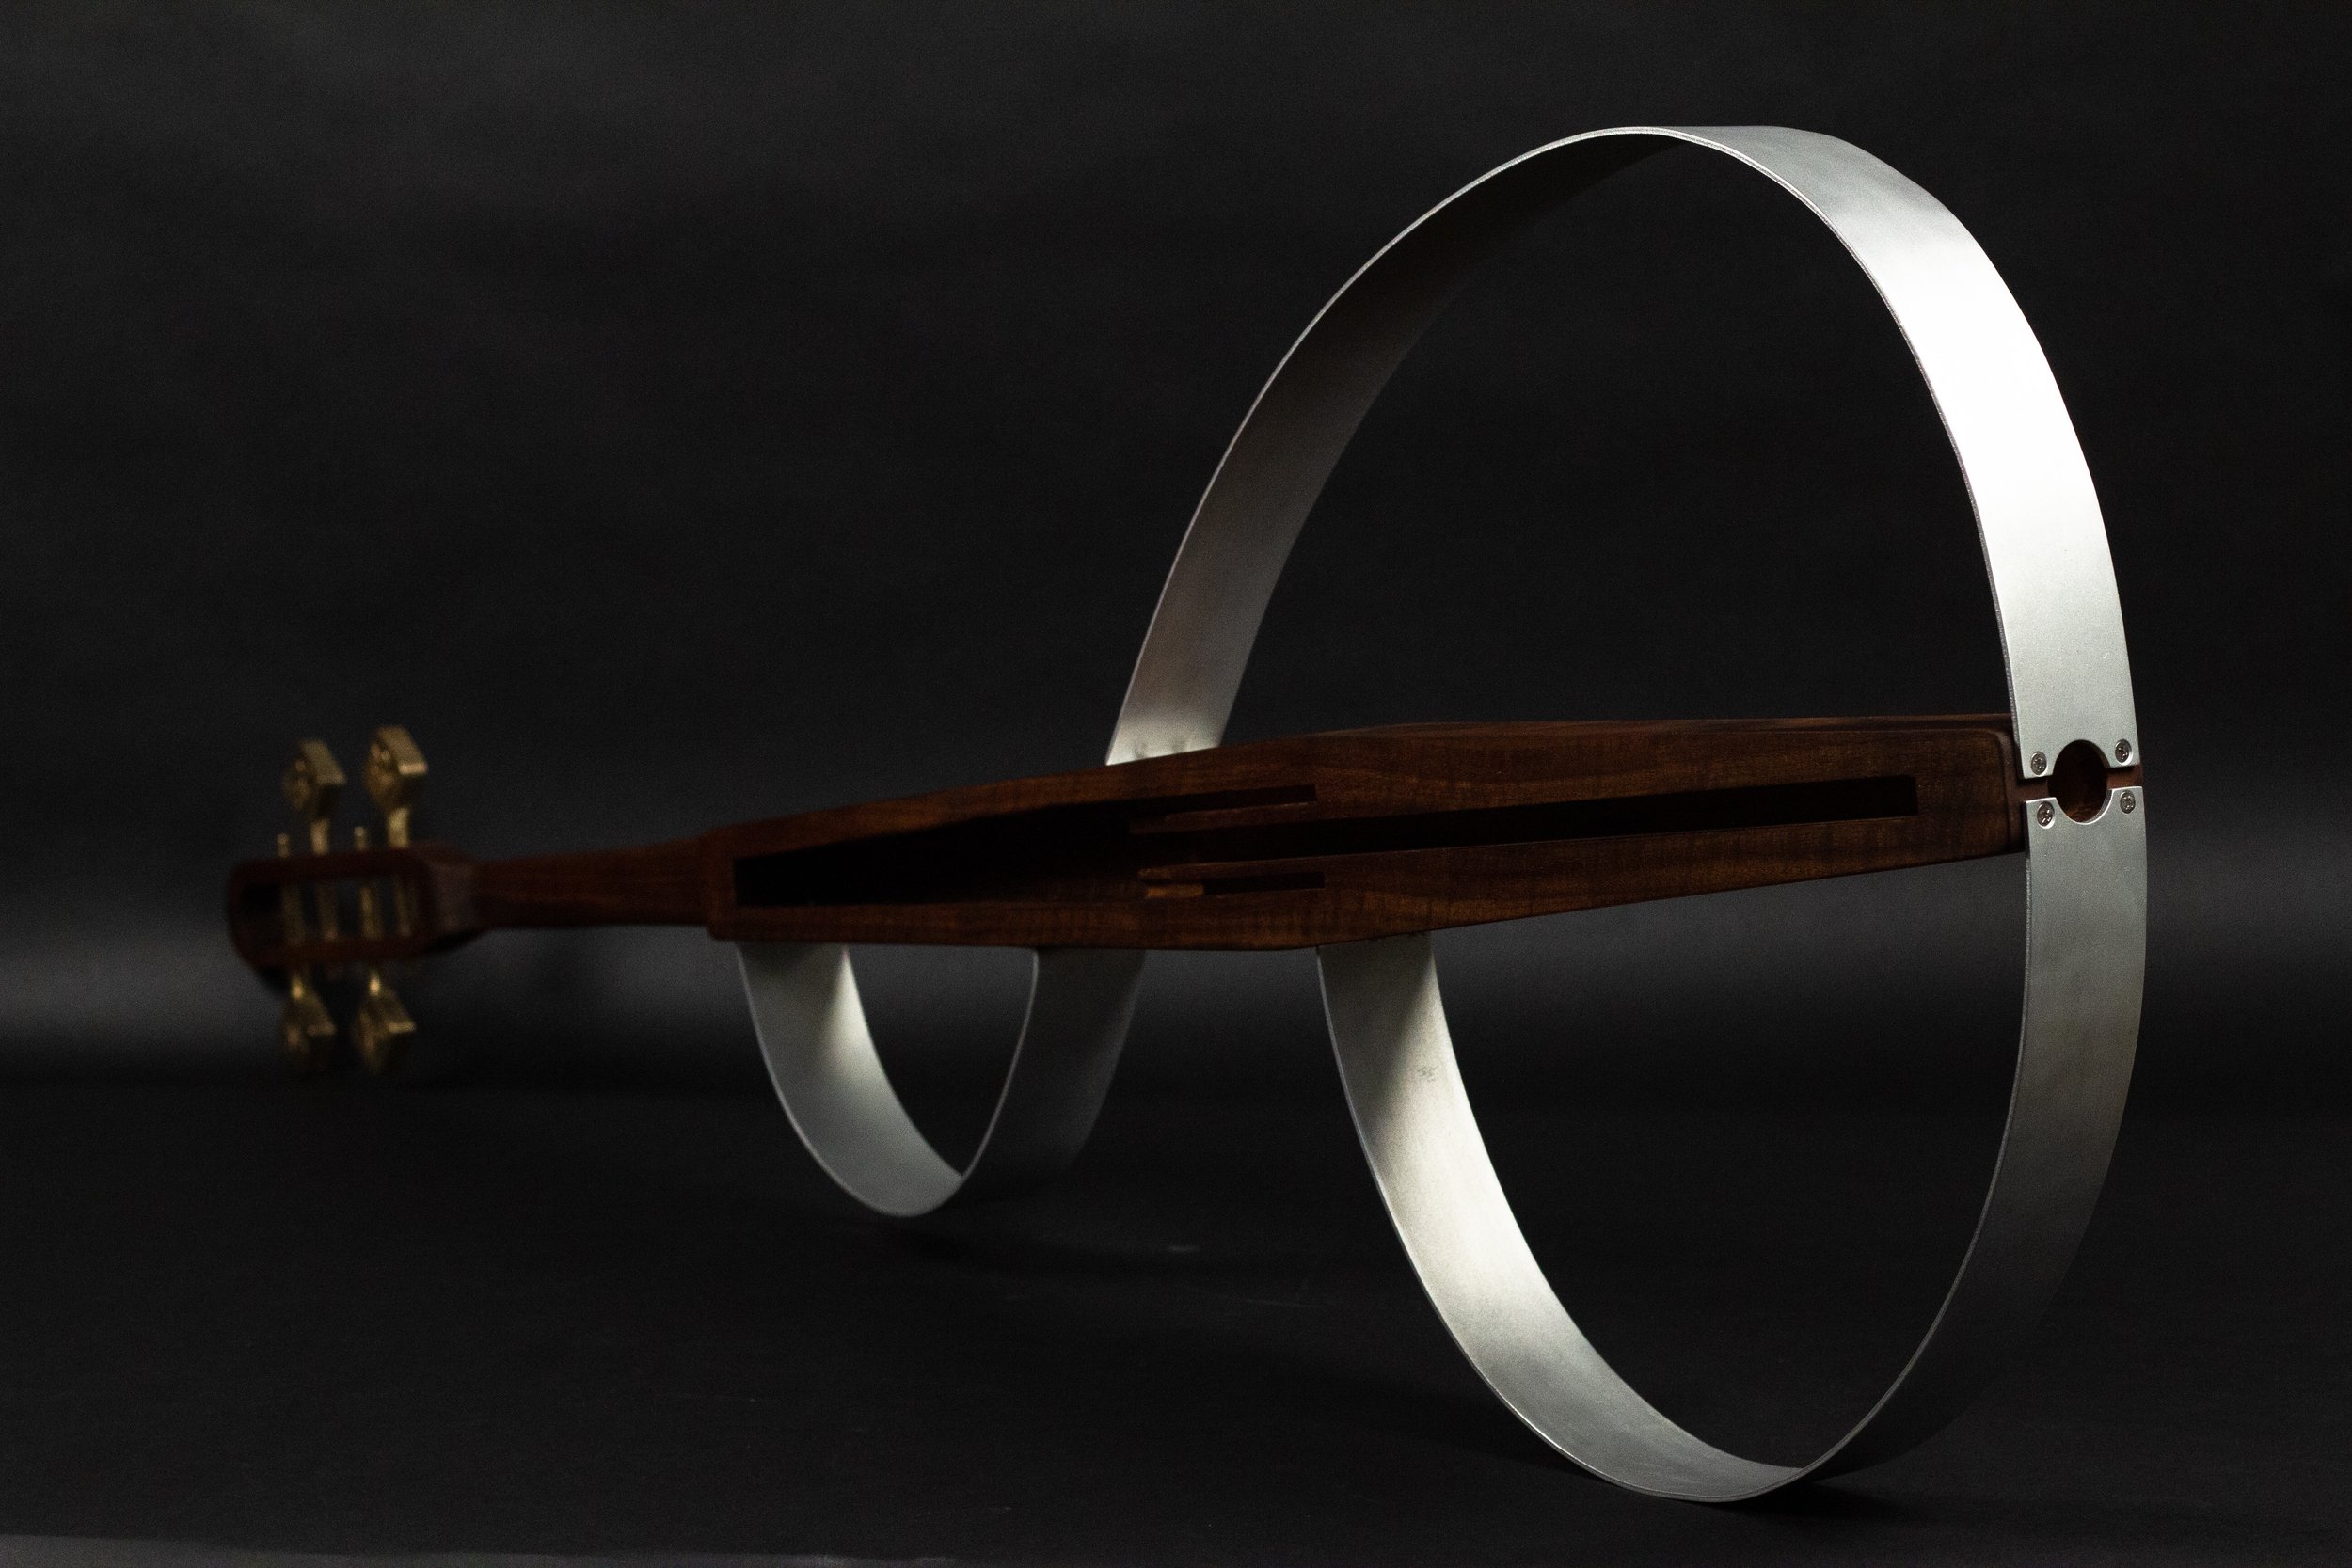
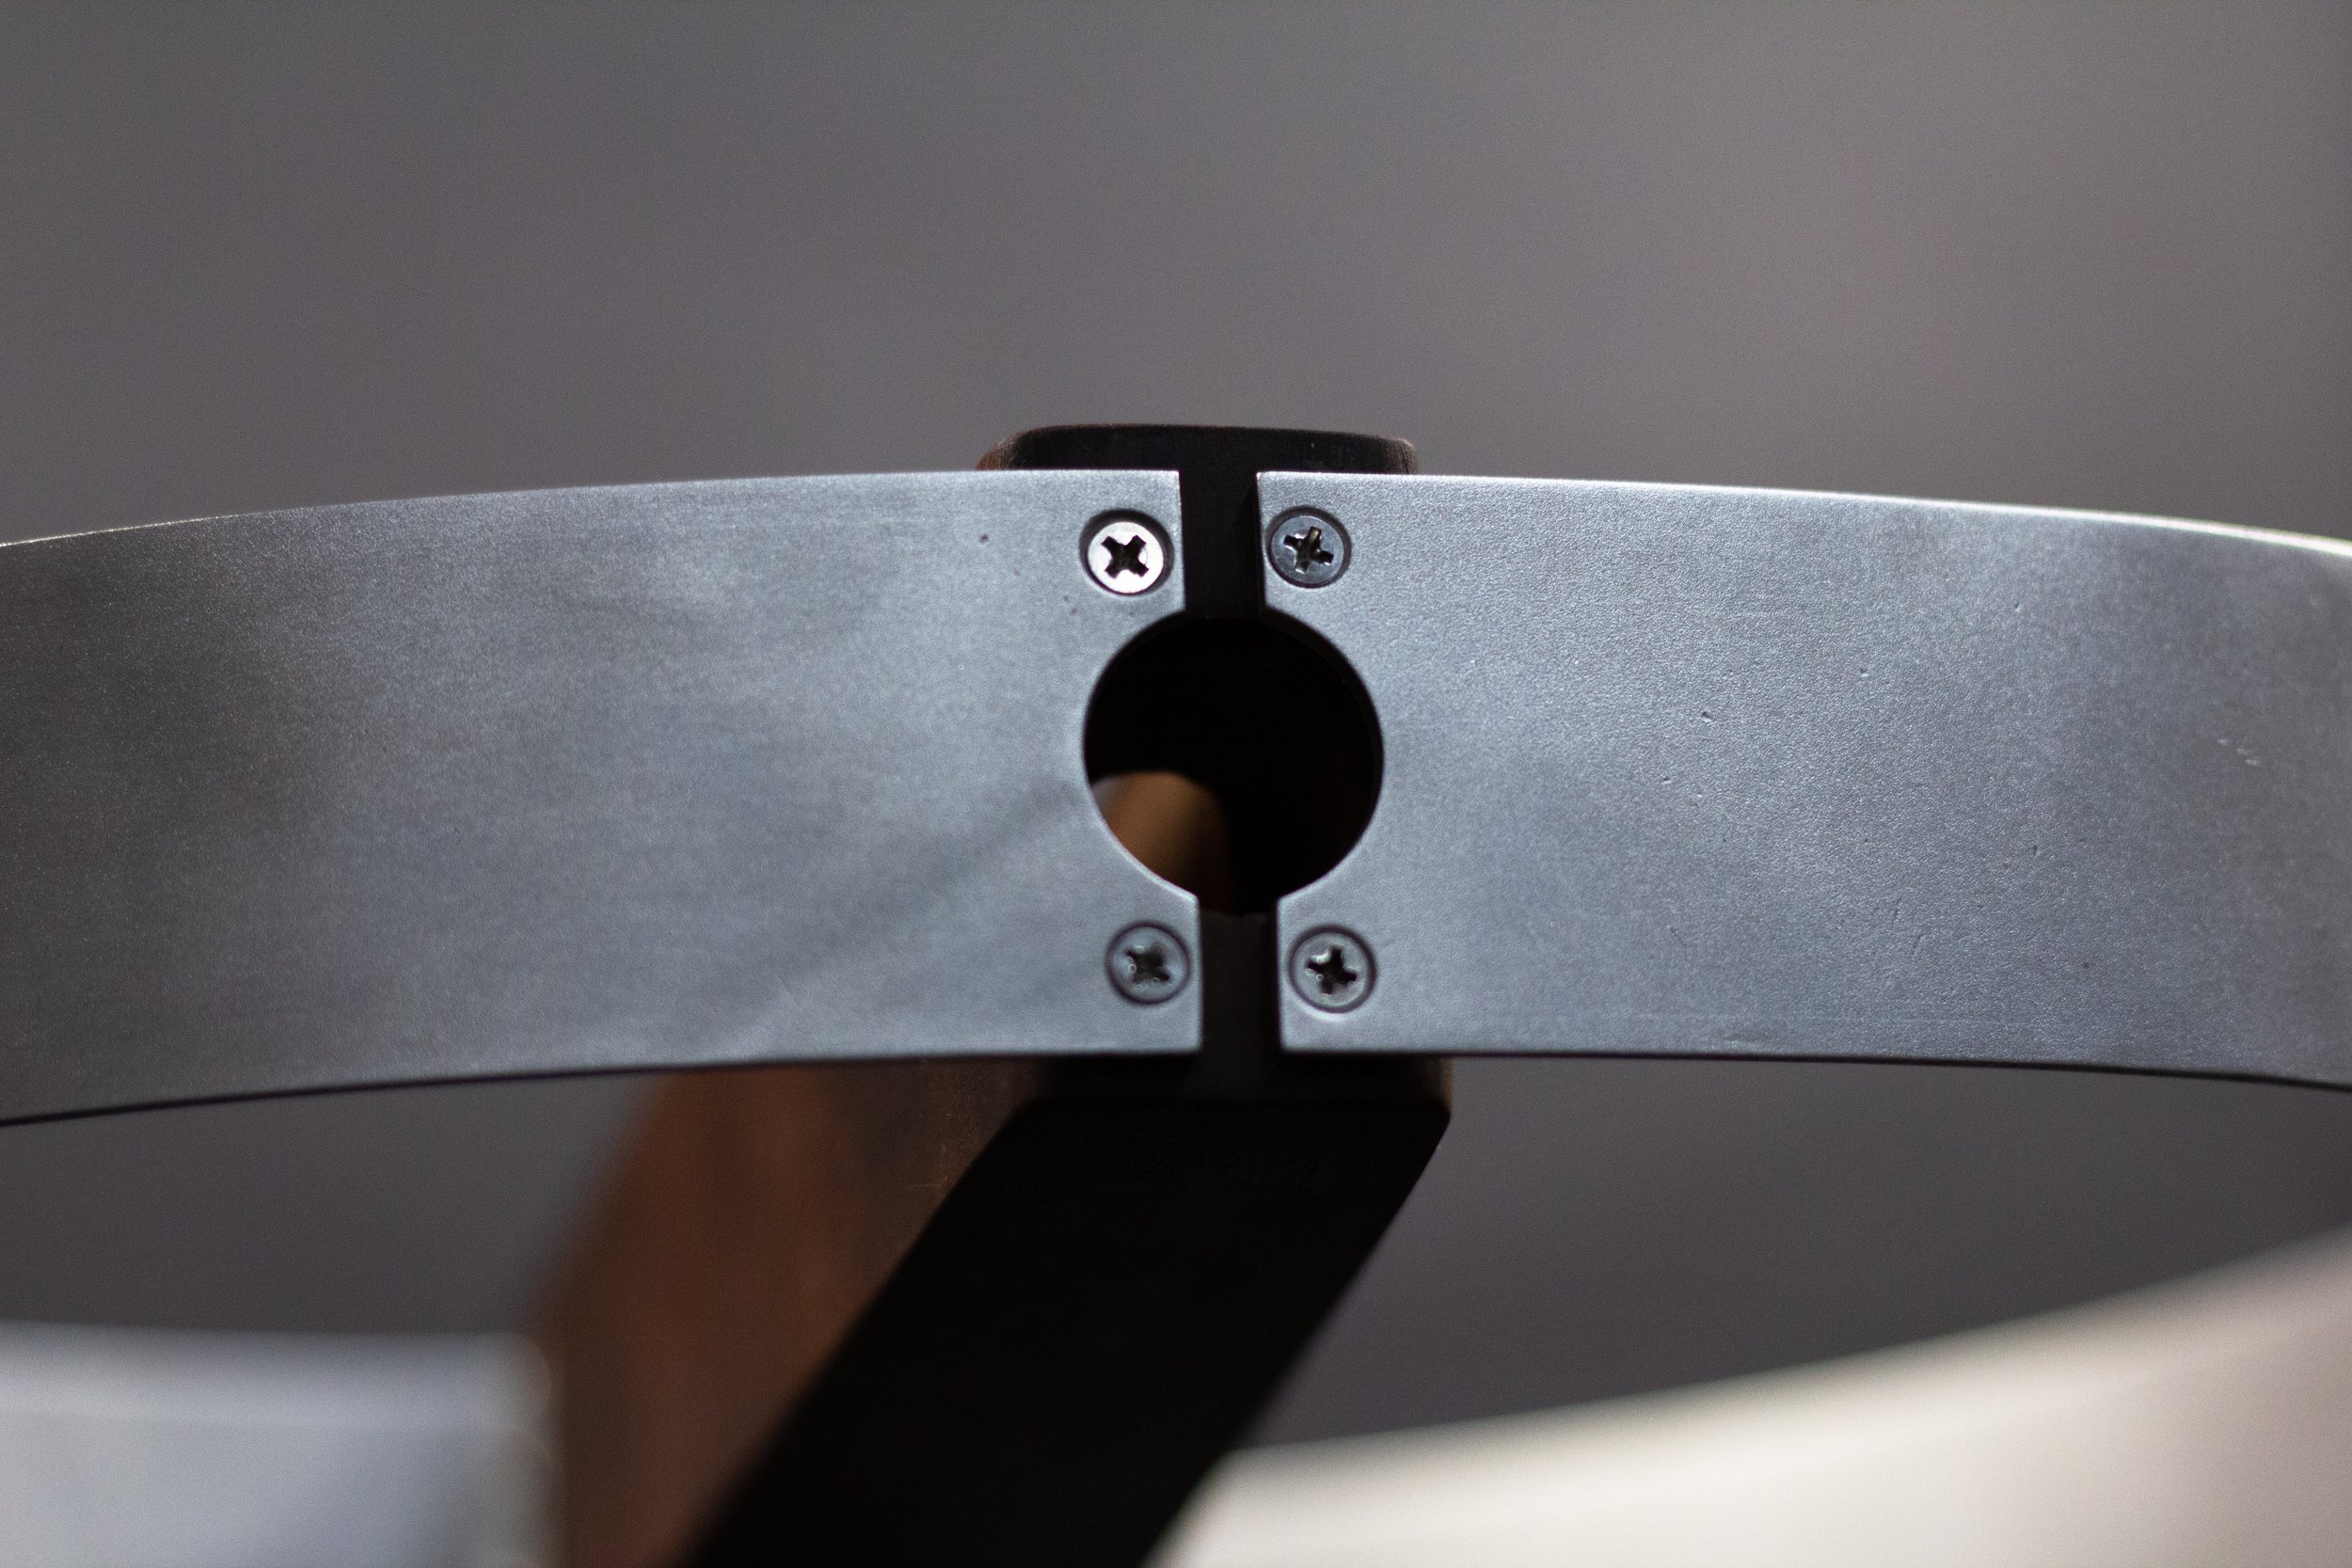
finished cello body

attached the frame to the wood body

pushed tuning pegs into place in pegbox/scroll

tuning pegs + scroll, close-up

frame + wood interface, close-up

finished cello body, ready for photography :)
story
For me, the cello has always been intimately connected to family and memory.
My grandpa, Gong Gong, bought me my first cello, still the only cello I play today… so far. The same cello I used to play for my other grandpa, Ye Ye, in his hospital ward room. Ye Ye suffered from dementia, and the music my brother and I played for him seemed to be the only thing that brought him back from his reverie, somehow. Our music brought clarity to his eyes and a smile to his face, and at least for those short afternoons, he remembered us. He was present.
When Ye Ye passed away, a year after we had begun playing music for him, my brother and I played an elegy at his funeral, in his memory. 8 years later, in 2021, my grandma, Po Po, had a hemorrhagic stroke. A week before, we had celebrated her 96th birthday with her, at our house. For the next few weeks, my brother and I visited her often, bringing our instruments to play for her as she struggled to heal. When she passed, with great heaviness but also gratitude for the life we shared, Luke and I played a few duets at her funeral, songs as light and sweet as she was.
Despite all of the sadness and grief surrounding my experience with music, to me, the cello has always been, above all else, a source of joy and connection. Alongside classical music, I’ve always enjoyed non-classical music, like jazz, pop, indie, and rock, especially when played on the cello. Non-classical cello music has always inspired so much joy for me: a similar kind of joy, and peace, which I hope my music has brought to my family over the years.
In creating this electric cello, I only hope that the memory of my grandparents, and the love and joy we shared together, shines through, in its physical form, and its voice.